Friday 27 June 2014

W.I.P - Trumpeter 2S19 Msta-S; Part 3


Good day all.. Time to update on this .. I will be putting up the turret this update -

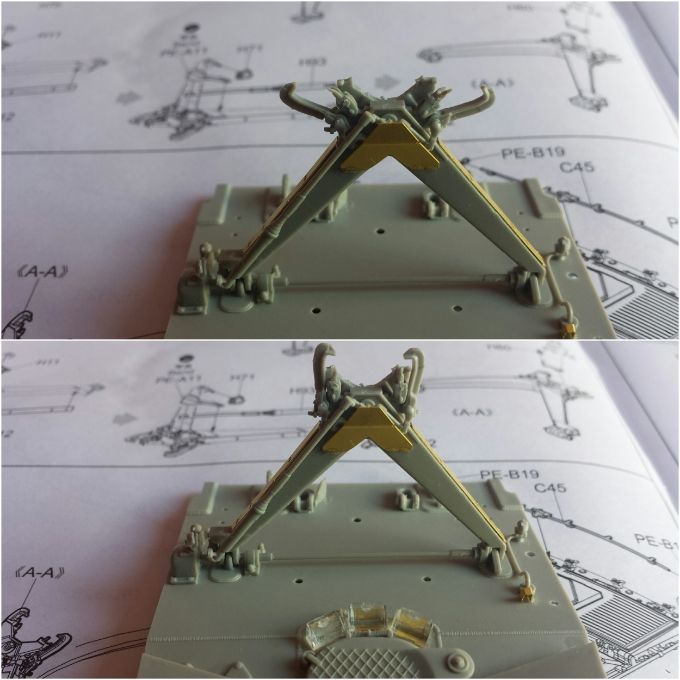
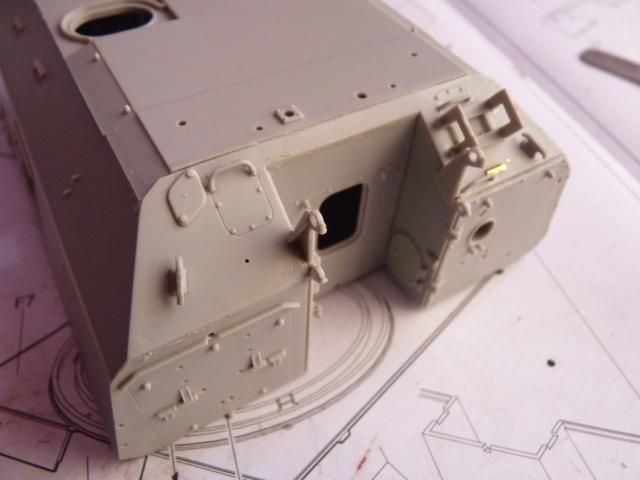
Started with the mantlet made and glued into the inside of the turret -


Image

It is held inside like so - 
Image
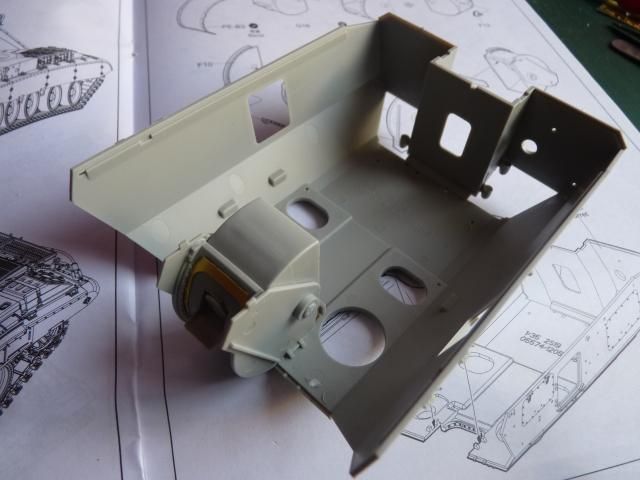
Quite a stable set up and quite strong. It should be able to handle a metal barrel should a AM company ever made one in the near future.

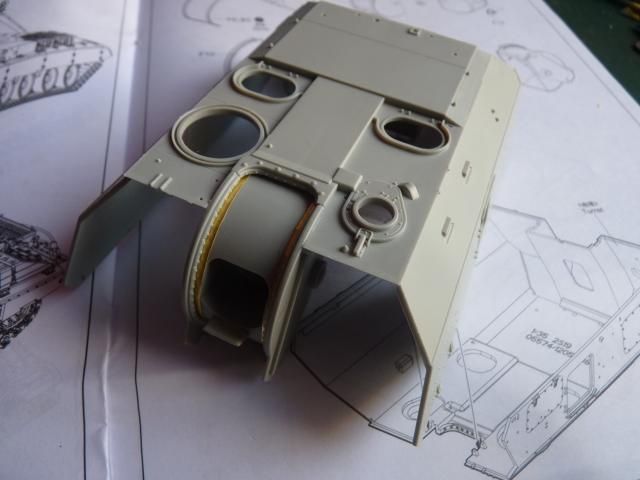
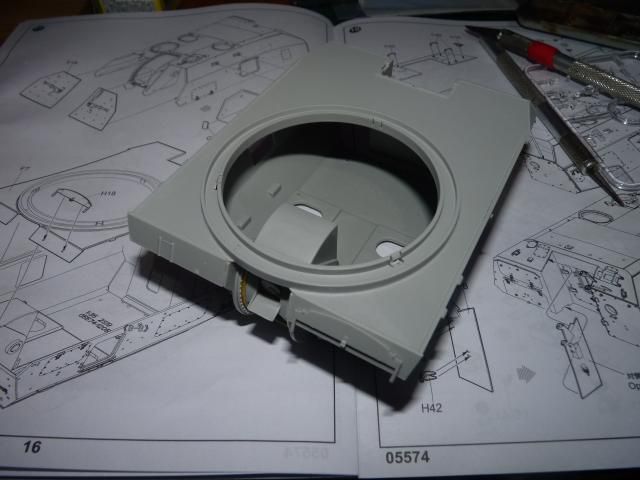
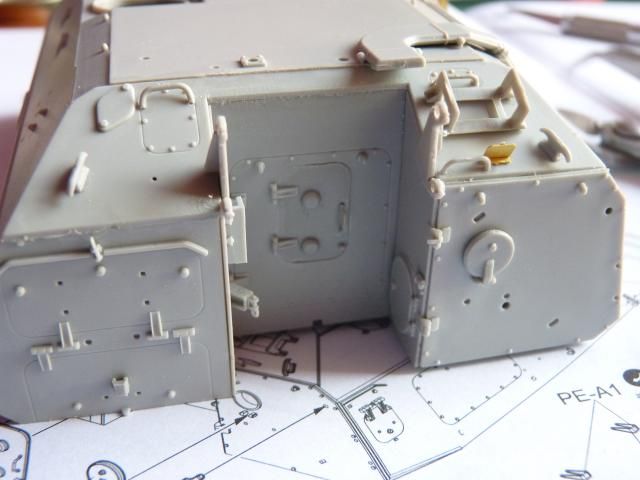
Closed up with the floor like so - ( a little extra care should be exercised or there will be some gaps along the edge )

Image


The upper back roof of the turret is a separate piece and all these extra appendages have to be glued on - Be careful as you will be dealing with a lot lf small parts - 
Image

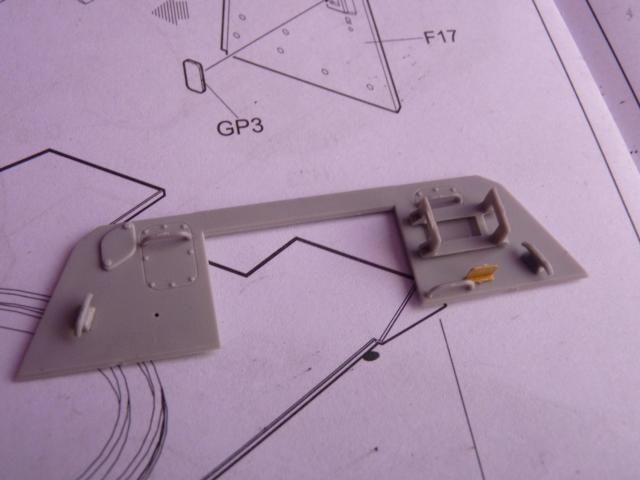
I had to followed that up with those two plates -
Image

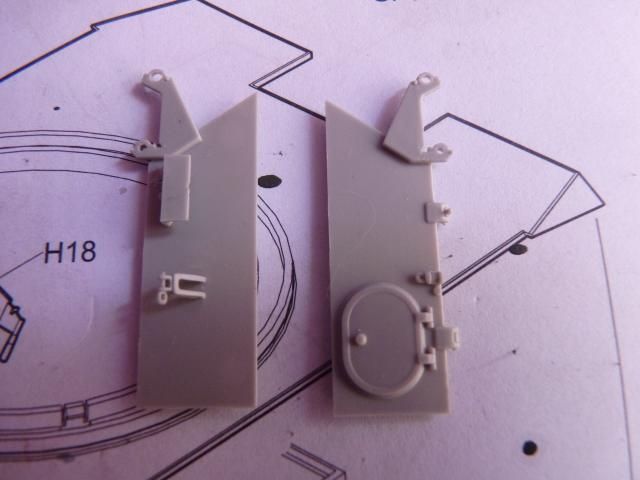
and all three goes on the back of the turret like so- 
Image

Glued on all the hatches that need to glued -
Image

And I put on all the little pieces as well as the big tube thingy ( what is that? a lot of russian vehicles has that on them).. again be very careful as you will be putting on so many small pieces -
Image

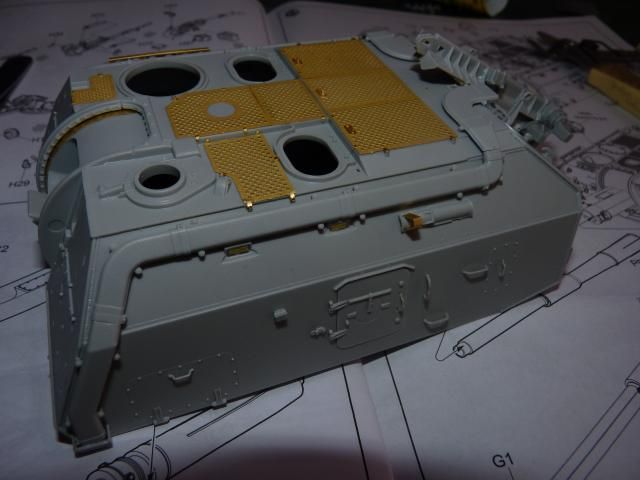
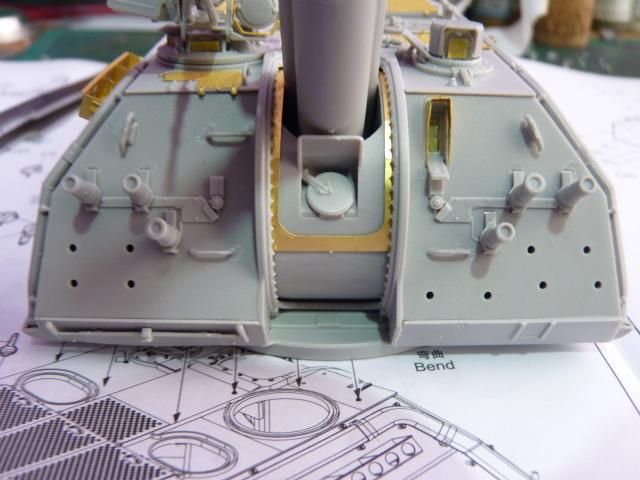
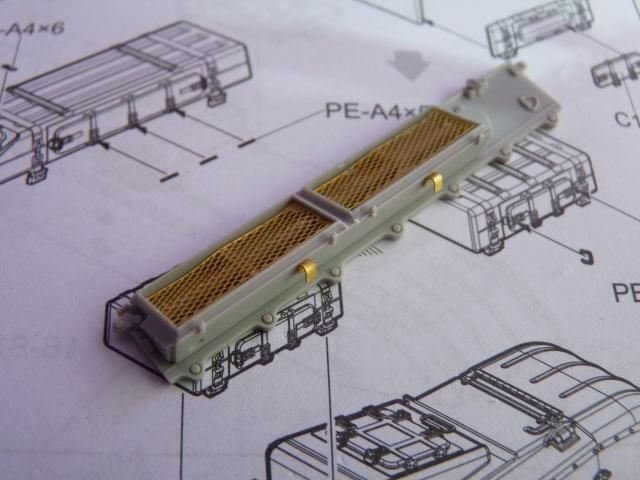
Followed that up with some kind of air filter pipe and a full P.E Rack ... take extra care with the PE Rack and which way it bends. You need to insert partitions inside and the inner walls has notches for the partition to glue onto. I also glue on the hatch and grab handles on the right side of the turret.
Image

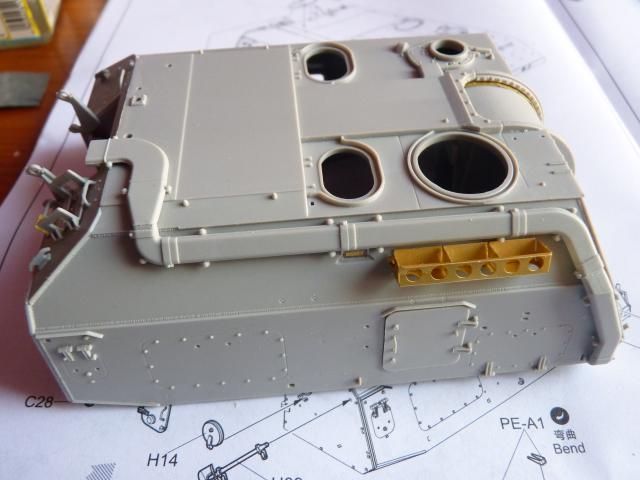
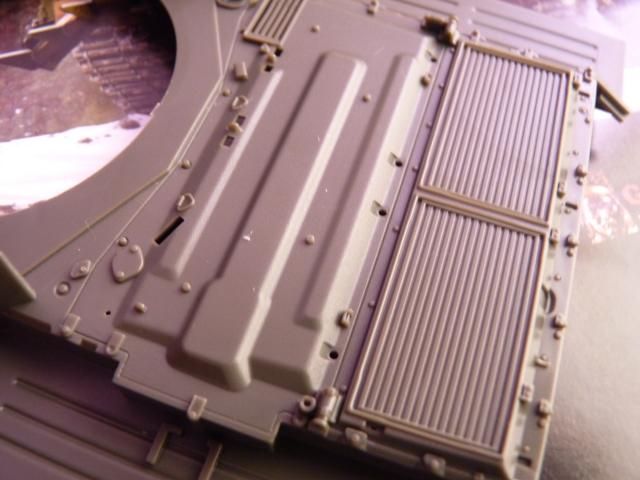
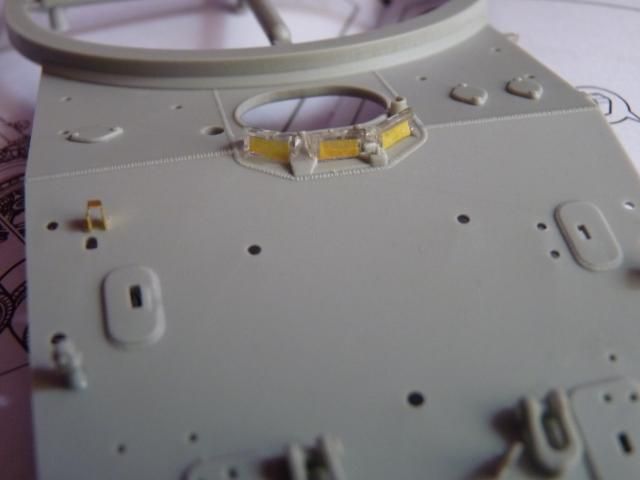
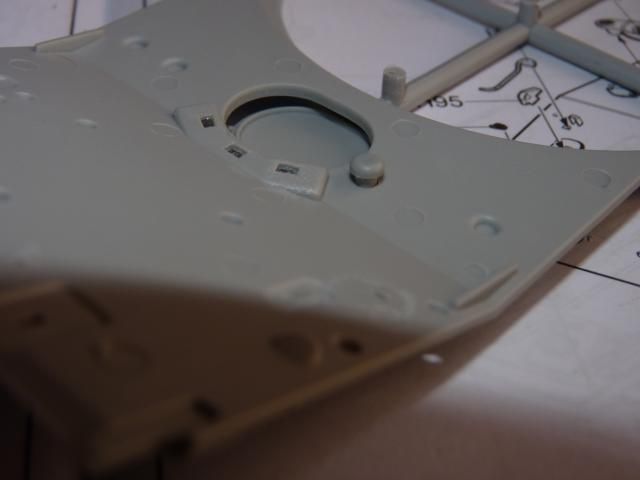
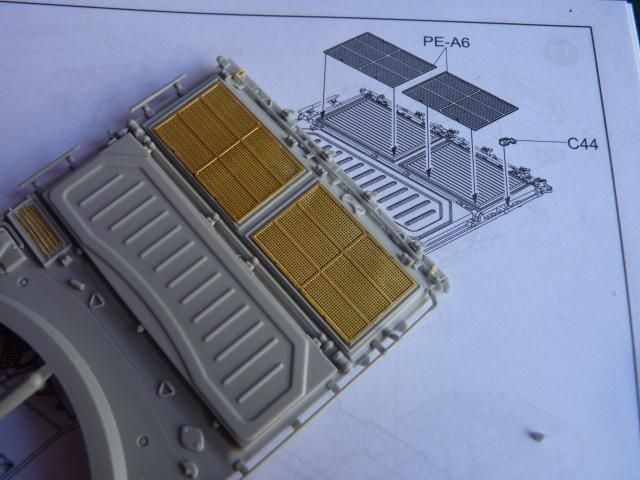
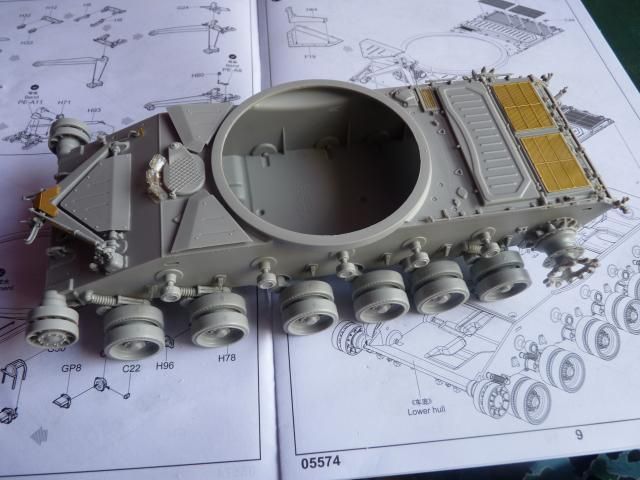
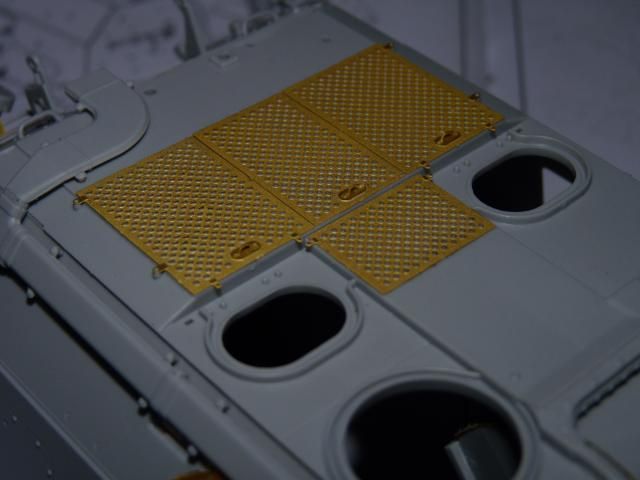
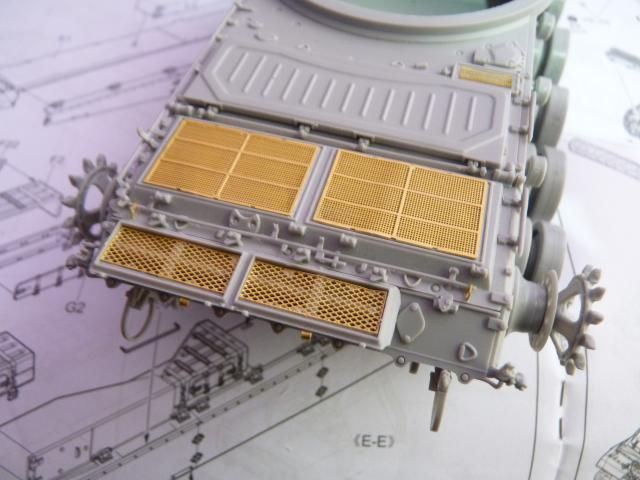
I put on the P.E thread plate on the roof of the hull. Again, be very careful when you glue them. There are very small little pegs and those pegs has to go on to the little slots on the extrusions of the etches.
Image

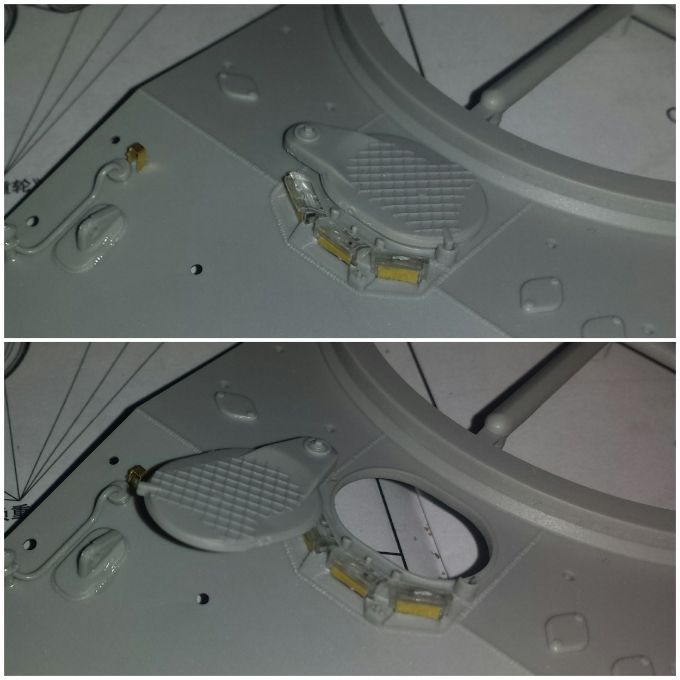
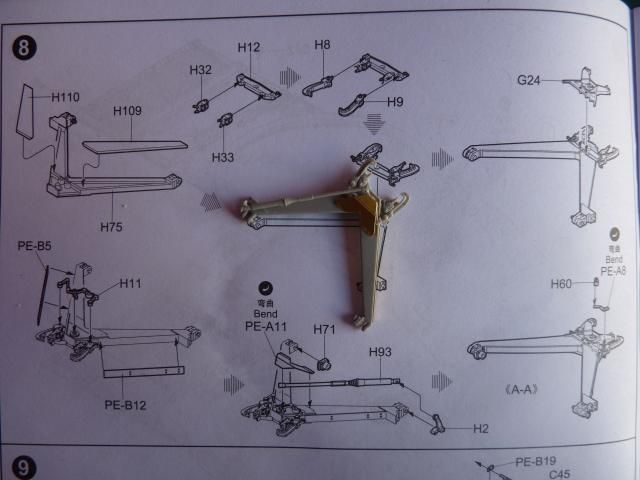
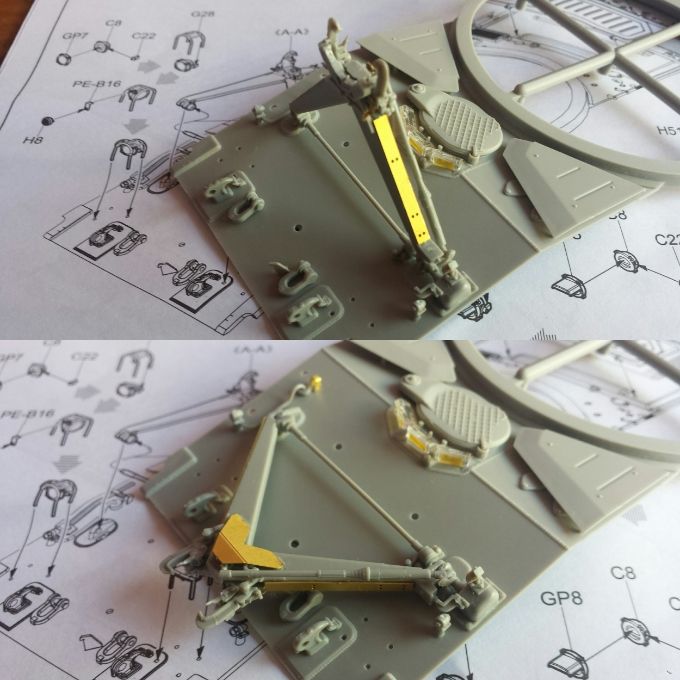
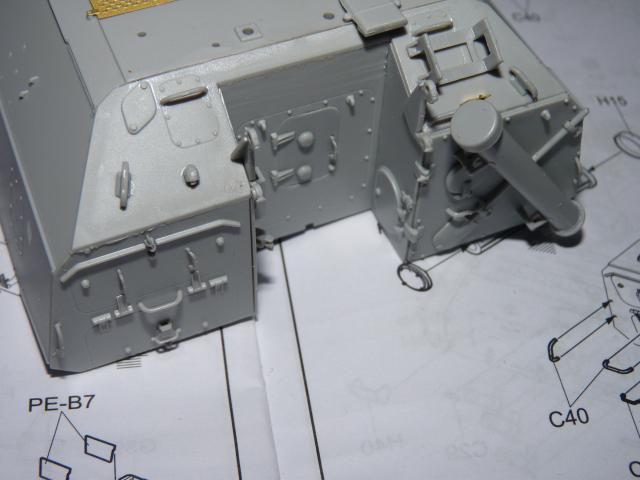
After that, I built part of the mechanism for the shell feed from outside. The instructions call for the entire mechanism to be built but I strongly suggest building this part first -
Image

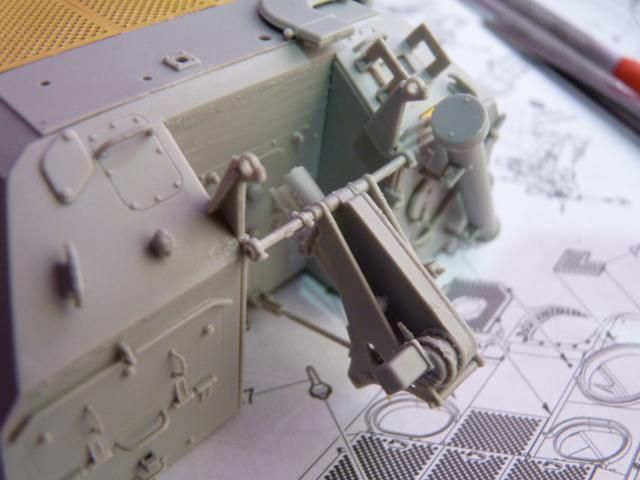
and then build the folding down tray and glue on the hinge at the end of the first part -
Image

This is the most fragile part of the turret and GREAT ( and I cannot stress enough ) care must be exercised.

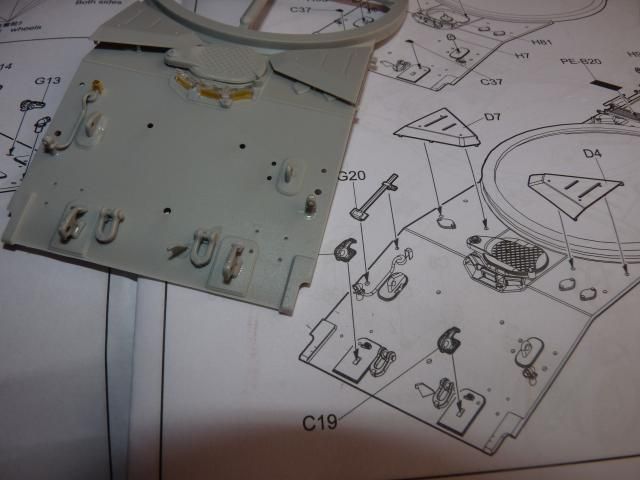
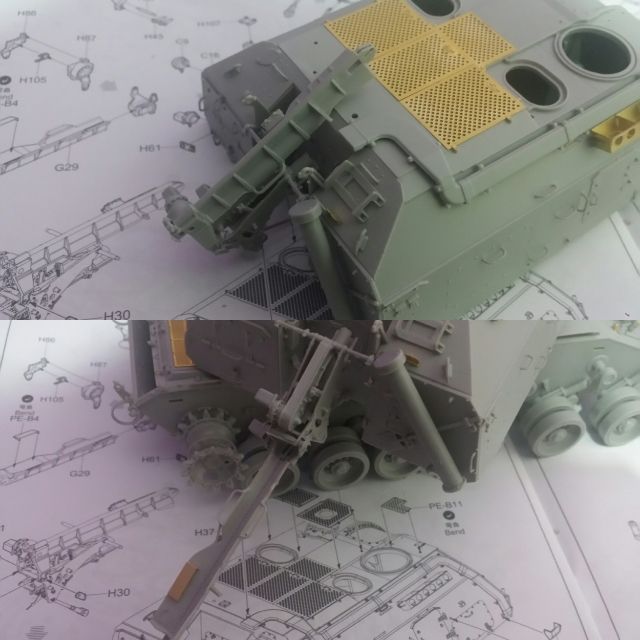
And I built the left Air filter or ventilations pipes and grab handles and I glued on all the thread plate on to roof -
Image

Followed that up with a recoil cylinders; I had to glue on four small pieces on the cylinders and it was such a chore so be careful. 
Image

Worked on the barrel; I had to glue on those little P.E pieces along the notches indicated on barrel. The P.E pieces are very small angle and long triangles so they are prone to bending. Be careful. Also, at the perpendicular side of the triangle, there is a little peg that has to go into the slot located on the base ring on the end of the barrel. Be on the look out for that for proper fitting -
Image
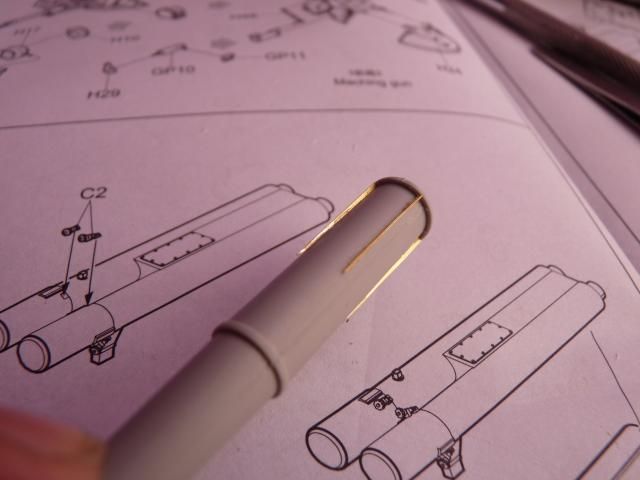
Everything goes in nicely; a bit of something to be aware about, make you glue on the muzzle brake after the barrel has gone on.
Image

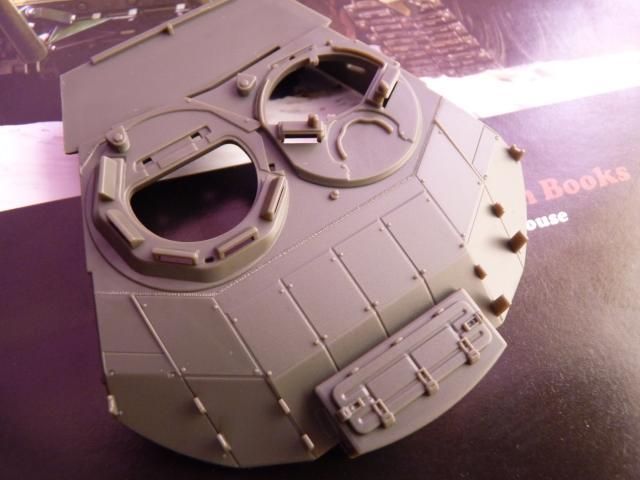
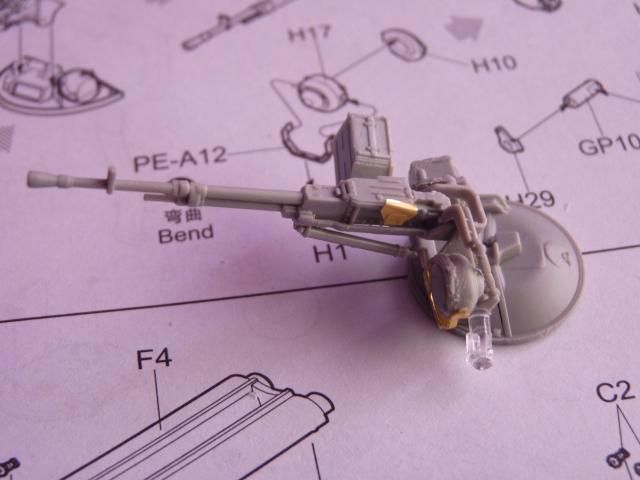
I built the commander hatch and the DShK machine gun. That hatch and machine gun is attached together much like that of the T-90. I think it is the same as the T-90. Such a lovely piece of moulding, this one-
Image

That and all the other hatches and the big hub for the sight goes on -
Image

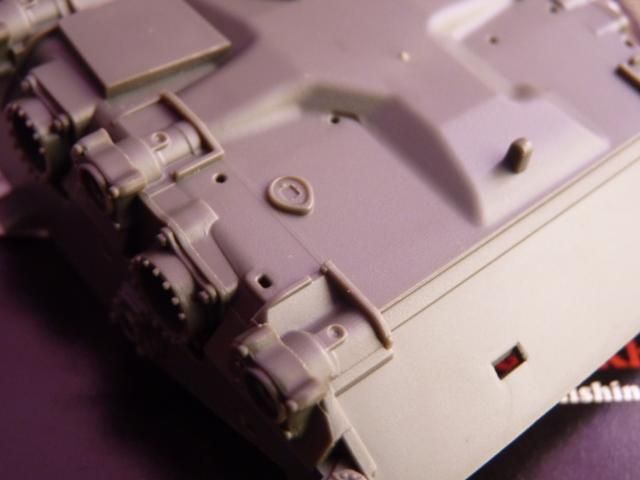
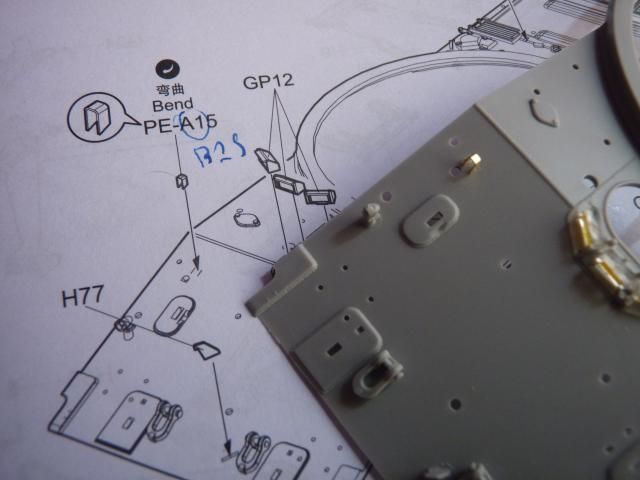
After that, I put on the smoke grenade launchers onto the front hull. If you recall, I point out an error of the mis-labelled P.E part at part 1 of my build. I actually found out where it goes. It goes on the top of the rectangle vision port on the left side of the turret-
Image

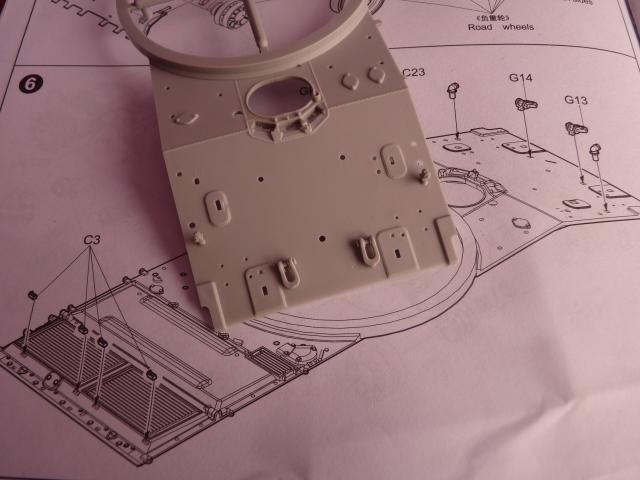
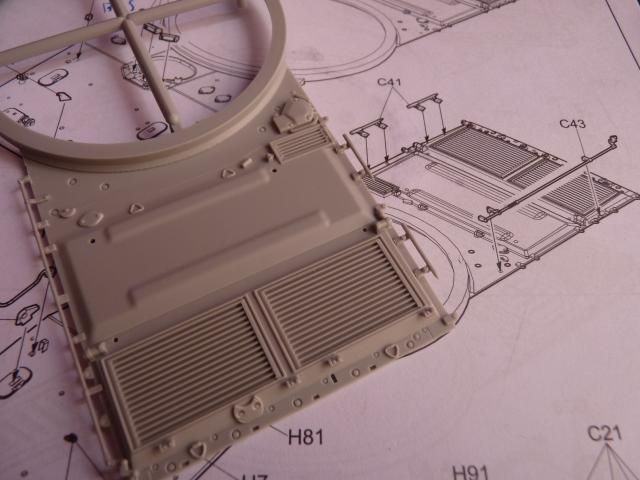
I had forgot to build this radiator piece so I build that - 
Image

which goes on the end of the engine deck -
Image

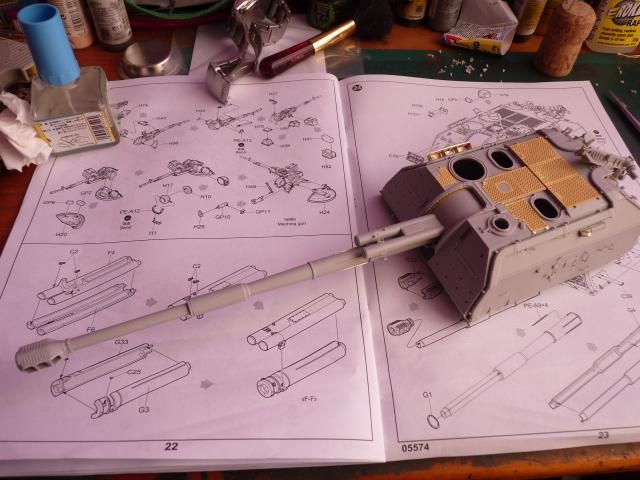
With that, the entire turret is done. I just need to focus on the annoying tracks and the fenders and side skirts
More to come in the next update ....

Read more >>

Monday 23 June 2014

A peek inside the box - MENG 1/35 BMPT '' Terminator ''

Hello all ... 

I received this gorgeous kit this morning that I bought from LucyModel. Such a beautiful kit. This has been released for a few weeks now and no body seems to be doing any kind of review. I myself was really curious what is inside. Well, now that I got one, I thought '' why not share this with the other guys so they know as well ''. 

I have never done a kit review and I don't have what it takes to review a kit. I'm one of the guys who don't give a damn about how a side skirt of a tank is 2mm too short or too long or blah blah. So, I will just keep this as a look of what is inside the box rather than a full review.

First we have the nice box art of this mean looking machine -
Image

That box is not that wide but tall and packed full and waited 1.5 KG.
And then we have this thick and gloss paper manual -

Image
I took pictures of the sprues but I didnt take them out of the bags yet as I will not be building this right now -

Sprue A -

Image
Sprue B -

Image
Sprue C-

Image
Sprue D - 

Image
Sprue E - there are 3 of them -
Image
Sprue F - 2 of them 

Image
ွSprue G - 

Image
and Sprue H - a total of 8 -Sprue H are the parts for the track. It has the same track like the T-90. When I saw them, I shouted out '' oh SHIT '' realising how screwed I am LOL. 

Image
Sprue K-

Image
Sprue L - Why there is a big gap in the middle, I have no idea

Image
Sprue M - two of them -

Image
Sprue N - The clear parts for the vision blocks and scopes -

Image
Sprue P-

Image
Sprue R -

Image
Sprue Q- The big clear part you see in the bag is the jig for the straight alignment for the wheel arms if one chooses to glue them in place

Image
Sprue T - All of these little parts are rubber

Image
and the little turret and the hull and chassis and the PE fret -

Image
Behind the PE fret is a small little wheel mask and metallic sticker for the rear view mirror - 

Image
The instruction provides call out for 3 colour scheme -

Image

Image
Quite a lengthy history is included in the book - 

Image
Quality wise, well, it's a MENG... what else I can say. I took out the hull, chassis and the turret out of the bag and took some close up pics for you all to see the quality -
Image

Image

Image

There you go folks.
I don't know how much it's gonna cost when it finally finally reaches the shore of the UK so keep an eye on the prices. But as you all know, MENG its may be expensive but you really get what you paid for.
Such a beautiful it with a lot of parts and details. 


Read more >>

Thursday 19 June 2014

W.I.P - Trumpeter 2S19 Msta-S; Part 2

Good day guys. Time to update on this W.I.P.

Now that the lower hull is finished, I carried on with the upper one. 

Started with gluing two little convoy lights and the hooks 
-


Image

I encountered my first big problem with this build. The instructions calls for P.E A15 but in truth, it is supposed to be B15. A15 is a very long part and won't fit in anyway at all to to the spot as shown on the manual-


Image

Followed that up with Driver Vision ports. I already put on masking tapes to prepare for the painting process.

Image
Following that is the driver hatch; trumpeter included a little hub kinda thingy that goes underneath the peg of the hatch piece -
Image

Which allows the hatch to open and close like so -
Image
But with the complete lack of any interior, I will just glue it shut later on.
Following that with more parts on the front of the glacis plates and the upper hull ( some sort of spaced step board or something ) -

Image
Switched to the engine deck after that, first started with these little railing/ hinges thingies -

Image

Followed that up with what is shown on the Manual - 
Image

and finished off what I needed to do on the engine deck like so -
Image

After that, I move on to the gun lock, which I was dreading. 
Image

The gun lock is made up of 19 individual pieces and it looks amazing as you can see from the photo.

The gun lock is attached to the lower hull like so -
Image

and the main lock remains workable -
Image

so are the little locks on top that grips the barrel -
Image

After that, I had to put on this triangular board thingy between the lock - 
Image
And now, we have a complete top hull, gun lock and engine deck -
Image

And that's it for this update. I thought this kit was expensive but with this amount of details, I guess £59.99 is not actually bad. Really enjoying this build.
Read more >>