Saturday 29 December 2012

WIP 1/35 Tamiya King Tiger - Part 1

Hello Ladies and Gents. Welcome to a brand new WIP from the hummingbird. Usually I would be modding away on some retro gunpla kit or improving an NG or MG but I have been pretty much inspired to focus on AFVs after reading modelling magazines regularly so Here I am, builing a mighty tank I have been dying to build.

Full Details of the king tiger ( to those who don't know what it is ) - http://en.wikipedia.org/wiki/King_tiger

Here's the Box art -


and here are the Sprues -


This is one seriously simplified kit ... but still, its a lovely kit and tamiya made this thing quite beautifully -

Anyway here's what I have done -
Did the road wheels ... Tamiya is just awesome .. all the road wheels fit just beautifully

Spocket and Ideller wheels

The details are pretty awesome

Exhuast are glued on and sanded ( although they will be covered, I just can't help getting rid of the seams )


The wheels fit very very nicely on the suspension


And I also made the Wheels movable by utilizing Tamiya's own superb engineering .. I plan to make a video showing you the moving wheels so be on the look out for that .....

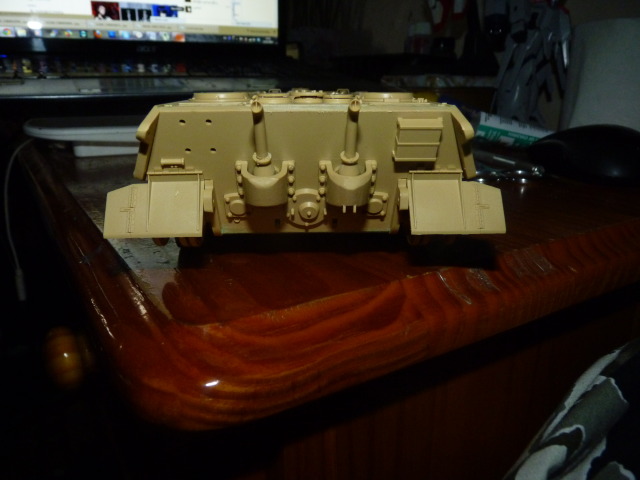
Although this kit is really good, when I put on the rear plate on to the chassis, there was this huge huge gaps all along the joint so I had to filled it and sand it down


Also ran into some gaps on the front Glacis plate so I had to fill them and sand them down ( I just realize there are still gaps ... darn it ... oh well, more fillers and sanding


The Exhaust goes on nicely onto the rear hull


And then, I moved on to the Barrel - Here is how I deal with barrel -


I put bits and bobs of my stryene rods lying around inside the barrel as support and to make them heavy and to have a proper rigid feel to them

With those in place, I glued the other half and I can even do this without breaking the barrel -


and followed with some usual filling and sanding . .. ( darn things always leave a seam in the middle )

And there you have it...

I am truly enjoying this build as I haven't touched any tanks for quite some times.

Please look forward to my updates and thank you for your support as usual.
Read more >>

Friday 28 December 2012

Everything I know about modding/SBing - Part 3


Part 3 of my '' Every Thing I know about Modding/SBing ' guys ... You can get to Part 2 from this link and Part 1 from Here .


DISCLAIMER - I am in no way a master in SBing or modding, there are so many others out there who can literally rape with me the amount of beautiful words they do. I believe in sharing and I want to bring out the best in everybody and help everybody in anyway I can. MAny Thanks!!!


5.0 Optional parts and accessories

So, optional parts and accessories. Obviously when we say about optional parts and accessories, one major product come into mind '' Koto Part ''. True you can always use koto parts as a reliable source but there are a number of stuffs that you can actually use from various cheap materials like straws or used up ball pens or lighters or even computer mother boards.

People actually spend money on buying koto vents when they can SB those little things themselves. I SB my own vents on my very first modding project ( WIP here http://modeller-innovation.blogspot.co.uk/2011/03/improving-hg-1100-nataku-part2.html ) so I'm pretty sure anybody can SB their own little vents and can save money on both the products and postage buying the koto vents. I would love to link you to other masters' works where they SB their own little vents but my bookmarks are a shamble right now and its very very hard to find out which book mark is which so I do apologize  But my wip can be used as a basic mean of SBing your own vents

Pistons; static or moving piston, pistons (also called hydraulic cylinder) can be easily put on if can get your hands on a pair of telescopic tubes. You can use Tube/Tube or Tube/Rod combination, either way is fine as long as your smaller diameter rod or tubes goes nice and tightly into the main body of the piston. Evergreen has a wide range of telescopic tubes in the category so I would recommend buying it from them. I say away from moving piston as it is so much work so please forgive me if I don't link any wip for that but for static piston-; you can have a look at these two pictures - http://i1001.photobucket.com/albums/af133/hummingbird2012/MAC%20concept%20WIP/piston.jpg and http://i1001.photobucket.com/albums/af133/hummingbird2012/MAC%20concept%20WIP/P1050067.jpg

Thrusters; We can always buy the Koto parts and now bandai making their own stuffs but the more adventurous modellers use the little conical parts on the front end (don't know how they are called) from used-up ball pen (either plastics or metal). I have seen people putting on the metal ones and they actually looks very awesome.

Wirings, cables, piping - DO NO throw away your broken Earphone because they will become very very useful when and if you ever want to put on pipes or cables on your models.You can also use flexible plastic ( styrene ) rods as well but if you are putting the cables/pipes on moving parts, I would recommend using the broken ear phones as they are very flexible ( sometimes too flexible so be extra careful ).

Spikes - I have seen some people use 'TEE' ( golf equipment) and they work quite well although I have no idea how economical they can be. I tend to use various diameter sizes of Wood Skewers. I cut just the spike off, attach it to my power tool and sand it down at an angle relative to the spike to a 400 grit sand paper at medium speed and I got a very nice looking spike.

I think that's about it when it comes to optional parts. Bear in mind those are the ones that you can scratch build. Some of those stuffs like the round mold or square mold are VERY hard or impossible to SB so I can only recommend buying them from the Koto part.
If I miss anything at all, do tell me and I will add it up but right now, That's all I can think about on top of my head. ( Actually, I am not really happy cos I know I could add more to the list. If you guys can think of anything that I am missing please tell me )

Thank you all for your support and reading my humble blog. Stay Tuned.
Coming up next - 6.0 Funtional mods and gammicks
Read more >>

Wednesday 26 December 2012

Everything I know about modding/SBing - Part 2


Alright, lets pick up where I left off from part 1 (in case you want to refer back to part 1, link is here ). Sorry it took me quite a while to write this up.


DISCLAIMER - I am in no way a master in SBing or modding, there are so many others out there who can literally rape with me the amount of beautiful words they do. I believe in sharing and I want to bring out the best in everybody and help everybody in anyway I can. Many Thanks!!!

4.0 Tools
Obviously, I don't need to say '' use a hobby knife'' as it is the first thing you would need to pick up whenever you start modelling.

Hobby Knives, however, comes in various kinds of blades and handles and it would really benefit you if you could invest in a set like 
this. The reason being that different blades have their different use, for example, the blade that look like a chisel ( I'm talking about the square one, third one from the left) is very useful if you need to cut away short pieces. Usually, if you overshoot something and need to cut, you use your ruler or whatever you can find, line up with the ruler, and run your knife along, which can and will result in too much force pushing the ruler away and your line of cut will be all messed up and you got a knife mark going all wobbly instead of a straight line. With that blade, I just mention, you just line up with a ruler, and just press down the flat blade down, and voila, hassle free cut.

Saws; Saws are your allies. Seriously, when I cut anything above 1.00 mm, Saws are the best to cut through them in short time while saving you the hassle of exerting too much energy. Before I invested in saws, I use my hobby knife to cut a 2.0 mm plate and OMG, it took forever and my fingers were almost blistered. With a saw, it’s just ''zig zig zig zig ( saw noises) ' and ''snap'', a nice cut.
Like knives and blades, saw comes in a great variety of forms. Quite a lot of Scale modellers who build those massive 1/32 airplane kits tend to use these 
kind of saw when they have had to cut the plane’s wings or fuselage or whatever. Personally, I think that's over kill; I mean look at it, you could kill somebody with it.  For gundams( Gunpla), this size of saw is more than enough to do the job. And lately, I have fallen in love with this particular saw ( from Trumpeter ). 

I don't think I need to say anything special about Sand paper as everybody knows how important they are. To be honest, I am still a noob when it comes to sanding, but I can say this, go to a DIY shop and grab from at least 400 all the way to above 1000. The more variety you have, the better. For me, I have 400, 600, 800 and 1000. I even have those sandpaper the carpenters use which are like 100  grit ( I think). Dang those things are really really coarse but quite useful if you need to do heavy sanding on two part epoxy. It would also be beneficial for you to invest in a set of file as well. I have this particular 
set of files and it really helps. It has a triangle shaped file, square shaped files and other shapes which I just can't describe (LOL) that will really really help you with sanding hard to reach areas and what not. 
Or if you are lazy and there is a large amount of sanding or you need to sand the inside of the tube (Concave surfaces?!?!?), you can always use a trust worthy power tool and a sanding bit.

Power Tools: ah, another very useful ally to us modellers. Without it, I don't think I could have even finish some of my kits. This little 
thing has been with me for 3 years and really really helped with me drilling through thick parts, cutting very very thick part, sanding down massive amount of epoxy.  It comes with as you can see from the link but you can also buy more bits (not the 00 universe bits, I mean the heads that you put into the machine). Every time I do some heavy amount of joint mod, I use this little thing to do some heavy duty drilling.

Rulers: Until about 1 and a half year ago, I always use my left over rulers I bought for my university, u know those two part rulers with one clear side and one dark white side. And seriously, plastic over plastic, the darn thing always move when I’m doing precise cutting. So I was ticked off, got off and went to a art store ask for a fine metal ruler that artist used. From then on, I just kept using Metal Rulers and I seriously Suggest using them.

Divider and circle cutter: They are your one of two options if you have to cut circular parts or some properly beautiful curved plates/plates/shape. I don't think I need to link what does a divider looks like (LOL). The other option you might need to invest in would be a simple, Circle Cutter like 
this .

Measuring: Most of the time, we use just our eyes to measure a approximate and then just use our rulers to measure it. That works, yes, but from time to time, when it comes to precise cutting, going on with that method is a royal pain in the butt ( not literally, mind you) and not to mention it hurts your eyes from them being strained too much. In that case, VOILA, A digital calliper comes in mighty handy. You don't really need to get an expensive one, just get the one that's work and it should be fine. 
Measuring angle is a major downer and most of the time, I always come up with some crappy angle and had to re-do stuffs 2, 3 times. It can be easily avoided with the thing every school children use (I think every school children use them); A protractor. For me, I use a metal protractor; that kind that sailors used (I stole it from my brother.. hahahah). It really helps make a difference. 

Well, that’s what I can think of, at the top of my head, regarding tools. I may be missing something and If you do find out I’m missing something or forgetting something, please tell me and I will put it in.


Read more >>

Tuesday 4 December 2012

A Reference BOOK for Gunpla Modelling in English??

A reference book that is dedicated for Gunpla Modelling ... IN ENGLISH ???

Is that what most of us have been dreaming about all these years?

You all know I build AFVs as well ... look at the photo below. That's like only 20 percent of my personal library. So many references and resources out there for me to read up for my AFVs.


But When it comes to gundam modelling, nothing .... I have nothing because there is nothing. 


I remember when I start making gundams; I was very lost, true I can find ''some'' resources on the various forums and blogs but , like i said, '' Various'', spread all over the world and on the web that there is no DEFINITE references for me.

True there are loads of books about gundam modelling but they are all in Japanese. Do we all read Japanese? I don't think so. 

I love this hobby and I wish more and more people would take up this hobby and I wish youngsters today could spend more time building models then doing bad things. Fortunately, there have been a steady increase in young modellers and they are all out of reference due to the lack of resources. That could very well be a negative effect ( imagine people with bad internect connections or not old enough to have access to the internet and so on so forth ) to stop the next generations to model. I mean, even with all of today resources, I still prefer books for my ''references '' to build my AFVs. Now, this project, spearheaded by a friend and one of the head huncho of Plamocon of the US is a welcomed addition to our arsenal (including mine ).

A dear comrade and friend of mine, gdx9902 of PlamoCon and his associates are spearheading this project. In fact, let me show you guys his exact words - 

'' We're doing some crowdfunding to help cover the costs of a mecha modeling book we're writing that's in English. The idea is to make the first ever book about gunpla that is similar in quality to those from Japan. I'm doing a build up of a 1/144 Gundam and three other dudes are also doing step by step buildups. 

I often wish for there to be a book in English, and now I'm trying to do something about it, so please support us if you feel the same! '' 

Here is the link to the funding site - 


So, Please guys, lets help out our friends achieve a goal that is beneficial for all of us ... I don't know about you guys but I love this hobby and I enjoy promoting the hobby so for the sake of the noobs ( we were noobs once when we started, don't forget ) and for the sake of the future generations of modeller, please donate as much as you can so that my friend and his associates will received as much funding as they can and they can start this great undertaking.  

 
Lets keep up the love for the hobby!!!! 

Thanks to everybody support, the Project had a splendid start and now in full motion to be publish, realeased and will soon be on the market. My friend gdx9902 and his associates will launch a formal thank you video and yours truely will blog about it when and after they have made the said video.
Thank you so much for the suppot!!


Read more >>

Monday 3 December 2012

And here we go again with another BIG event !!!!

Hola People ... Welcome to another post from the Bird ...

I have good news.. Great news infact ...

As you know, Kamm ( Our esteemed and man-love hungry Admin ) always have a knack for coming up with exciting stuffs like the EUGC ( please prefer back to my posts about it ) and the 2012 Mecha Contest that was just finished; successfully with loads of people participating, just a few months ago. And now, the said esteem admin has came up with another idea and after discussing within the Staffs of Mecha-Lounge, we are happy to announce a new and big event for year of 2013.


After a back-and-forth debate of naming, we have come up with this title, C.H.A.O.S, which is the abbreviation of -

Collectively Hoarding Astronomically Over-priced Styrene

Here is the background theme thought up by Kamm -

The world plunges into war as the fight for resources becomes too great. As chaos descends upon humanity two factions were formed those who would choose to inhabit the air and space, those who would choose to inhabit the land and sea. The colony's prepare for what will come to be known as the Great War, in which only one colony will survive and lay claim to Earth's resources. We would like you to choose your side and build your own personal war machine for the Great War and aid your colony to victory.

And the Rules are as followed -


GROUNDED COLONY             OR                 SKY COLONY

- First choose your side (Grounded or Sky)
- You may build any kind of model kit for your chosen side for example. You may choose the Grounded Colony and build a Zoid, Gundam, Tank, Boat, Figure etc.
- All we ask is you try to paint / modify / build your model kit to match your chosen Colony. E.g. for the Sky Colony you may build your model with numerous thrusters etc.

- This is not a competition. This group build is for fun and we will be announcing prizes for lucky winners and participants throughout the event! We want to encourage everybody to take part regardless of skill level and just have fun together. You may build models for more then one colony and again this event allows for almost any kind of build so if your looking for an excuse to work on your back log! now is the time.

- Deadline will be January 1st 2013 - June 30th 2013
- You can enter More then one model into the group build and dioramas are accepted!
- Prizes will be announced during the GB to keep the excitement rolling.

So what will it be!? who will you choose to fight for? and what will you choose to fight with!? (more information will become available over the next two weeks)

So there you go. Since this is kinda like a Teaser announcement and we still have more process and bugs ( to coin a phrase) to iron out, I can only release this much information so I do apologize in advance but I will keep you all posted.

BUT here's something you guys need to know -

This GB is not limited just to Gunpla ( and gundams) and mecha, this GB is given life so that all kind of models  ( plamo, mimi, figure, gunpla) and all kind of modeller can have a good time, kick back and enjoy, share their build and , most of all, to have fun. I wouldn't even be building any gundams ( fingers crossed) as I have a huge backlog of Tanks and this is the perfect excuse I have been waiting for.

We hope to bring all kind of modellers together to have fun while in the mean time, share techniques as well. Basically put, this GB is made to '' SPREAD THE LOVE OF Astronomically Over-priced Styrene WHICH WE CALL MODELS '' .. lol .. 

So even if you are a tank modeller, a car modeller, a ship modeller, a mini-figure ( wargaming modeller ) or a plane modeller, gundam modeler etc. etc...  doesn't matter what as long as you build models, Join us ... Join our GB to spread the love and most of all to have fun ...

The friendly and dedicated staffs and equally awesome  members of Mecha-Lounge await your participation.... lets have some fun ...

Now, CHOOSE YOUR SIDE ( Im going to the Ground team, btw )

Would you like to know more ??? Simply click on the image below and it will take you to the forum thread -

˅˅˅˅˅˅˅˅˅˅˅˅˅˅˅˅˅˅˅˅˅˅˅˅˅˅˅˅˅˅˅˅˅˅˅˅˅˅˅˅˅˅˅˅˅˅˅˅˅˅˅˅˅˅˅˅˅˅˅˅˅˅˅˅˅˅˅˅˅˅˅˅


oh and here is a teaser ...

Stay TUNE for MORE INFO


Read more >>

Thursday 15 November 2012

Hasegawa 1/72 VF-11B ThunderBolt

Hey guys .... Welcome to another finished product of the Bird ...
Ever since I have started working, I just have no more time to produce kit as I have done so in the past so there hasn't been any kit launched from me since like April. Sorry about it.

I tried to squeeze what amount of time and energy I have left to finished this as it was a gift from a dear and close friend. And that friend is not other then Mr. Steve Santos AKA sneeper1980. He was kind enough to send it to me in surprise so I figure I might as well make good work out of it.

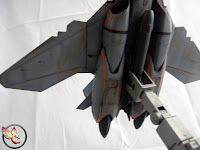
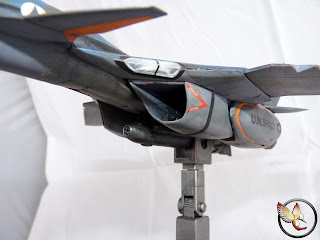
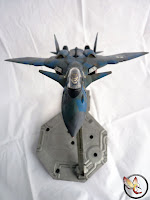
Nothign special about this just a quick Fun work ( actually took me about 5 weeks :/ ). Followed some shading method I saw on FloryModels forum and used FloryModels pigment, FloryModels Washes, MIG Pigments and MIG wash. Everything has been painted with Tamiya Acrylic. The colour Scheme is my own custom and a mix of almost everything that was within my sight LOOL.

The weathering is done in a sense that it has been going through one missions after another that it has become fairly dirty. The jets from the Macross universe are really fast so I figured paint fades would be quick and not to mention they can transform so they can and will get weathered pretty much. I added some black soot on the thrusters on the Dorsal (back) side. I added some dust effects as well on the Dorsal air intake and some amount of fading and weathering effect on the large main air intakes. (I am a SUPER noob at Aircraft )

I hope that everybody will like it. I tried my best to make this kit as good as it can get but I still made some boo-boos but nothing I can't improve on in the next build. And most importantly, I hope Steve will like this as I will be sending this back to him as a gift along a 1/48 P-51D Mustang (I've already bought the Mustang Steve, I will not take no for an answer ) ...
so as usual, here are the photos - enjoy


Thank you all for viewing and thanks in advance for the support and most of all, Thank you Steve for the kit .. It was a fun build.

                                                                                                                                 
Read more >>

Tuesday 13 November 2012

Everything I know about modding/SBing - Part 1

 
 Hey guys .... I haven't been able to post blog these days as I was busy during the months of October. I do apologize about it. Long Story short, I have to do 12 hour shifts last month and those shifts left me exhausted that I just can't bring myself to blog.

Basically,one of the member of MechaLounge sent me a PM, asking some questions about Modding/Sbing so I thought it would be nice to make a thread that every one can have a look if they anybody want to refine or start modding/SBing


DISCLAIMER - I am in no way a master in SBing or modding, there are so many others out there who can literally rape with me the amount of beautiful words they do. I believe in sharing and I want to bring out the best in everybody and help everybody in anyway I can. MAny Thanks!!!

1.0 Concept

Basically, the most common question I get and I see around on the forums is this - '' How do u Scrach build something ? '' or '' How do u mod? '' or  '' How do I learn modding? ''

and my reply those kind of question is this -
''' The only option to do it is to learn by looking at how other people works and getting the general ideas and finally getting your own concept, and start working on yourself which at that stage, you can specifically ask how to change a specific part ...
We all learn to do this ...
Browse through the various threads and see how each person works
There are some basic-need-to-know stuffs about SBing and modding in the tutorials sections too ....
Above all, What you will need is - your concept, a good eye to catch what other peoples have done, and no fear ... ''

Not to mention one crucial thing Aulon pointed out - '' The Idea '' ..
The Idea is the most important, IMO, only by knowing your idea, you will know what you want, and only by knowing what you want, you can narrow down your search ( if you got stuck ) and start building.

And that is no joke-  It's all about knowing what you want to mod. Ask questions of yourself. Like " is this part necessary here? " "Maybe I can remove it and put something better there? " or just finding a style you like.

and also, when people ask ' how do u SB something '' , All I can reply is -

'' You're asking a very very very broad question mate ....
I have been in this hobby since 2007 .. there is no such ''specific'' tutorials such as '' How to SB Something''
We all have to learn from other people's wip and see how they make them ...
BUT what you can find is some basic ''how to '' ( ''dos and don'ts'' ) tutorials that can help you SB ...
and SBing also require your initial concept/designs .....   ''

As you can see, the answers are quite similiar and everything goes back to the important thing, ' idea/design/concept'

2.0 Cutting pla-plate/Poly stryene


The other kind of question Which I see quite often is '' How do u cut pla plate ''  or a follow up to that '' How do u cut it identically/neatly? '' ...


here are some tutorials about pla plate cutting....


http://forum.zerogunz.com/viewtopic.php?p=88355&sid=a4a3e7479fdc2bf0b71887044b13c581


http://heathorn.wordpress.com/2010/03/06/plaplate-cutting/


http://www.starshipmodeler.com/tech/cj_scribe.htm


For cutting identical pieces, the most effective weapon is ''Double Tape.
Another method is to use kamm's method; to drop a very very small droplet of glue right in the middle of the piece you want to duplicate, then glue it toa plate, wait for it dry, cut the shape along the edges of the first piece, and after cutting, check if both pieces are identical, sand if needed and just drive a hobby knive down the seam in the middle, slowly does it as you only want to cut it open by cutting away the glue.

I couldn't find too much about tutorials on that topic but when it comes to research and references, you know me ... so will keep searching...


3.0 MG-fying, improving articulation etc.

Another Kind of question which I also see from time to time is the usual  ''' How do u improve this part's articulation '' or in a whole '' How do u go about MG-fying a old kit '' -

I'm not sure if this can be universal but i make up my own set of things to look out for if you want to mg-fied a kit -
1. mobility of the arms (that included the shoulders)
2. mobility of the neck
3. moblility of the waist
4. mobility of the skirts
5. mobility of the legs ( included the knee joints, ankels and thighs too)
6. extra details
There are alot of example out there... and even my own works are done by researching and reading about what I want to do, what i can do with my current skill level, and never forget to checkout the other great guys' works...

for mobility of the arms specificilly, you can check out my own wips... or you can check out this
site .. That is my VERY first WIP that I studied to get a MG elbow... This is also what i refer to.. You can get a general idea from that ...

I learned a thing or two from
here too
another
one of Derringer's works that I believe is helpful this should help too
i did my reserch from
here too
This
DSHC is one of my '' have to go look and learn '' piece.
Same goes for this
Freedom if I need to do more research

Nowaday, too many MGs are coming out true BUT there are still some people who enjoy improving OLD kits ... ( LIKE me ) so this is for those who enjoy making old HG and NG kits into a beautifully articulated one .. ( so please refrain from dropping comments like '' what's the point when there are many MGs out there, blah blah blah ).


Okie, its already long enough for the first part and some paper work came up (im at work now) so I will stop here. In part 2, I talk more about Tools, and Accessories so Stay tuned.
Thanks for reading.

P.S, If I missed anything that should have been included in this post, please do tell me. Thanks.
Read more >>

Monday 12 November 2012

Review : AK's ''The Weathering Magazine'' Issue 2 - DUST

If you guys could recall, I made a post last month, reviwing one of the wonderful book published by a great company ( Link HERE  ). AK interactive has just release the 2nd issue of their '' Weathering Magazine '' and as soon as it hit the stores, I just jumped and bought 3 copies straight away ( the other 2 are for my friends if anybody wants any ). This 2nd issue is named '' DUST '' and was released in the third week of October. Because I was busy, I couldn't write a proper review until today so I do apologize for my delay in writing a review.

In this issue, Ak showed a even greater variety of methods (compare with Rust ) to apply dusts on a model, from heavily dusted helicopter in use in Afghanistan to a dusty and dirty figure, from simple trick as airbrushing on paint like Tamiya Tan to the complicated tricks of combining all the products ( washes, filters, pigments) to produce a ultra-realistic effect.

The magazine is printed on a very high quality glossy heavy paper, and is 63 pages in full color.

First you got this on the cover -


And once you turn the page, you are greeted with a wall of text from the chief editor himself ( I didn't take any photo of it, sorry ) ... and then after that, you will come to the contents

Again with the model but Im not really complaning about this one ... she's hot.. especially since she's holding a gun ( chicks + guns = hotness, u know hehehe )

and after that you will get straight into the first chapter -

'' Chopper Dusting '' is basically how an aircraft can get dirty when it is in service in a really really dusty and sandy area, in this case, a Black Hawk used by the 160th Special Operations Aviation Regiment ( Airborne ) in Afghanistan. In this chapter, AK showed step by step in using acrylic paints and enemal washes to create a well used aircraft operating in very dusty and sandy conditions. The chapter cover how to replicate dust sticking to the matt paint finish and how it collects on areas that are frequently lubricated with oils and greases.

In Chapter two '' Panzer Grey and Dust '' -
They talked about how to achieve a realistic dusty finish in on a tank. They took a Tiger I, somewhere in the eastern front, as a subject. They talk about how to acheive a various down of dusty finishes on the tank, and where dust would be thin  and where it would be thick. I found this chapter very useful and very good as most tanks would be dusty in this kind of way, espeically tanks operating in climates like the russian summer.

Chapter 3 '' Space dust '' is all about how a sci-fi model offer a wide range of weathering potential.

The chapter talks about how to achieve a fairly used space hardware, with space dust and everything in between. Since this is sci fi, creative potential is high and too many a option are avaiable but they chose to go not too over board with a ton of dust but instead, showed how to make a suitable layer of dust using a minium amount of materials.

I wouldn't actually say this article is a chapter since it is only one page but this is one page that seriously helped me. TBH, I knew how to apply a dusty finish by airbrusing acrylic paint on a model but never knew about using ENAMELS to make it. Now I do ...

They choose to use Humbrol for the article and they couldn't have choose a better paint for the job .

'' Mucking up a Merkava'' is the title for chapter 4 and in this one, they talk about how to achieve a really really dusty and dirt-filled, dirt-stained tank that have undergone extensive services and opereations by using ACTUAL dirt as one of the materials

I find this article very interesting and eye-catching and actually useful for modellers who aim to work on vehicles that have been used and abused in numerous operations and humid,dry and sandy climates.

Again, this is another article too short to be a chapter and this article is aimed for those diorama builders.

Titled '' Dusty Cobble Stone Road'', they talk about how to get a realistic dusty Stone road and not only just dust, they also talk about how to enhance the texture of the stones as well.  I really really like this article as they show how to acheive a nice dusty road in a matter of a few steps ( namely in 5 ) and with only 4 different materials.

Following this article is another Article for a diorama as well, with a title '' A dusty Diorama''.

What interesting about this article is that they actually used real sand ( fine sand ), real pebbles, some fibrous hairs ( don't ask me where they got the hairs from, that was the very first question I asked myself as well when I saw them ) and some dried lichen. Also to be of noted is the use a modelling clay as a base and for the sand to stick onto.

Chapter 5 '' Dust brings a tanker to life '' shows how some modellers forget to weather the crew figure according to the settings in which they weather their vehicles.
The chapter shows how to bring life to the figure using both enamel and acrylics for dust effects and how a figure weathered accordingly to the environment will add a ton of extra realism to the entire model or diorama.

The article following this is named ''Dusting Tiger Tracks '' which basically shows how to put on tracks on the tiger tank coverd in chapter two.
Quite a lot of materials is involved with this materials but the explanations are clear and easy to understand. Another great article that would be useful all the time if one if fond of making tanks ( like me ).

The next article to follow is an article named '' Airbrushing Dust and Dust Washes ''.

Basically, this is quite similar to the way we spray enamel and acrylics to produce a dusty finish but instead, they talk about using enemal washes and white spirit and another peculier instrument  ( namely a artist fibre pencil ) to get a nice dusty finish. This method has been covered in Chapter 2 as well but this article covers in details about this method.

For the next article, it is titled ''VK4502 Dust and Dirt'' and they talked about how they get the dirt and dust that covered the VK4502 that was featured in the very first issue's very first chapter.
To be of note in this article is the use of Modellling product such as AK's Gravel and Sand fixer, some leaves ( not the big ones, the diorama accesories ). This articles is more about how to get a dirt ( or clumps or dirt) effect on a vehicle instead of a dusty layer and how to fix it properly on the model.

The next articles is kind of a like a combination of everything that has been said previously ( I beleive).


Basically, this articles shows how to get dust and dirt effect using every weapon in a modeller's arsenal: acrylic, enemal, enamal washes, pigments, filters and other products such as AK wet effect fluids. A particular part that is of great interest ( to me that is ) is the part where they talk about how a heavily dusted surface makes a great base for the dried mud and how pigments, applied correctly, create a cool looking and ultra-realistic cracks in the dried and caked mud.

Following this is a section dedicated to a fine selection of real life reference photos, just like they did in the first issue.
After this, we come back to another Chapter, Chapter 6, titled '' Br39 Before and After ''. Basically this is a chapter that shows, in great details, how a locomotive can get dust and dirt with all the oil, greases and cargo on board. The model used is Rivarossi Analogic H0 scale br39.

This chapter shows how to achieve some uber realistic weathering effects without the need to disassemble any parts to change a toy looking mass-produced model locomotive into a real looking one.

The Final Chapter, Chapter 7 is named dusty ground and they showed how to make a dried and dusty diormama from the ground up and with dust and dirt effects on the DIORAMA instead of the model.
The example setting they choose was Tunisial; which is a landscape of not purely desert sand but also comprises of different types of soil,rocks and vegatation. Basically, this chapter talks about how to make a real life enviorment with different kind of shades of soil and type of pebbles and rocks.

This book is a must have in my opnion. Packed with invaluable techniques for recreating all manner of dusts and not to mention beautiful photos, detailed "how to" information, and containing real-life examples, too.


VERDICT - HIGHLY, EXTREMELY RECOMMENDED.

Read more >>