Friday, 16 May 2014

W.I.P - R.O.K.A K9 Thunder SPH - Part 4


Right... and update is long over due on this gal .... let's do this ...

With everything glued on, it's time to start painting this gal..

I had to put on the base colour, which is dark green but having no other brand apart from revell Aqua, I thinned that with Ultimate Modelling Product fantastic thinner and spray it like so - 
Image
Revell Aqua is just like Vallejo, dry too fast inside the nozzle ( for me that is ) and somewhat a pain to put on but UMP thinner just made it go on as smooth as a baby's bottom... Really surprised and happy with the results.
After that, I followed up with MR. Hobby Aqueous Wood Brown -
Image
I decided to use Nato Black instead of Black. I love Nato Black. It has a very nice muted,flat greyish black tone and just lovely.
Image
Followed that up with Tamiya Wodden Deck Tan . I wanted to put on just flat Tan and bought Flat Tan ( labelled as Tan Earth on the bottle ) but that colour looks very much like a friend Salmon pink so I just opted for the Wooden Deck Tan. I wanted to use Deck Tan but my Deck Tan ran out.
Image
Followed that up with decals and pin wash -
Image

Image

Image
With all the pin wash, it toned down the bright colour combinations and looking like this for now - 
Now, come to weathering this gal up. I decided to go for a very wet situation. I saw some videos of these gals doing exercise in a very rainy weather so I thought '' hey, rain .. wet vehicle.. wet mud..'' so I went ahead and start preparing for adding wet mud.
First, I decided to mix a lighter, dried shade of mud with pigment, thinner and plaster.

Image

Image

Image

Image

Image

I left them dry for half a day and started working on the wed mud layers.
This time, I put in only a small bit of plaster, more pigments and thinned Vallejo Gloss Acrylic Resin heavy gel and mix them all into a slightly thinned paste and put it on top of the previous layer of mud.

Image

Image


Image

Image

Image

It's not all dried yet so I can't tell how wet/glossy it is so I'm gonna let it dry and see if I need to put more. 

I did sprinkle some dry pigment and fix them with pigment fixer for added texture.

After that, I turned my attention on the track. This is the first time I have ever got so lazy painting track so all I did was bombard them with pigment, washes and acrylic resin to show the similar effect as the running gears.

Image

Well that's it for now... IT's slowly coming along and I'm enjoying every bit of it. 

Coming up next will be the crew and the wet effects on the top ( which I am dreading ) .. Should I buy some Wet effect fluid from AK or Ammo ? or should I just use Acrylic resin/ Gloss varnish ?? I don't know.... any input? 


Until the next update.

Read more >>

Tuesday, 13 May 2014

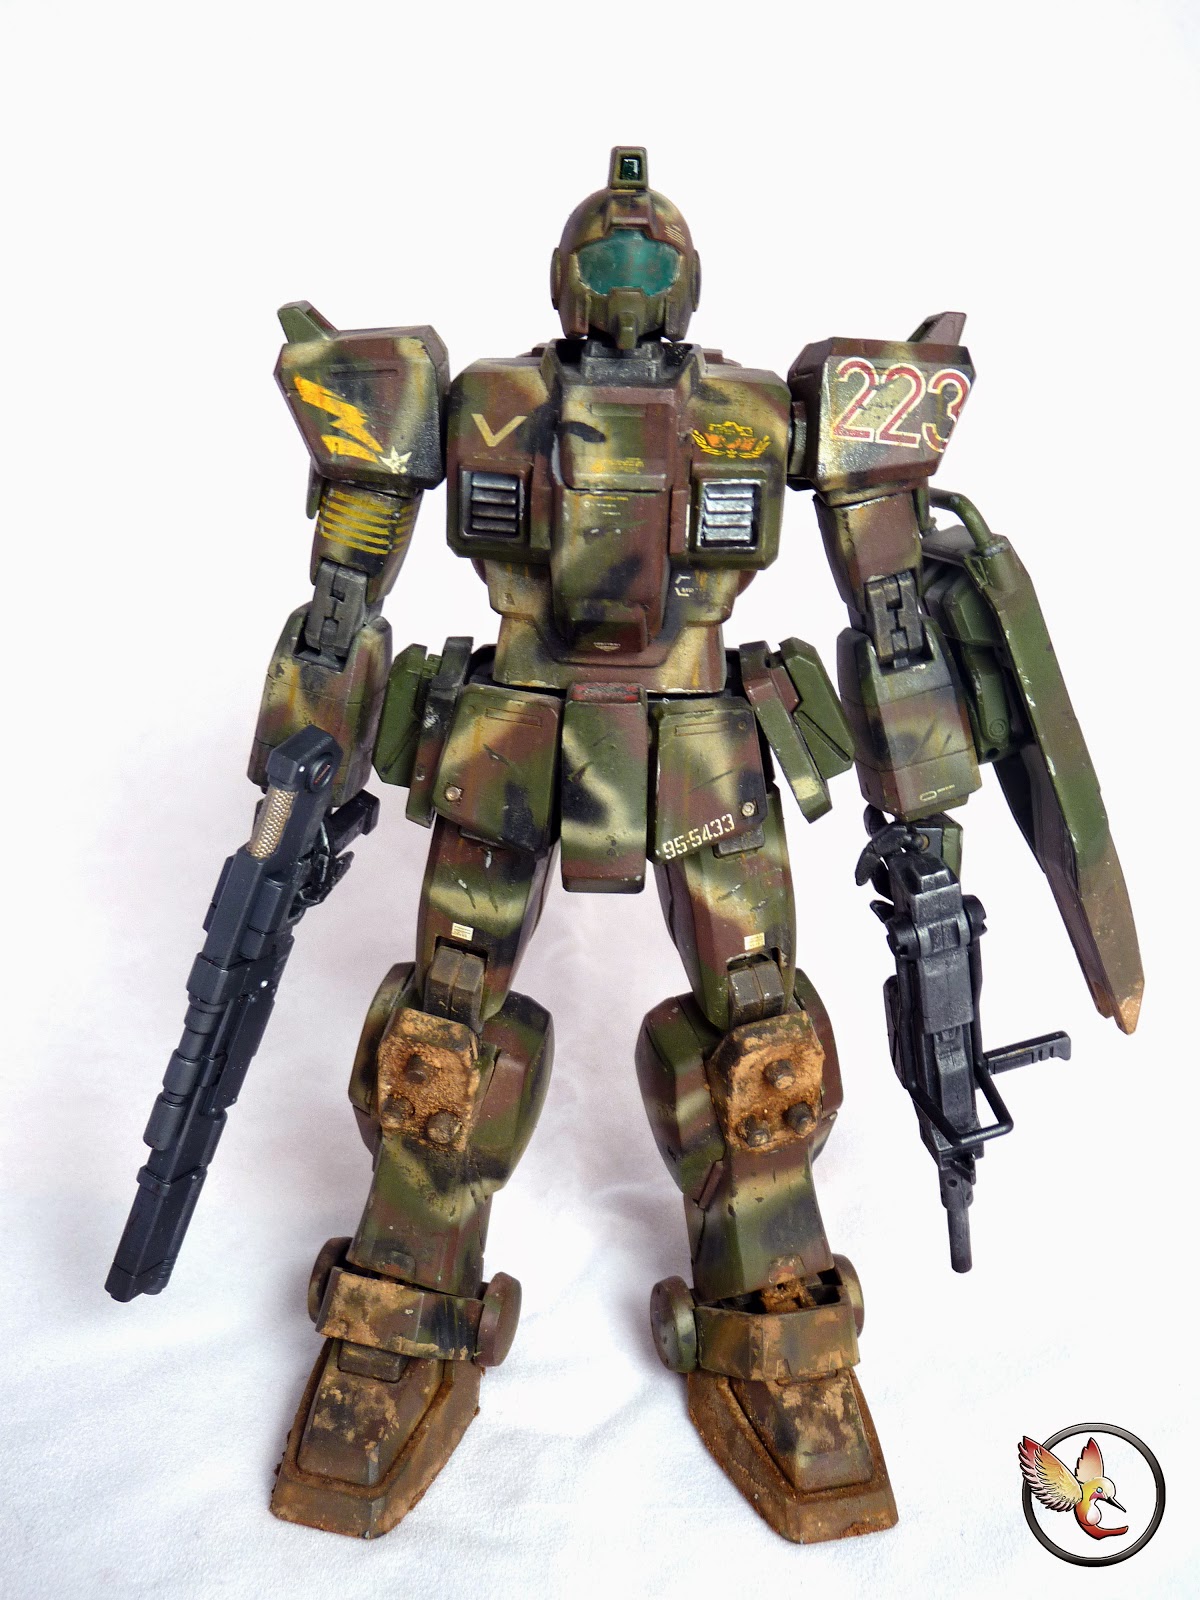
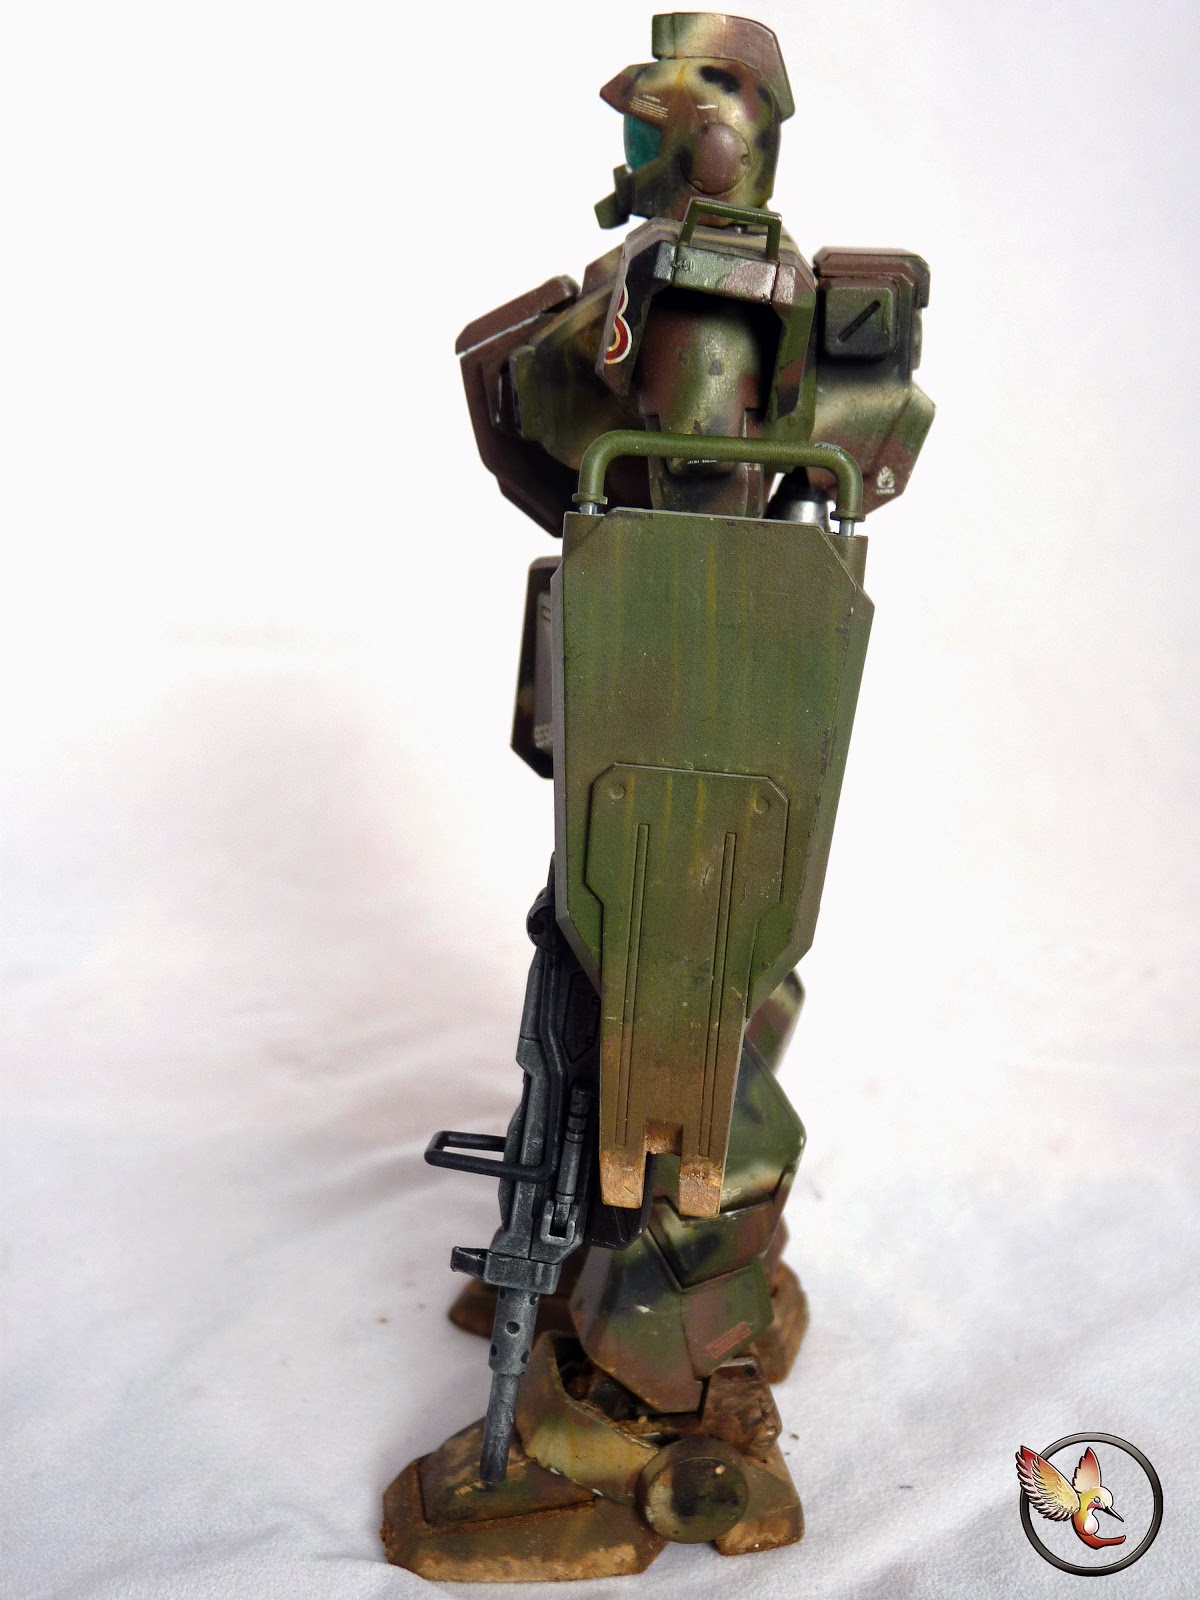
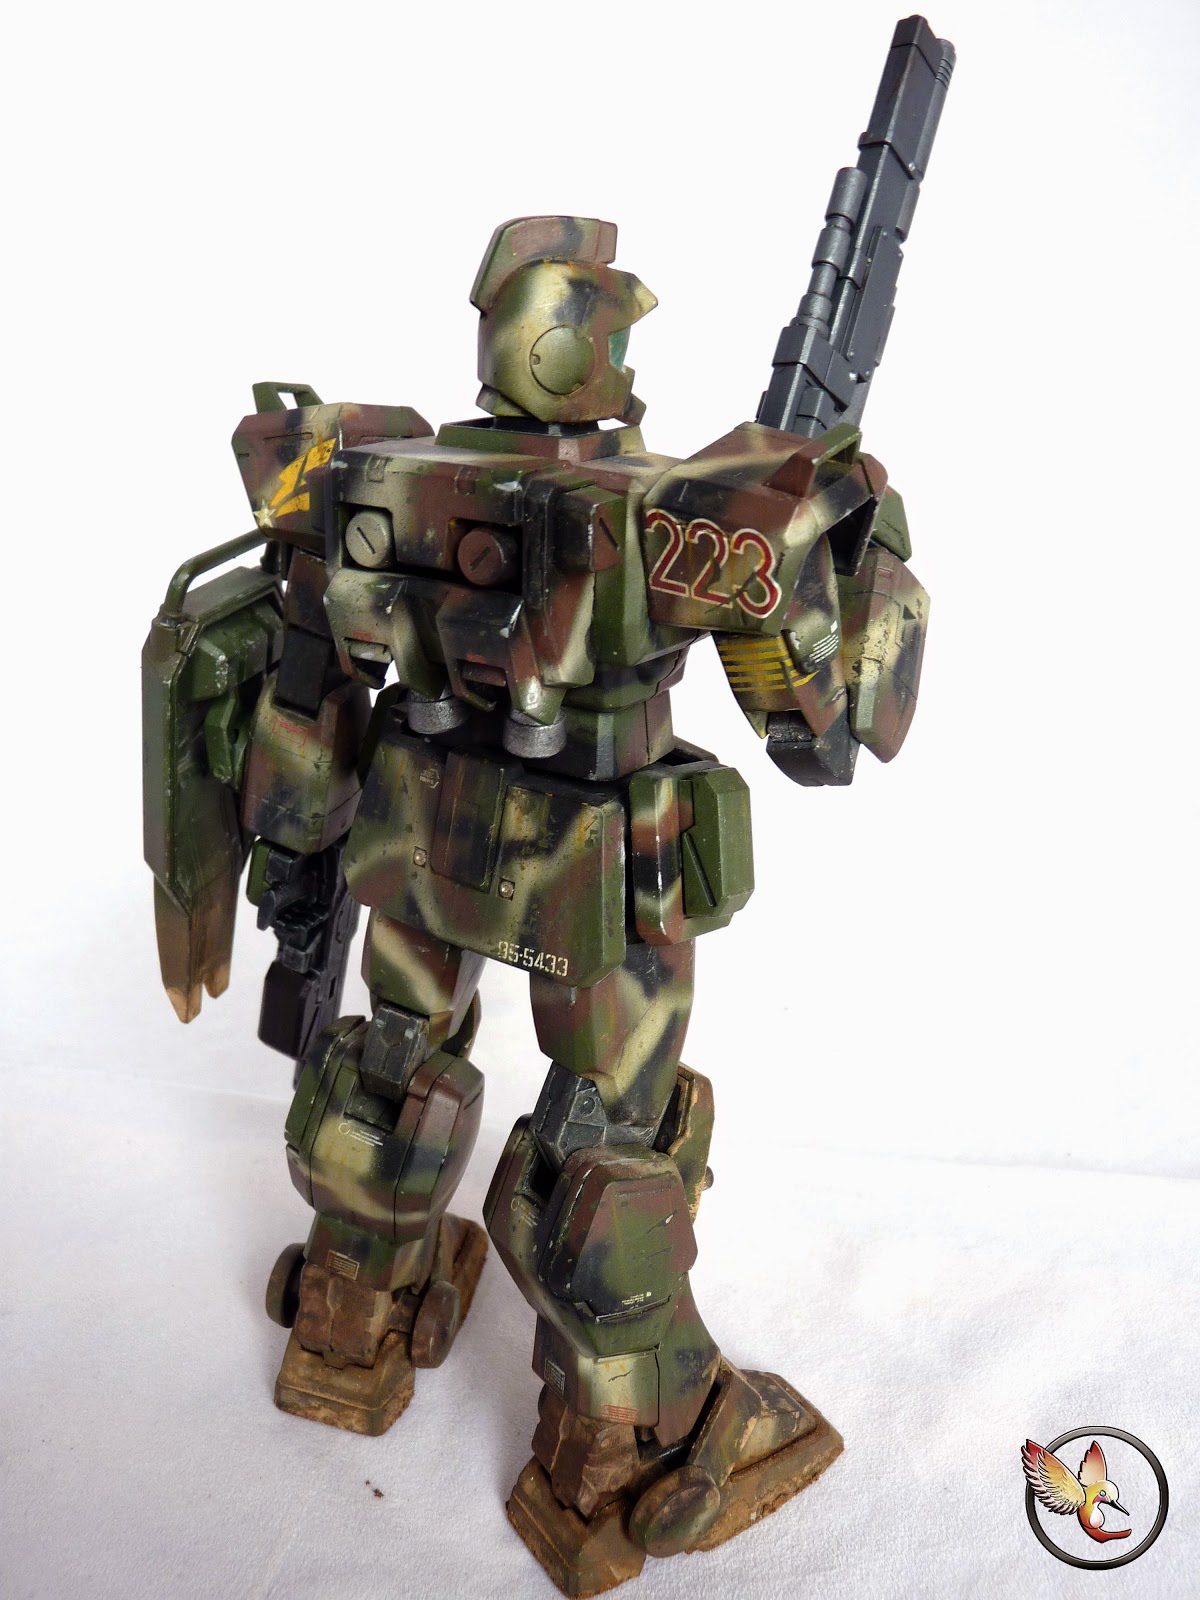
A Veteran GM: MG RGM-79[G]


Hello fellow gunpla builders....

Well, what can I say, I have a surprise for you all. The hummingbird has been very quiet in the gunpla front but not anymore. As you all know, I have taken a long break from gunpla and are going back to my root form of modelling; armoured fighting vehicles. A lot of my close friends didn't want to see me completely forsake gunpla and also, I wanted to paint and weather a grunt suit but I didn't have any grunt suit. That's when my friend Simon / GundamUK comes in. He sent me his GM Sniper so that it will serve both of the condition I just mentioned. I think of this as a free commision though, haha. 

As you all know, I have been building so many tanks and weathering a lot of them and I wanted to put the same skills I acquired from going back into my root modelling back into gunpla. Simon gave me absolutely freedom on what to do so the first thing was to figure out the camo scheme.

I considered a lot of camo scheme, Nato-three tone, German panzer 3 tone, Soviet Summer, Russian 3 tone, and the MERDC among other things. As most of the camo I considered are only 3 tone, I omitted them and decided to go for the 4 tone MERDC scheme.

If you all are wondering what the MERDC ( US Mobility Equipment Research & Design Command ), this is how it looks like - 


And here is a little history of the scheme.
In the 1970s, the US Mobility Equipment Research & Design Command (MERDC) developed a system of camouflage patterns for US Army vehicles. These consisted of a set of standardized patterns for each vehicle, to be used with a set of twelve colours. The local terrain conditions and colours decided which of the paints were to be used, and on which parts of a vehicle. Then, if conditions altered, for example by a change in the weather, or by the unit moving into a new area of operations, the scheme could be quickly adjusted to suit them by replacing only one or two colours by different ones.
For example, if a vehicle was painted in the US & European winter scheme, which had a dark green and a medium brown as its predominant colours, and it started to snow, by overpainting either the green or the brown with white, one of the two snow schemes could be created. This gave a high degree of flexibility, though in practice it was hardly ever actually made use of—most vehicles were painted in one scheme and kept that.
Any of the MERDC schemes could be found with either hard edges (hand-painted) or soft edges (spray-painted) to the colour patches. Soft-edged patterns seem to be more common, however, probably because it takes less time to spray a tank than it does to spray the tank and then touch up the edges.

I can't remember the colour I used. The green was a mix of 4 or 5 greens and the brown was Brown+JGSDF Brown ( which made it very chocolaty ). The black is just normal black and the tan is a mix of wodden deck tan and deck tan. I have been criticised negatively ( and called an idiot ) as the colours are a little bit off but it was from a guy who have never built any military stuffs and not to mention it all tie down together with the subsequent layers of weathering. And most importantly, Simon loved how all the colours looked  ( regardless of him having little experiences in the camo field. He's great at painting so he knows what he's talking about ). All in all, that know-it-all dbag who called me an idiot can get bent as I delivered a kit that far exceeded the owner's own expectation ( sorry to rant but I feel like letting it out )

The weathering scheme/scenario for this baby is to show a veteran mobile suit operating in a forest, thick foliage area from spring to autumn. Because of the weather condition, I decided to put on a lot of streakings to show rain marks accumulated from extended periods of operating in the fields. As these guys knees a lot to use their weapons, I decided to heavily stain the knee with dried earth and mud. The feet and ankle are weathered to show that this guy have been travelling through rivers and streams of different dept. My shishou ( master ) Derick did point out that I was thinking too much as how a human feet would look like when I did that and it looked a little bit wrong. I do agree with him but I aready fixed them with pigment fixer so I didn't want to ruin all the way down to the paint layers removing them.

The chippings are done in four layers; a lightened tone of the base green colour, inside it is the hull red-dark brown primer colour and inside it is the bare metal colour. The streakings are done by by oil and streaking product from AK interactive. I did not put on any rust as I am certain the metal that this thing is made of doesn't corrode ( according to the lore that is ) 

Here's the all around view -


and here's some of the close up - 


And some shots of the decals -


Here is how the decals are broken down :

Left shoulder is the unit number, right shoulder is the division insignia, left chest is the brigade insignia and the right chest is the battalion number and the one on the skirt is the production number.

The yellow rings around the right arms are kill marks rings, inspired by the kill marks found on the German tank barrels. 

Per the norm from me, here's a number of poses -


I am my own harshest critique and there are some aspect of it that I could have done better. I did get rid of the seams on the guns but it was enough and I only found the seams are still a bit visible. With all the works I have done, I could have get rid of it entirely. That was very idiotic of me. Another one is that when I applied the decal 223, I was thinking of the whole thing as a tank and on tanks decals can be found applied like that, using whatever space they have although they are not that common, and I went ahead and applied like so which turned out to be a mistake. I should have cut it and reposition them into a much more acceptable position. 

Most importantly, I'm so happy to hear that Simon regard this very highly. You can check out what Simon think on this video. Go give his page a like and subscribe to his channel as well. He's one of the best gunpla builder in the UK.


There may have been some mistake ( big or small ) that I made but still  this is a little bit better then how I usually paint Gunpla... LOL ( I suck at painting in gunpla). Even with the flaws, I am happy to see this came out like this.

My utmost gratitude to Simon for providing me with the kit and purpose to model a gunpla again and my thanks to my friends, Kamm, Pawel, Jeff, Justin, Derick, Geeyan, Jerome, Paul and Thanos for supporting me all through out this project ( and when I was called an idiot). Thank you so much guys .. for keeping the gunpla flame alive in my heart. 

Until the next launch.. ( and yes, I am still building gunpla)
Read more >>

Saturday, 3 May 2014

W.I.P - R.O.K.A K9 Thunder SPH - Part 3

OKAY .. Part the third for this one ... picking up from where we left off, this is what I have right now -


Just before that, I put on the very long rods along the length of the hull sides. I don't know what these rods are for but I believe they are gun cleaning rods

Image

after that, I turned my attention to the gun travel lock.
First, I inspected the lock it self and I found ejector pin marks so I filled them up with Perfect Plastic Putty- 
Image


Follow that up with the hinge base which goes on the front of the hull. I also put on the front mud flaps-
Image


The lock can be swivel up and down -

Image

and it can be open and closed -

Image

I am grateful toward academy for designing the kit like this. I hate to have to make decision on whether to keep it glued up or down.

I had to put on this little piece which looks like a signal light or something on the top of the hull -
Image

After that, I moved on to the commander's cupola and hatch. Upon inspection, the sight on the cupola is all flat and I didn't like the idea of it so decided to improve on it. I glued some plastic on the edges of the sight to show that '' border '' features around glass.

Image


and checking the references, I modified the inner details of the hatch as according to the real thing -

Image

The 4 grab handles are just simple brass wire glued on. It's not perfect but it is presentable.. ( I think ) 

The commander cupola and another crew member hatch goes on -
Image


You can also see some kind of small guard wall that's sticking out near the back of the turret.

The gunner sight goes on after this. The kit doesn't include any clear part but the ballistic covering was well made. Having no desire to paint the glass effect, I decided to put on the cover. 

Image


You can also see that little sight or detector thingy that has been treated with perfect plastic putty. That part has one big sink hole so I had to fill it up.

After that, I put on 4 of the big hook on the four corners of the turret ... 

Image


and that's it for this update .... 

Until the next one ....

Read more >>