

Good day to you people. Hope you readers having a good day and all are good.
As you all aware, I'm building a fleet of SPG and this is my fifth on the line after the Dana, Type 99, Pzh2000 and the AuF1. The sixth and seventh will be the Mista-S and AS-90.
The kit is almost entirely conventional – no photo-etch, no resin, no clear plastic; just 314 parts in old-fashioned tan polystyrene, plus two matt grey one-piece vinyl tracks. Moulding is sharp and in some places really rather nice. The parts breakdown and assembly sequence are pretty much as you’d expect from any typical modern AFV.
I used a variety of different paint type for painting this gal. Having no other brand apart from revell Aqua for the base colour which is Dark Green, I thinned that with Ultimate Modelling Product fantastic thinner and sprayed it on. After that, I followed up with MR. Hobby Aqueous Wood Brown. I decided to use Nato Black instead of Black as I thought Nato Black would look much better than just normal black. Followed that up with Tamiya Wodden Deck Tan . I wanted to put on just flat Tan and bought Flat Tan ( labelled as Tan Earth on the bottle ) but that colour looks very much like a friend Salmon pink so I just opted for the Wooden Deck Tan. I wanted to use Deck Tan but my Deck Tan ran out.
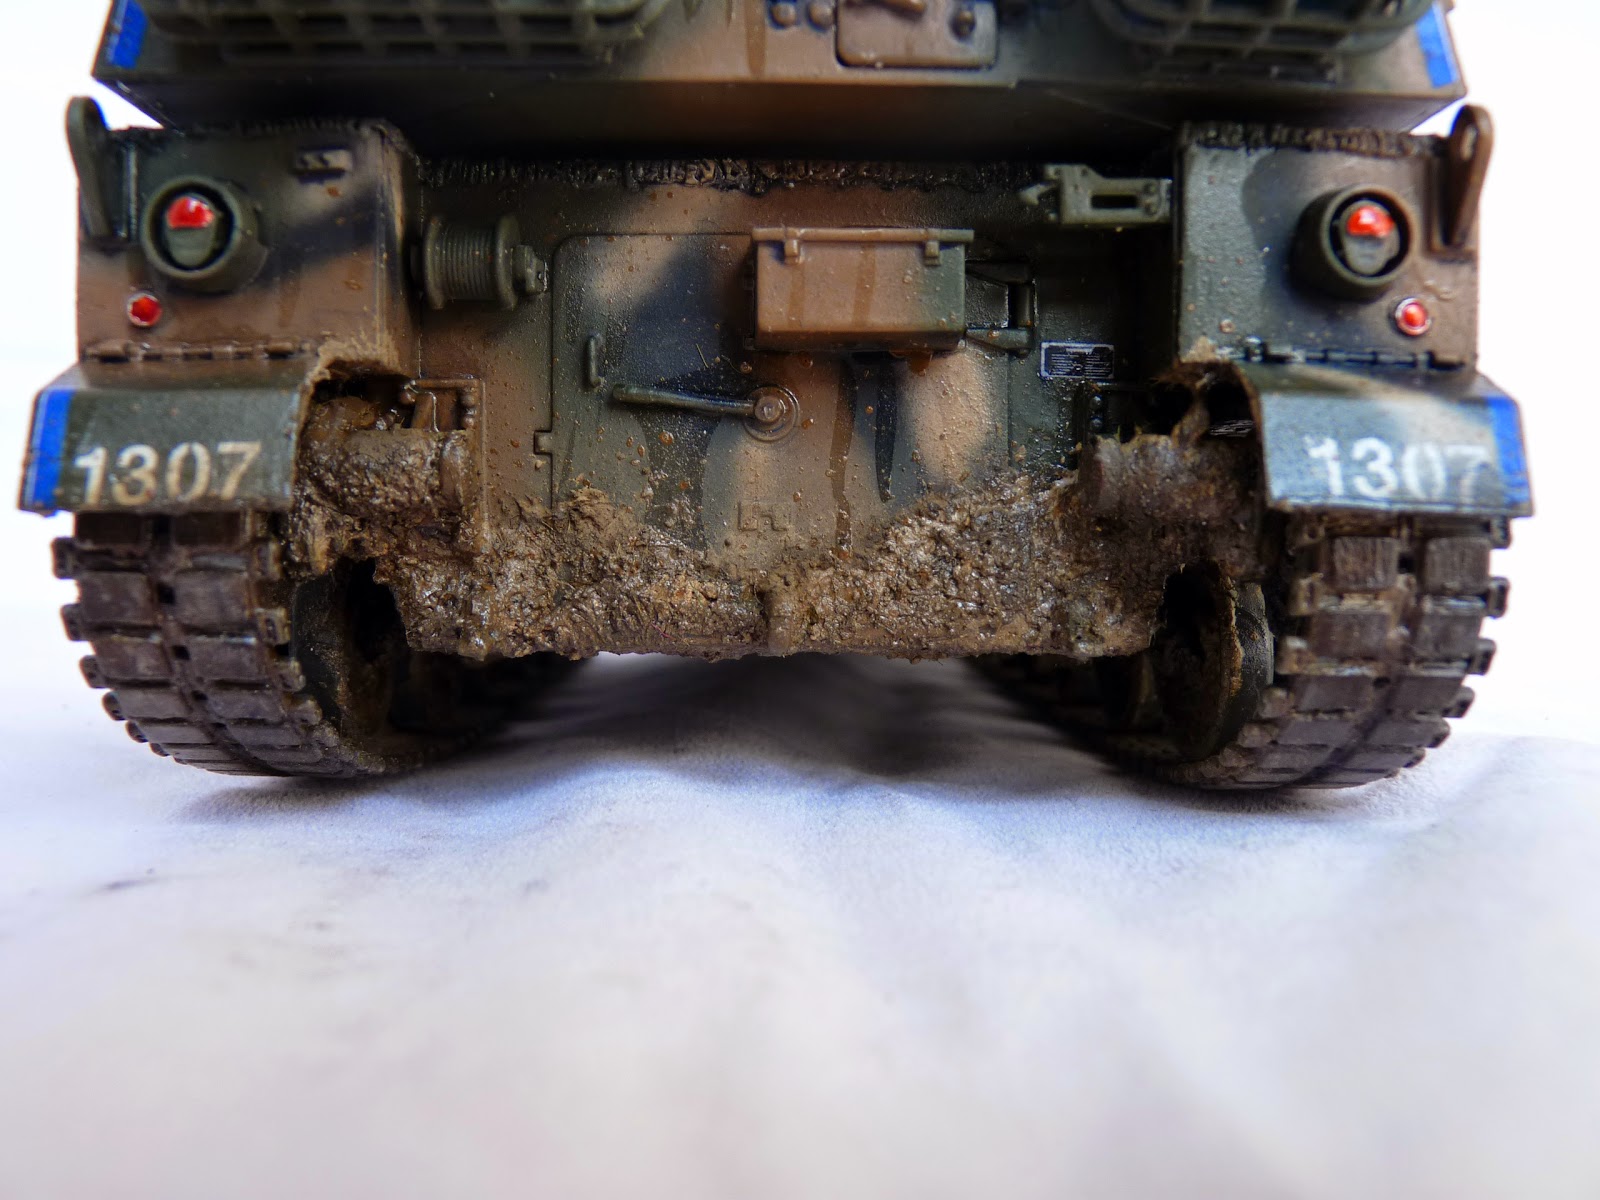
I decided to go for a very wet situation. I saw some videos of these gals doing exercise in a very rainy weather so I thought '' hey, rain .. wet vehicle.. wet mud..'' so I went ahead and put it on. To compliment the wet mud on the running gears, I decided to take the wet effects further. I decided to make the entire vehicle quite wet as if it has been staying out in the rain. In order to do that, I just used a lot of Vallejo Gloss Varnish as I do not want to spend money on any wet effect fluid. It's not perfect but it does the job suitably. Had I more budge, I would have love to get an AK or an AMMO.
As I have stated in my WIP post, I managed to get a after market resin set for this and used the stowages from that set. After building tanks and SPGs without any stowages on them, it's kind of a good feeling to be building vehicles with stowages.
The build was really enjoyable, despite being a academy kit and a somewhat old one. I made a full account of the W.I.P in the previous posts and you are welcome to look over at them if you are curious about how well the kit goes together. Actually, let me make a list here for the Work in Progress posts -
Well, that's about as much I can sum up about the build. The exact steps can be found in the 4-part W.I.P.
The running gears -




The on board tools -
 The outer side of the turret just to show the rain marks and water effects -
 The only one visible sight/scope on this machine -
 The head and tail lights on this machine, you will see why I am not happy about them -


 The Stowage on board -

 The machine gun -
 And as usual, my show case photos from various angles -


 Well, that's all I can say about this. As you all know, my patience is my bane so the usual hiccups are met but nothing I can complain. The most unsatisfying thing on this particular build would be my lack on control when painting the lights. I thought they were alright but upon taking the pictures, I saw that they could use a repaint with the camo colours as the edges bled out but if you know me, you know I will just say '' meh, can't be bothered now'' and be done with it; which is exactly what I did. Another thing I am now regretting, in hindsight , is that I should have put on some more mud on the tyres. That was a BIG boo boo.
Read more >>
As you all aware, I'm building a fleet of SPG and this is my fifth on the line after the Dana, Type 99, Pzh2000 and the AuF1. The sixth and seventh will be the Mista-S and AS-90.
The kit is almost entirely conventional – no photo-etch, no resin, no clear plastic; just 314 parts in old-fashioned tan polystyrene, plus two matt grey one-piece vinyl tracks. Moulding is sharp and in some places really rather nice. The parts breakdown and assembly sequence are pretty much as you’d expect from any typical modern AFV.
I used a variety of different paint type for painting this gal. Having no other brand apart from revell Aqua for the base colour which is Dark Green, I thinned that with Ultimate Modelling Product fantastic thinner and sprayed it on. After that, I followed up with MR. Hobby Aqueous Wood Brown. I decided to use Nato Black instead of Black as I thought Nato Black would look much better than just normal black. Followed that up with Tamiya Wodden Deck Tan . I wanted to put on just flat Tan and bought Flat Tan ( labelled as Tan Earth on the bottle ) but that colour looks very much like a friend Salmon pink so I just opted for the Wooden Deck Tan. I wanted to use Deck Tan but my Deck Tan ran out.
I decided to go for a very wet situation. I saw some videos of these gals doing exercise in a very rainy weather so I thought '' hey, rain .. wet vehicle.. wet mud..'' so I went ahead and put it on. To compliment the wet mud on the running gears, I decided to take the wet effects further. I decided to make the entire vehicle quite wet as if it has been staying out in the rain. In order to do that, I just used a lot of Vallejo Gloss Varnish as I do not want to spend money on any wet effect fluid. It's not perfect but it does the job suitably. Had I more budge, I would have love to get an AK or an AMMO.
As I have stated in my WIP post, I managed to get a after market resin set for this and used the stowages from that set. After building tanks and SPGs without any stowages on them, it's kind of a good feeling to be building vehicles with stowages.
The build was really enjoyable, despite being a academy kit and a somewhat old one. I made a full account of the W.I.P in the previous posts and you are welcome to look over at them if you are curious about how well the kit goes together. Actually, let me make a list here for the Work in Progress posts -
Well, that's about as much I can sum up about the build. The exact steps can be found in the 4-part W.I.P.
I'm vary satisfied with what I did, albeit it could look better but still, I'm happy.
It's time for the photos -
(If you think some are small, just click on them ) The running gears -
And as usual from me, the Gary Wintin Shot -
I couldn't keep building if not for my supporting friends and comrades. Thank you guys for always supporting me. Thank you dear readers for your patronage as well.
Until Next time.


