

Good day to you people. Hope you readers having a good day and all are good.
As you all aware, I'm building a fleet of SPG and this is my final entry on the line. The fleet is a total of 7 SPGs consisting the the Dana, Type 99, Pzh2000, AuF1, K9, 2s19 Msta and this AS-90.
This is the only kit of this kit available in 1/35 scale. Since it's release, a lot of sites including Armorama has reviewed this gal so I will not be saying anything about the quality of this kit. Although I can say this - even though it's old, it's a pretty good kit.
I was lucky enough to get it for £15 posted including the metal barrel with the sagged recoil sleeve. I also indulged myself with a Eduard upgrade set. I didn't spent money on the second set which consisted of the basket on top and the grilles. I thought it would be waste of £7.
As you all know, the British Army desert colour is something that is very hard to paint and there is no exact shade available out there. So using XF-59 desert yellow as a base, I decided to play around with the high light and shadow as I know this will be a monotone vehicle anyway. Four other colours were used to play around with the highlights and shadows - XF-68 Nato Brown, XF-72 JGSDF Brown, XF-57 Buff and XF-55 Deck Tan. I admit I put in more brown than I'd like to admit and it makes the paint very brown in hue but I kinda like it. You can see the visible brown hue along the edge of the bottom of the turret and the upper hull.
For the weathering, I wanted to show it used well enough from the strong offensive as we have seen during the Iraqi war. I also wanted to show a lot of sand and dusts on it to depict a vehicle going through the very harsh desert environment.
I didn't have any kind of sand colour pigments so after pondering, I decided to go for 2 tubs of pigments from Pinnacle Modelling supplies and there were fantastic. I bought a tub of Desert Sand which is of a darker colour with a brown hue to depict the deeper part of the desert and another tub of Light Sand which is a typical sand colour but not as yellowish as beach sand.
The chipping colour is from AMMO and I actually enjoy that colour rather than the usual Vallejo German Black Brown ( or whatever it is called exactly). The Streakings colour are made from Oil paint and I used Serpia Brown, Burnet Umber and AK Streaking for DAK vehicle.
The stowage comes from the Tamiya US military set along with some pouches I found lying around. The big tarp was made from a big cut out of aluminium foil, folded nicely and pressed along the edge of the stowage basket and then painted.


The Stowage on board -

 The machine gun -
 The massive amount of fuel spillage -
 The streakings -


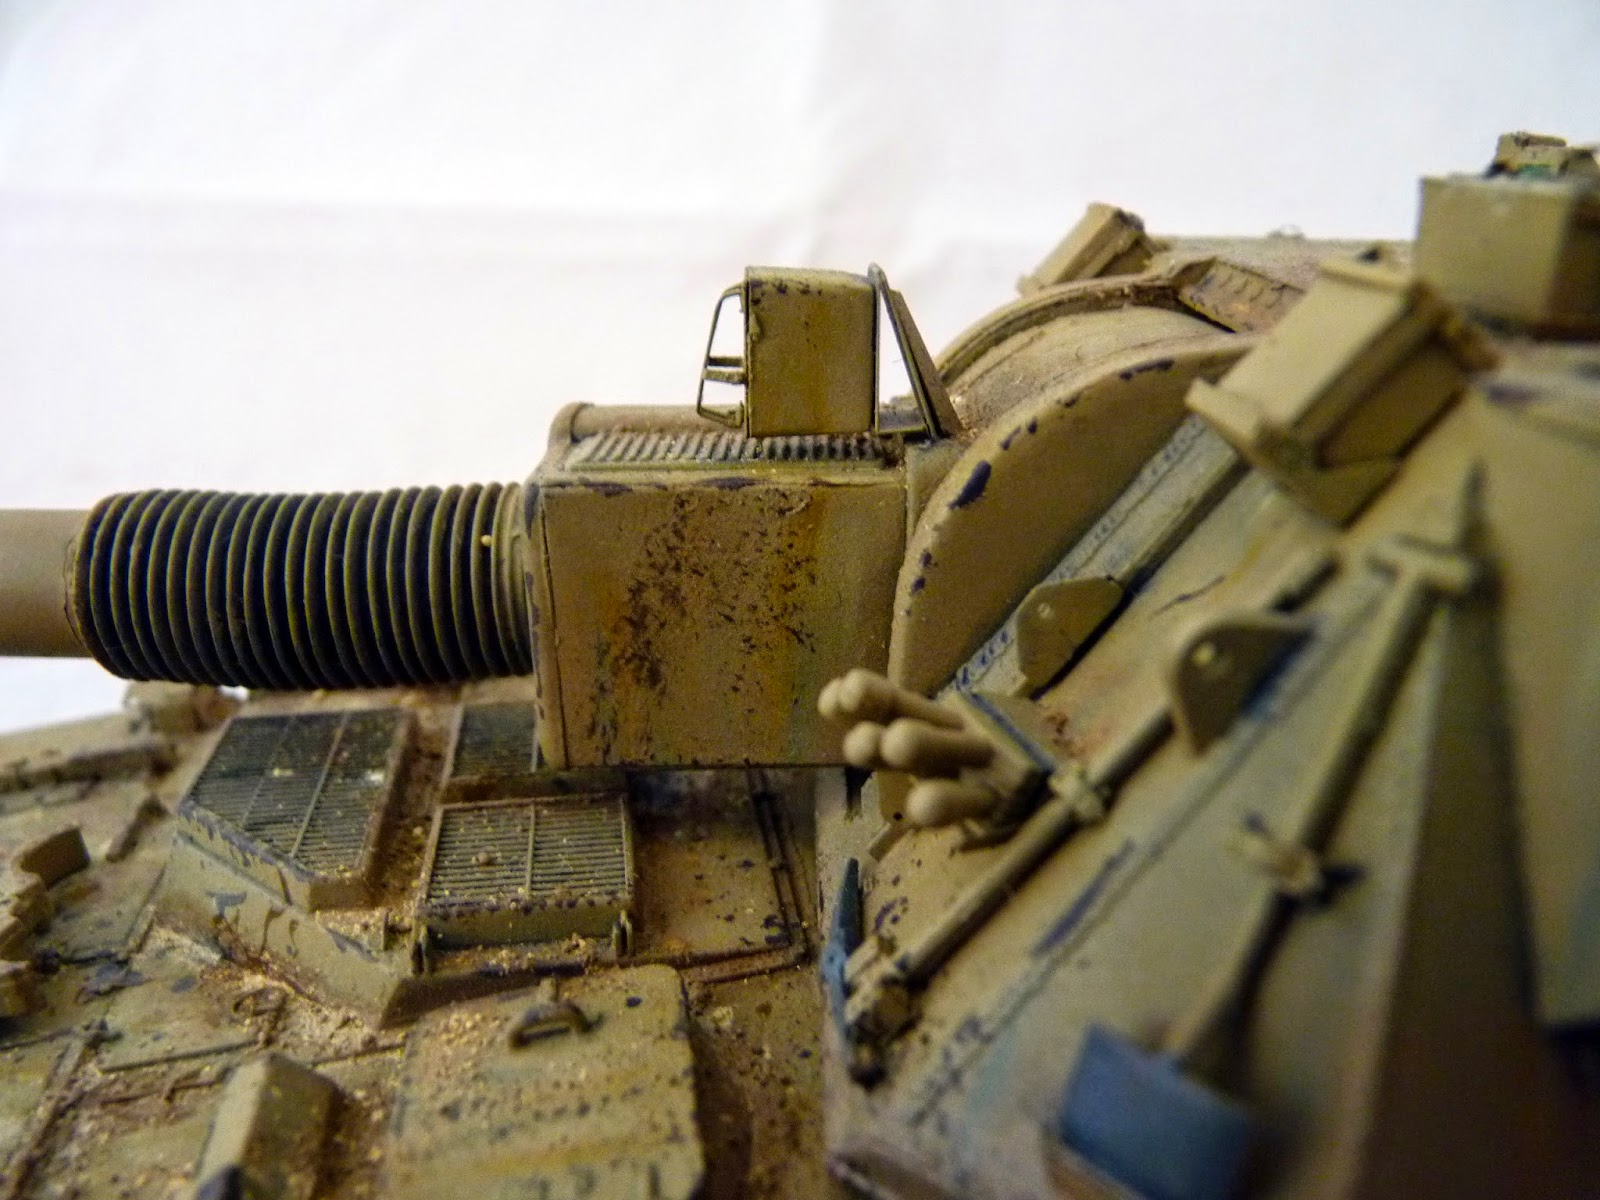
 The dusts and numerous chippings from severe usage -


 The exhaust -
 And as usual, my show case photos from various angles -


Read more >>
As you all aware, I'm building a fleet of SPG and this is my final entry on the line. The fleet is a total of 7 SPGs consisting the the Dana, Type 99, Pzh2000, AuF1, K9, 2s19 Msta and this AS-90.
This is the only kit of this kit available in 1/35 scale. Since it's release, a lot of sites including Armorama has reviewed this gal so I will not be saying anything about the quality of this kit. Although I can say this - even though it's old, it's a pretty good kit.
I was lucky enough to get it for £15 posted including the metal barrel with the sagged recoil sleeve. I also indulged myself with a Eduard upgrade set. I didn't spent money on the second set which consisted of the basket on top and the grilles. I thought it would be waste of £7.
As you all know, the British Army desert colour is something that is very hard to paint and there is no exact shade available out there. So using XF-59 desert yellow as a base, I decided to play around with the high light and shadow as I know this will be a monotone vehicle anyway. Four other colours were used to play around with the highlights and shadows - XF-68 Nato Brown, XF-72 JGSDF Brown, XF-57 Buff and XF-55 Deck Tan. I admit I put in more brown than I'd like to admit and it makes the paint very brown in hue but I kinda like it. You can see the visible brown hue along the edge of the bottom of the turret and the upper hull.
For the weathering, I wanted to show it used well enough from the strong offensive as we have seen during the Iraqi war. I also wanted to show a lot of sand and dusts on it to depict a vehicle going through the very harsh desert environment.
I didn't have any kind of sand colour pigments so after pondering, I decided to go for 2 tubs of pigments from Pinnacle Modelling supplies and there were fantastic. I bought a tub of Desert Sand which is of a darker colour with a brown hue to depict the deeper part of the desert and another tub of Light Sand which is a typical sand colour but not as yellowish as beach sand.
The chipping colour is from AMMO and I actually enjoy that colour rather than the usual Vallejo German Black Brown ( or whatever it is called exactly). The Streakings colour are made from Oil paint and I used Serpia Brown, Burnet Umber and AK Streaking for DAK vehicle.
The stowage comes from the Tamiya US military set along with some pouches I found lying around. The big tarp was made from a big cut out of aluminium foil, folded nicely and pressed along the edge of the stowage basket and then painted.
I'm vary satisfied with what I did, albeit it could look better but still, I'm happy.
It's time for the photos -
(Just click on the smaller ones and they will pop out )


The running gears -(Just click on the smaller ones and they will pop out )
And as usual from me, the Gary Wintin Shot -
Well, that's all I can say about this. As you all know, my patience is my bane so the usual hiccups are met but nothing I can complain. I could have done a better jobs on colouring the periscopes, some of the P.E works and also on some of the over- and under-sprays but at least it is presentable.
Ohhhkay, maybe I have one complain. I have no idea what in heaven happened underneath the exhuast marks. I didn't see it until I took photo of the exhaust. Just what are those squiggly lines underneath the black soot? Grrrrrr, it's pissing me off to see them.
Oh and another thing I have to nit pick is that since I cannot find any information about this gal during the Iraq war except 3 photo of it in action, I had to wing it with the decals and I didn't know if I should put on the CIP panels or anything so that's another thing I didn't put on as I couldn't be bothered. That annoyed me but let's just say I took a artistic license hesitantly on this one.
Apart from that two fact about those squiggly lines, this was a very enjoyable build. I am more than proud to have this on my shelf. Now I can focus on other fleet such as SPAAG or IFV or wheeled vehicle. We will see.
Until next time.


