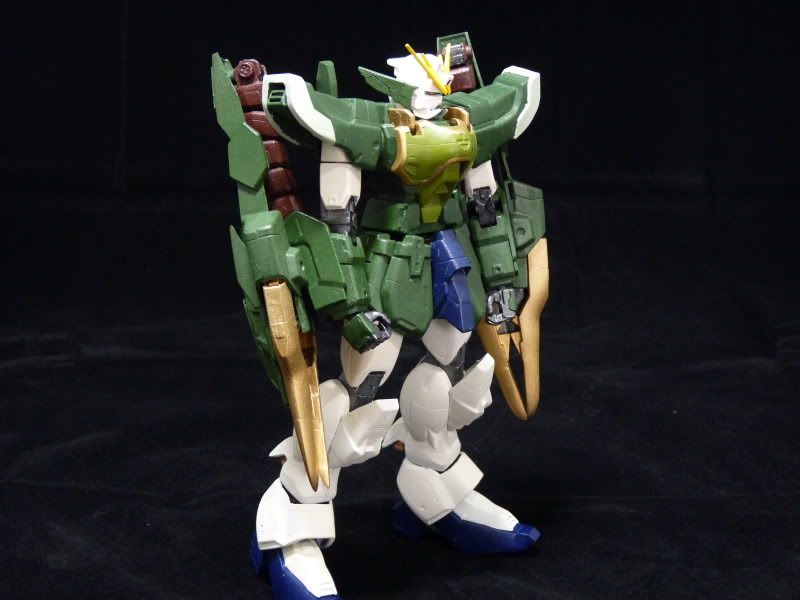
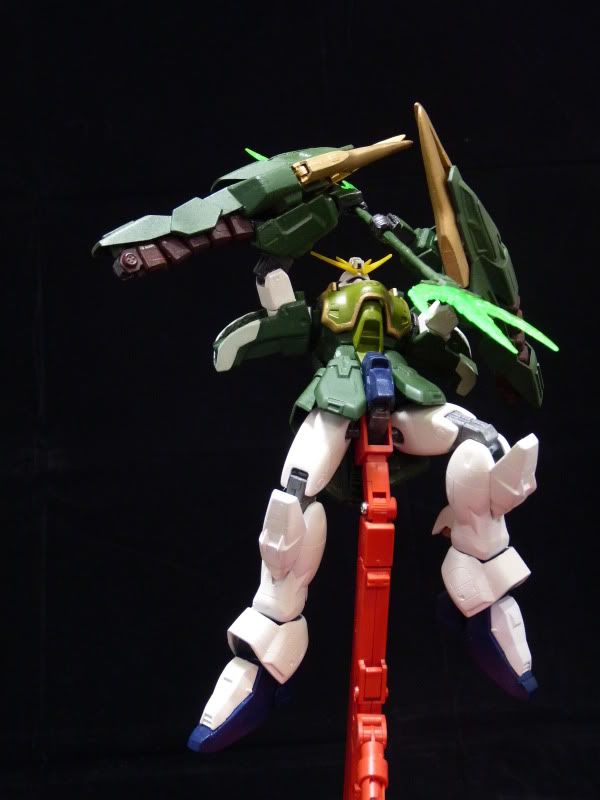
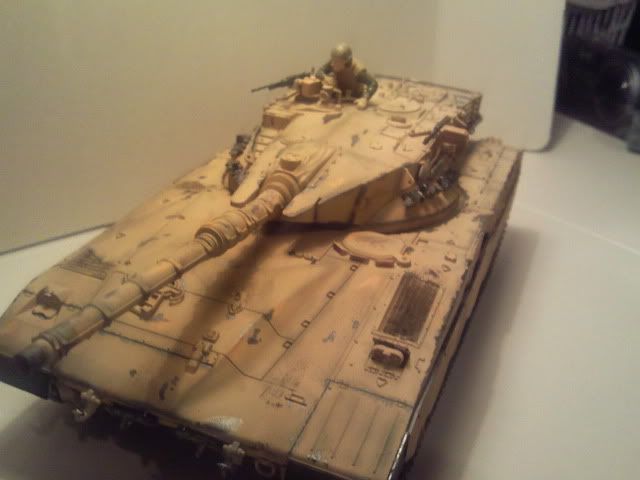
Alright you guys... I did some very very very small works on the Noir.... pls take a look.. thanks.. again, i have to disappoint you guys as no major works are included in this build ..
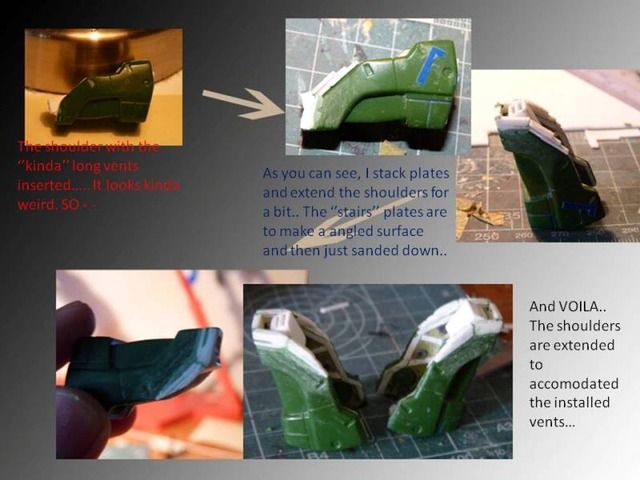
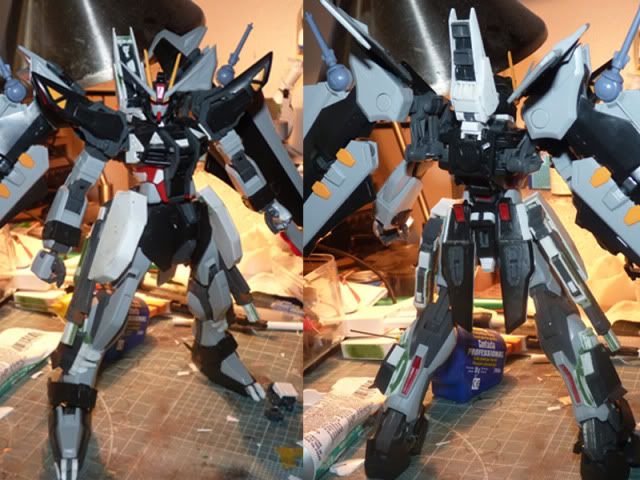
First off, did some detailing on the shoulders.. nothing fancy, the usual plating...
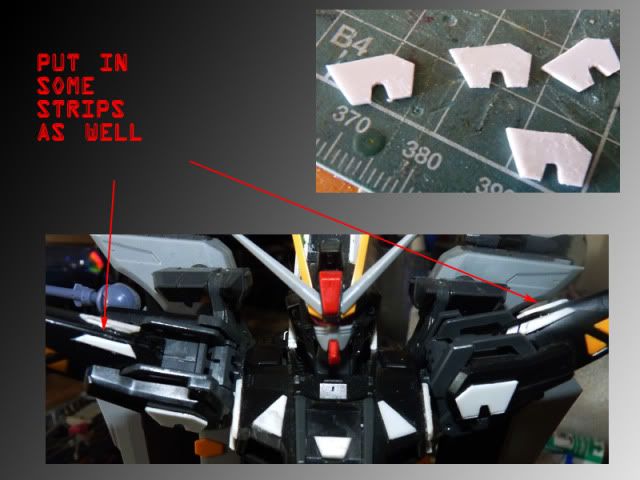
and the arms ...
The forearms plating haven't been beveled yet... but i did beveled the eh... is that triceps ??? 
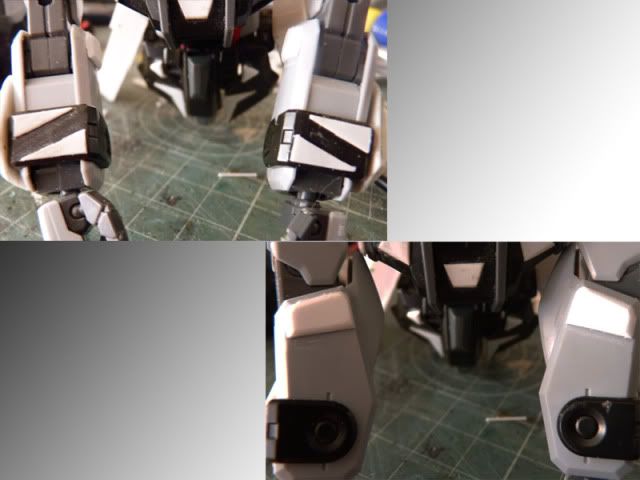
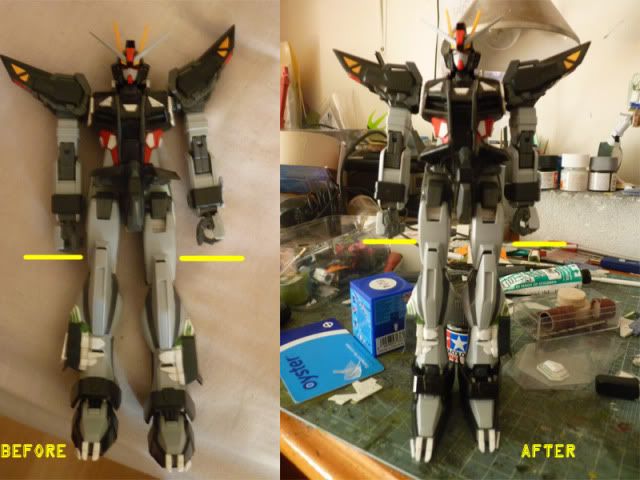
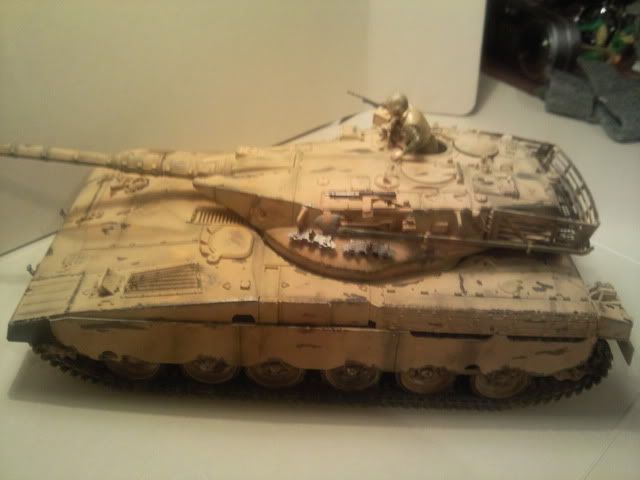
right ..these are the thighs
as you guys can recall, i did the thigh extension and as you guys can see from the photos, that leave a pretty wide gap after extension so I had to cooked up that for appearance sake.. I DO HAVE TO DO SOMETHING ABOUT THAT UNEVEN SLIDES though..
right... here are the skirts
didn't do much... just put on plates .. I am still debating about panel-lining... I'm kinda lazy to do that..Well.. that's all for this first part of the update ... If i disappoint you with this simple update, then i do apologize....
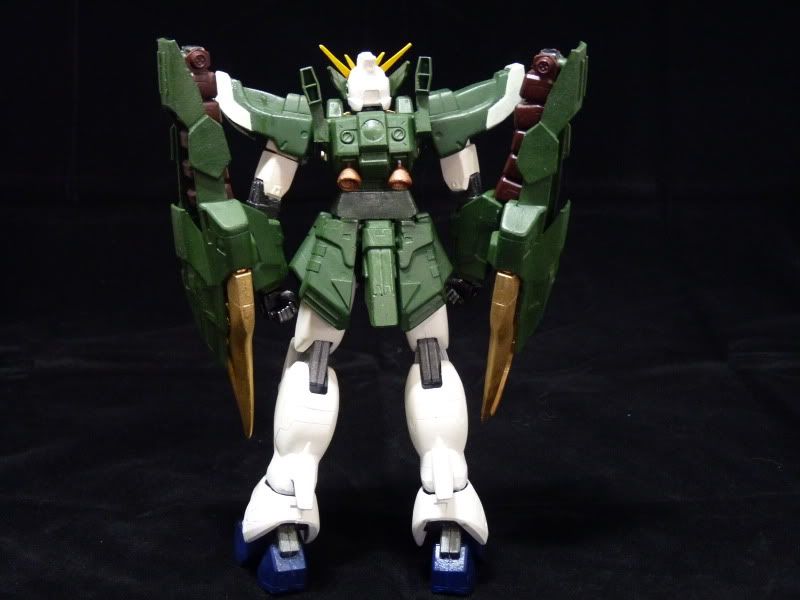
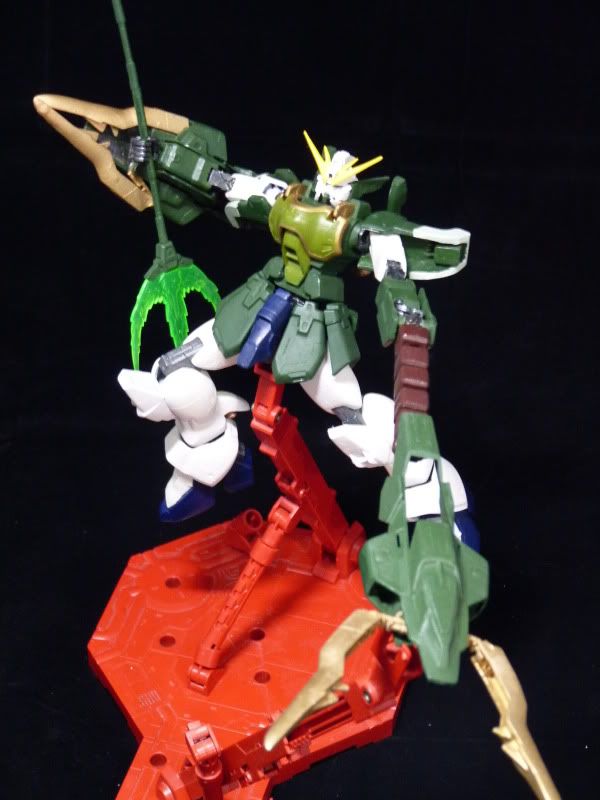
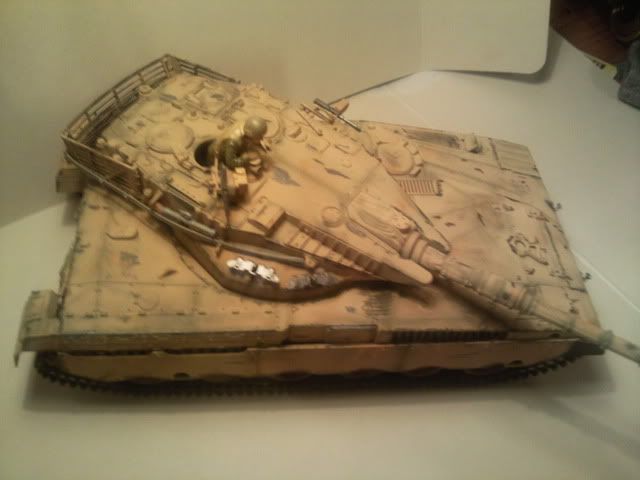
For the 2nd part, the first thing i did is the rear skirts ... put in some internal details ..
Didn't want to put in too much so I just put in only this much
next - I put in a bigger head crest

I was watching Cleopatra and I have always dig those roman/greek helmets with large crests... and as you can see, i just put in one..
thirdly - I put in some plates on the wings ...
It wasn't anything big or serious.. .but for some reason, I love that lower plates with the holes... kinda look like vents to me..
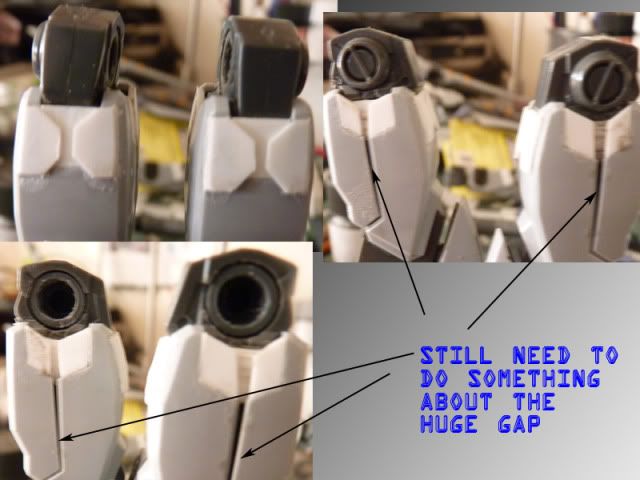
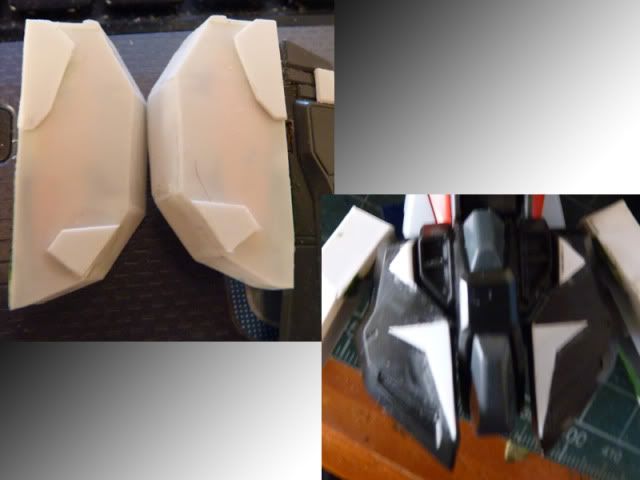
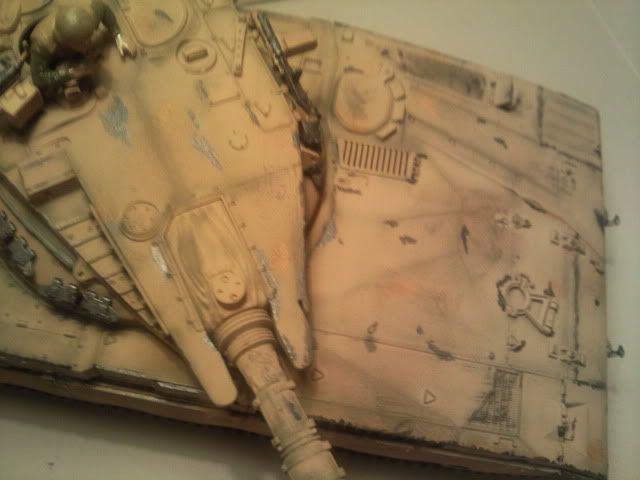
finally - i did soething about the gaps i have on the thighs...
That trick was, I just cut out strips and glued then, beveled them. and try to blend with the kit... It look messy now cos I primed it to see if it needs fixing and clean up... boy, it needed clean up alright... anyway... i'm quite happy with that i get there...
Again.. this is not some major update so I do apologize for those who were expecting heavy works... this is nearing completion and i don't want to stress any more major works...
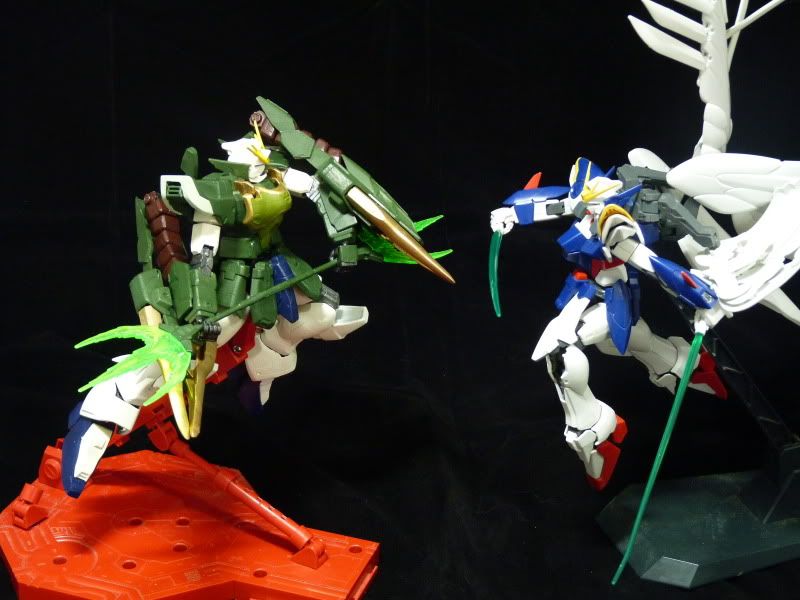
Thank you for reading and stay Tuned...
Read more >>
Hello, guys. This is my very very first tutorial so please bare with me if I made mistake or sounded like a douche :P. Anyway, as you all know, the world of modelling is now filled with great many masters, people who can literally Scratch Build a Mobile Suit out of plywood ( bit exaggerated). The greatest newest innovation to modeling in the Gunpla community was the usage of plexiglass. It was made first and foremost by one of us, which I am so proud to present, a modeler by the name of Gravewolf of MAC. Now, scratch building has taken a tremendous leap, and I know ( as I myself evolved from a lurker in forums and an admirer of the great works of MatX, Juju, Don and etc.) that more and more people are taking up this hobby which we treasure above all other hobby. And those ''juniors'' will be wanting to mod, inspired by those great models out there, but they will be discouraged by the hardness of scratch building. I write this tutorial for their sake, to help the juniors as much as possible and to share my techniques to the world. Alright, that's enough intro.. lets get on it.
I name this ''Stacked Stairs'' method as it involves stacking plate and making a stair with those plates. Imagine a 4 or 3 sided pyramid, and imaging trying to scratch build one. Your option is pretty much using putty cos making such shape with plates is hard, as you need to measure carefully the exact size, the exact angles, and duplicate up to 4,5 plates to achieved a perfect symmetry pyramid. But the problems doesn't stop as when you glue those pieces, the inside will be hollow; I guess this picture should help explain things -
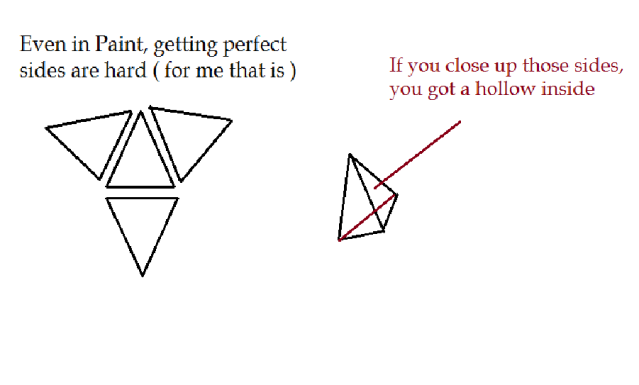
And trust me, you don't want a hollow object with low structural integrity, you literally can't do anything with it as it will keep breaking with force. Now, with stacking plates together, both shape and integrity can be achieved.
I will, firstly, be explaining on a simple 2D slope..
Picture any slope you want to do... simple slope, (inclined surfaces)... if you got it then cut to desire shapes
Me, i will be working with this ..

make sure to cut the pieces progressively smaller.. the actual length on how much to cut is of course, up to you.
And don't forget that depending on the angle you want, you might want to watch out how much you want to make them progressively shorter.
For example, you start with say, 10 mm, then you make the 2nd 9mm, and progressively cutting off 1mm with each plate, you will get a pretty steep slope.
Again, say you start with 10mm, and you take off 2-3 mm with each plates,, you will get a pretty inclined plate.
Precise measurement is preferable but not really crucial.
Ok, once you are happy with the size and length, stack them like so
this is a simple Slope if you can stack with the other side uniforn, you will get a pretty nice slope...
next, sanding...
besure to sand it down according to the angle you stacked...
and sand it .. and you will get something like this
of cos, being humans, we will have errors.
But those can be easily fixed by filling with puttin and sanded down for the putty to blend it should be fine.
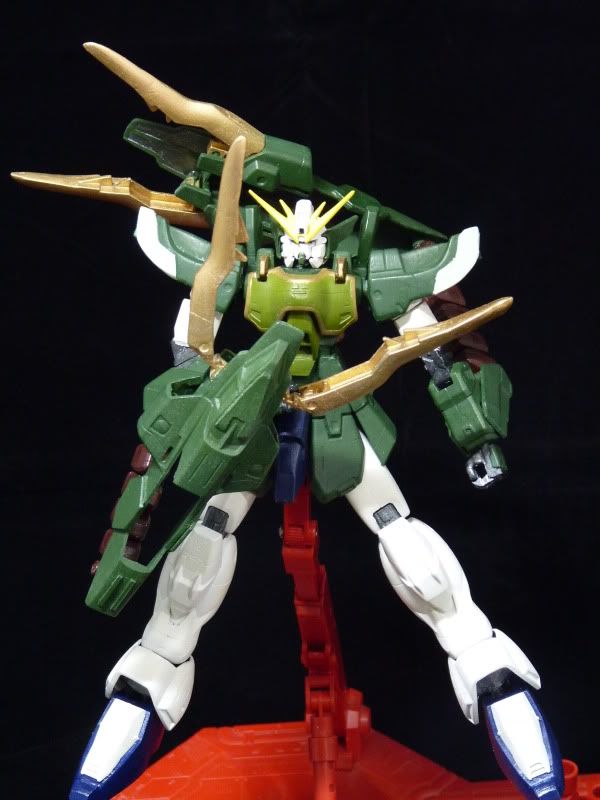
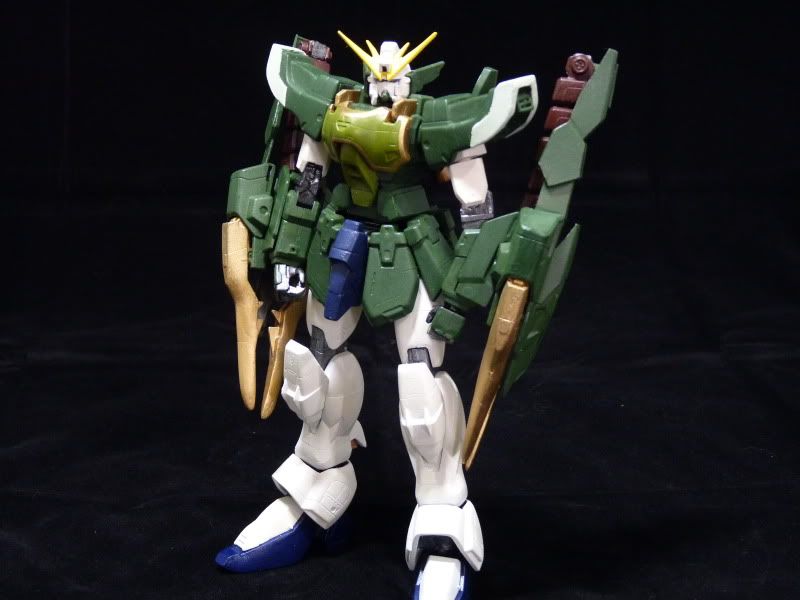
that's how i got the shoulders of my Nataku..
Pictured here
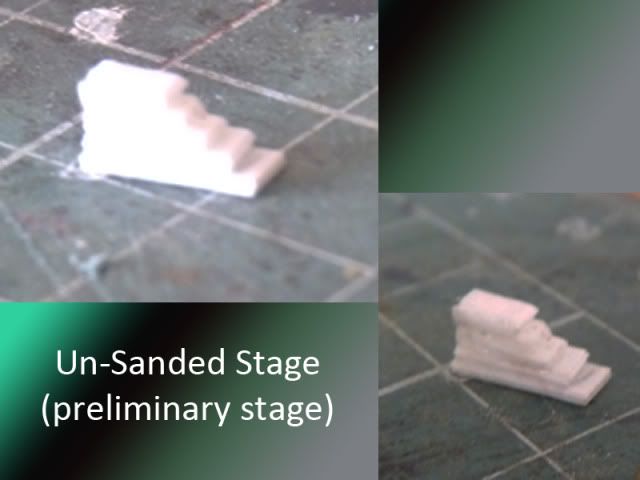
right that's the simple slope covered.. next, i want to talk about a pyramid shape..
same steps... but you might want to be more precise with the measurement..
i started off with 1x1 cm
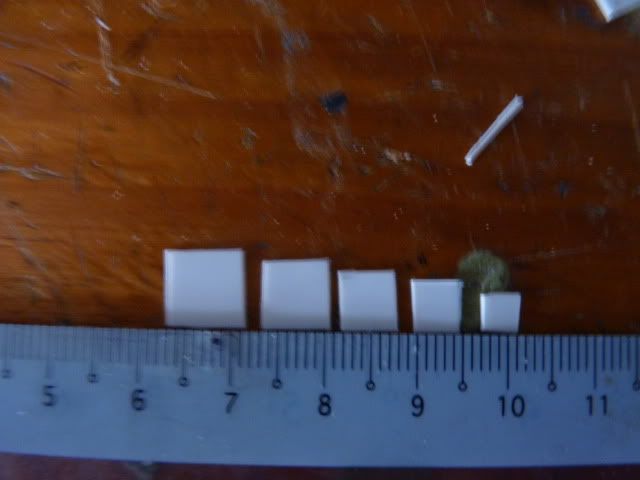
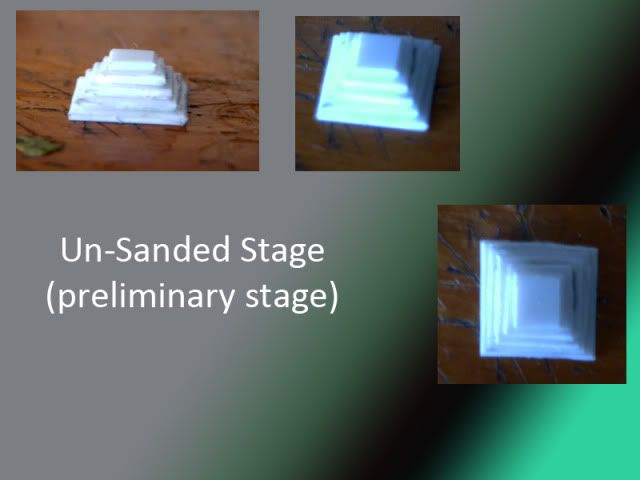
now since this is a pyramid, you would want the smaller pieces to sit directly in the middle of the bigger one
Pictured here like so .
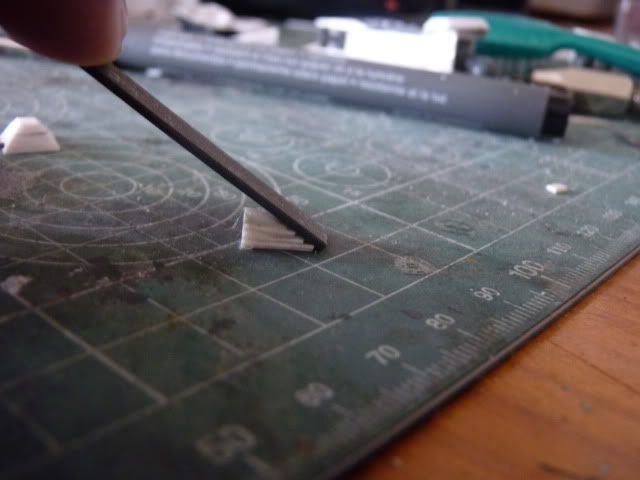
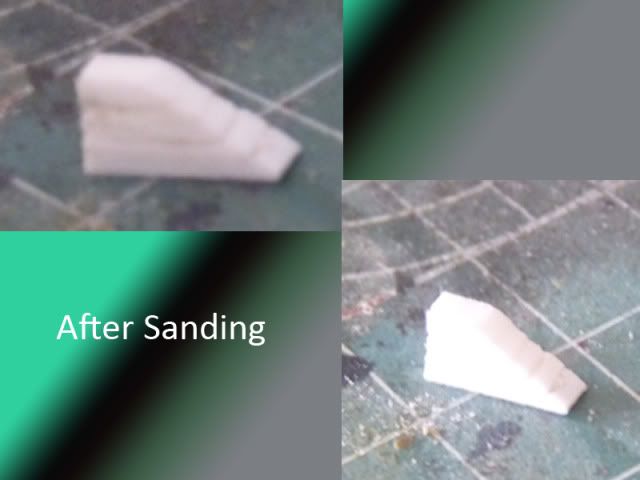
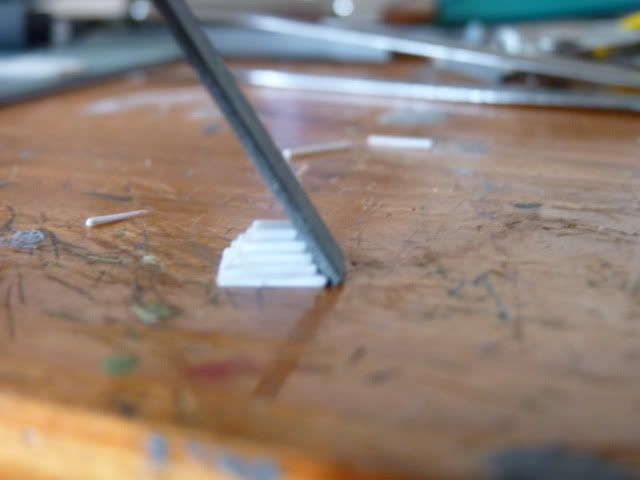
right the usual, sand
and after sanding you will get this ..
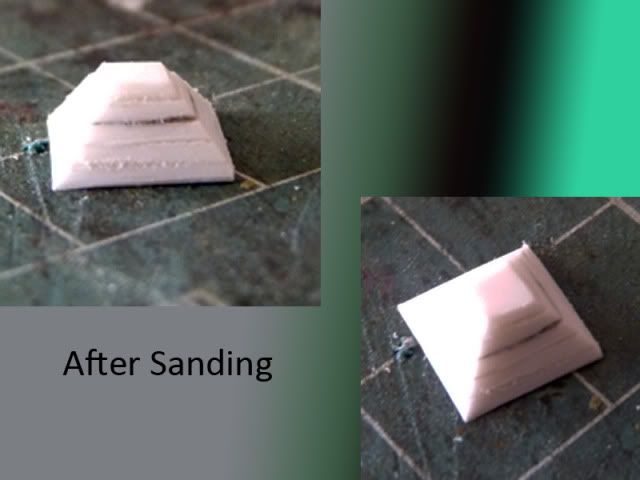
again, check for error and filll with putty if needed....
well, that's that... I don't know how effective this will be with other but this works wonder for me. This is part 1 and I have covered simple slope and a basic 4 sided pyramid and in part 2, I will be covering more faceted shapes. Thanks for reading and Stay Tuned.
Read more >>
Hello dear readers.... .. another very very small update on the Raven,
i guess for the first part of the update... pictures will speak a thousand word, eh??
I had to do what will you see in the following picture as it was too bloody ugly..
The adapter you will see in this photo is make by stackign three plates together ...
this is test fit and showing you what it can do ... it can swivel up and down and left to right.. consider that a multi-directional booster...
and this is a overalll look ( front and back ) that i have acheived now .....
well that's that ...
Right ... the 2nd part of the update I will be making this time is about the Beam Shield Generator ( lets keep it B.S.G for short )
here's the process

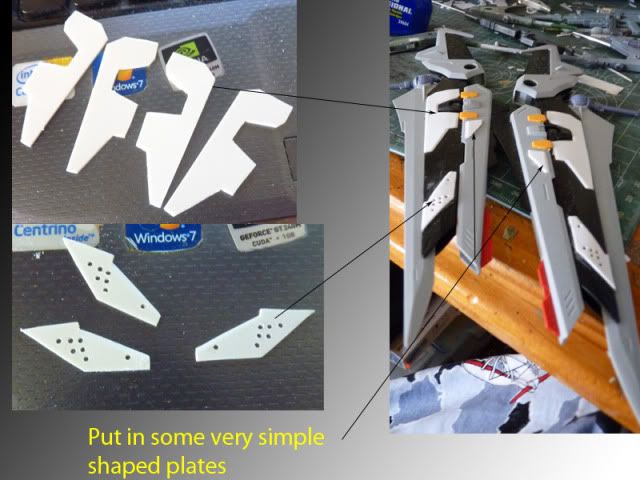
right - Step 1 is where I cut off a shape that i want to the B.S.G to have ... these shapes are clearly and heavily influenced by the B.S.G on the Strike Freedom forearms , the destiny and legend's wrist...
Step 2 is where i cut off two more same shape yet smaller size plates and carefully aligned them to be along a central axis, then the ''pyramid'' was sanded down at an angle and putty filled along that angled and voila..i got that nice little slopes ... ( I am sorry I couldn't show step by step as I simply forgot to take pictures of the step by step)
Step 3 - the things you see on step 2 are basically the lower portion so i had to build an upper portion, same theory, i had to build a pyramid so cut the large ones and then the smaller ones. ( pls refer to the finished product to see how they look like )
Step 4 - as you see from step 3 , i drilled two holes .. so i had to drill holes in the lower portions too ... the reason for it will be explained in step 5
Step 5 - as you can see, i put in pla-rods on the upper portions... that's why i drilled those holes on the upper portion .. they will serve as pegs .. and obviously, the holes on the lower portions of the B.S.G will serve as female part of the pegs ...
and voila.. as you can see from the photo, i have made a NG standard B.S.G.... pretty nifty.. love it ..
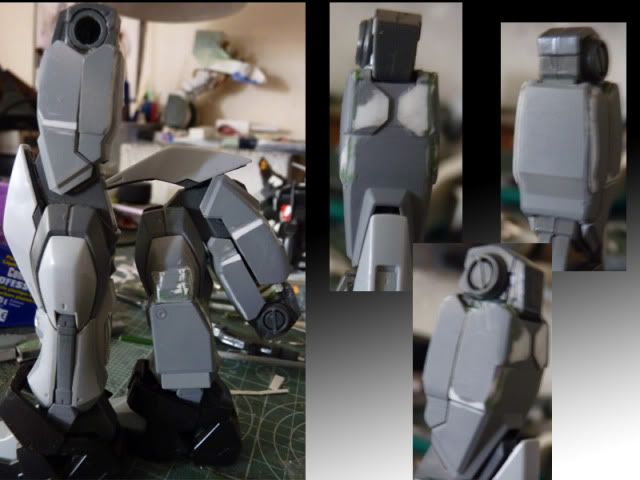
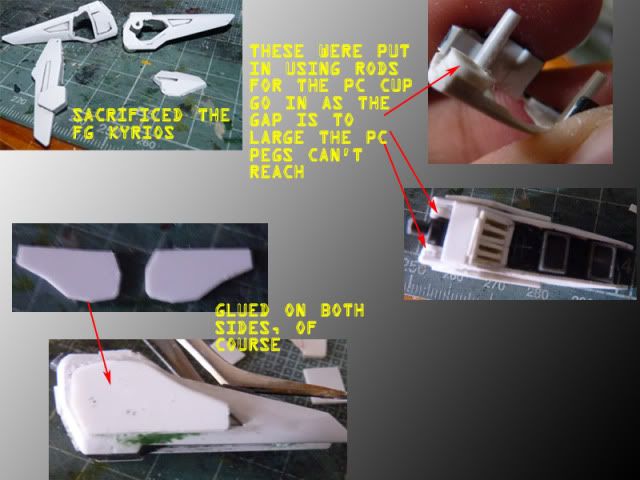
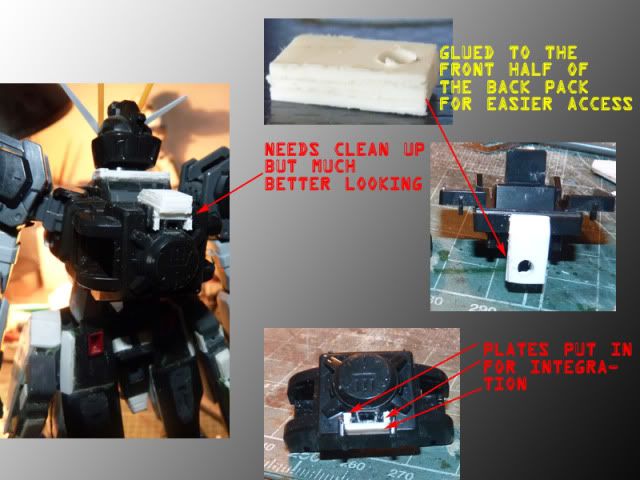
right, moving on... this is a huge update for me ... the first time i have successfullly done a major surgery on a MG

Step 1 - as you can see from the picture, i cut the thigh off. .. drilled a hole and inserted a brass rod
step 2 - i made 9.6 X 9.6 mm square plates from 1mm thick plates and make a 5mm thick block
Step 3 - I drilled a hole straight through the 5mm block ... so that that brass rod can go in ...
Step 4 - I drilled a hole on the top part of the thigh, where the PC cup is ... again.. this is for the brass to go in
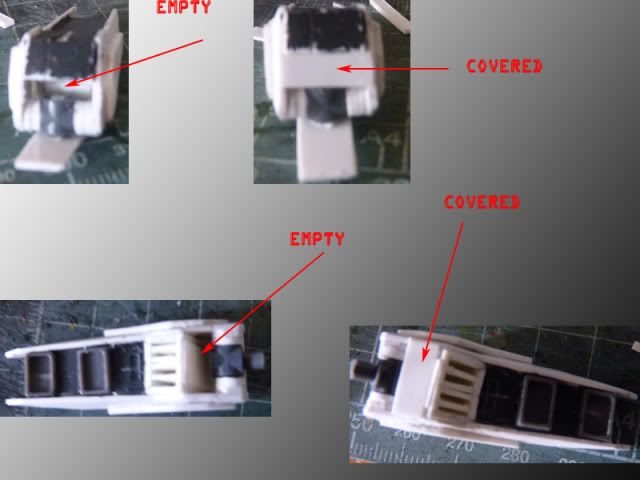
and as you can see from the finished photo, i just push in the block and put the PC cup part on top ... I had to use CA GLUE for the brass,PS, ABS to bond ...
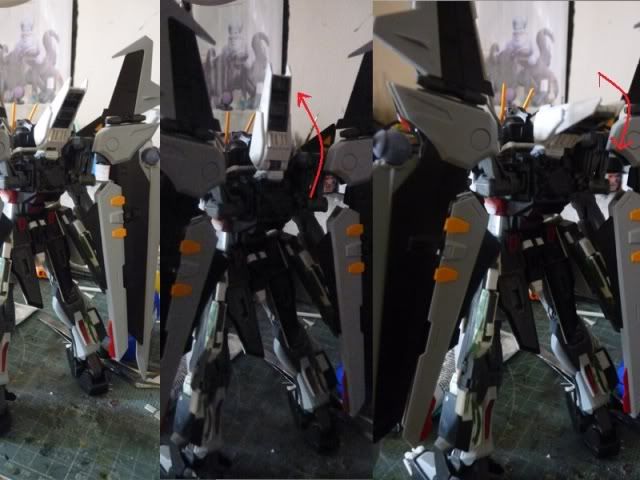
And this is a comparison (sort of ) pic of the thigh extension ...
Hope you guys love this thigh work as much as I do... me i love it.. my first successful cutting of a MG inner-frame ...
Alright, this it for today... thank you all for reading and stay tuned...
Read more >>


 T
T