Hello awesome people.
Right... so I have here another finished kit for you following after the ugly E-100 that I just finished a while ago.
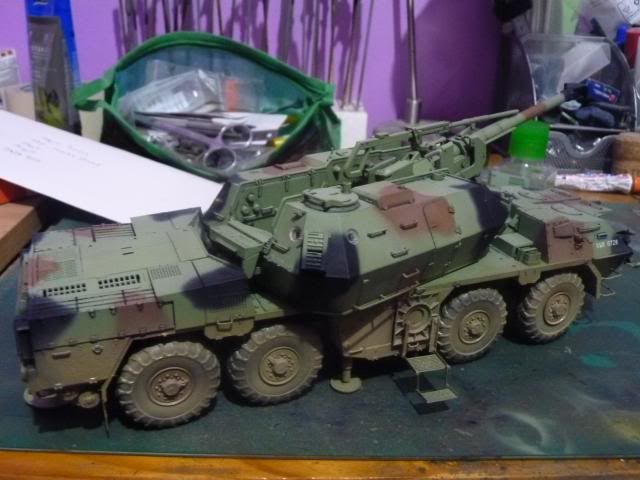
What we have here is a little gem from HobbyBoss. At the price of £44, this kit comes with rubber tires, clear parts, highly detailed suspensions and chassis, an engine, a sufficient amount of interior details fro the front cab and metal cable ( and of course, photo etch; 3 fret of them to be exact ). The only downsides were the two halves barrel, lack of any details at all inside the turret ( I'd have really enjoy if they put something to fill in the gaping hole where the auto-loaders fetch the round and charge.) and a rather wrongly sized P.E part that serve as a protective barrier for the engine and some poor information on the marking schemes. The downsize are really out-weighted by the great details of this kit. If anybody is thinking of getting this kit, I strongly recommend it. You won't regret it.
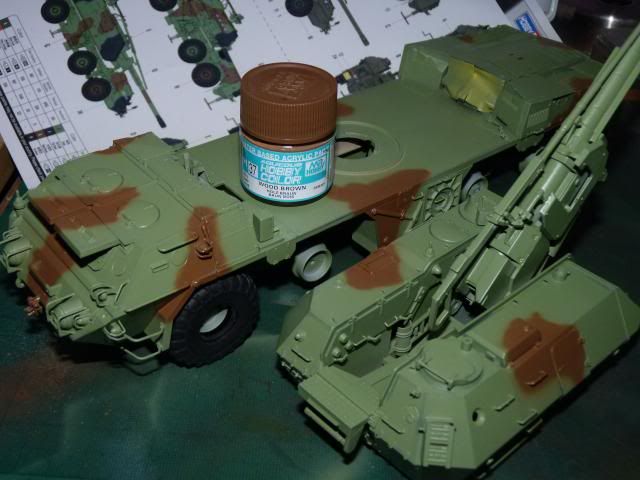
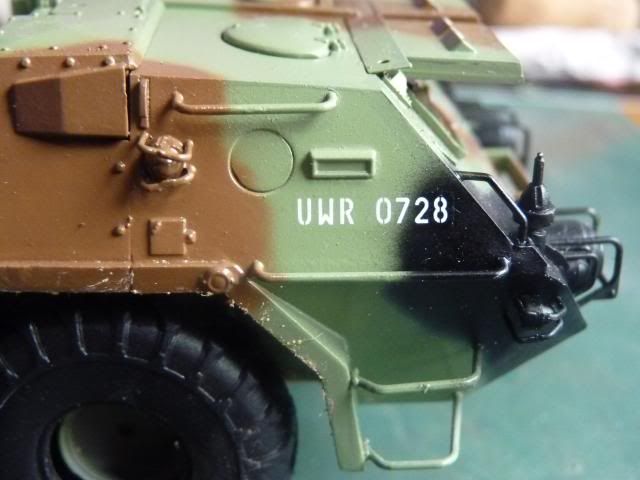
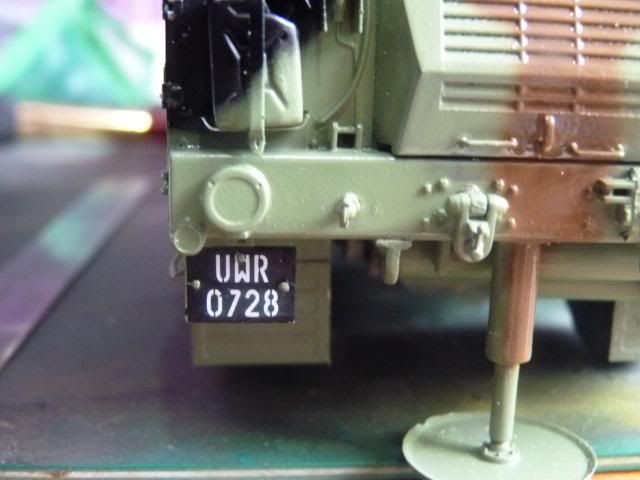
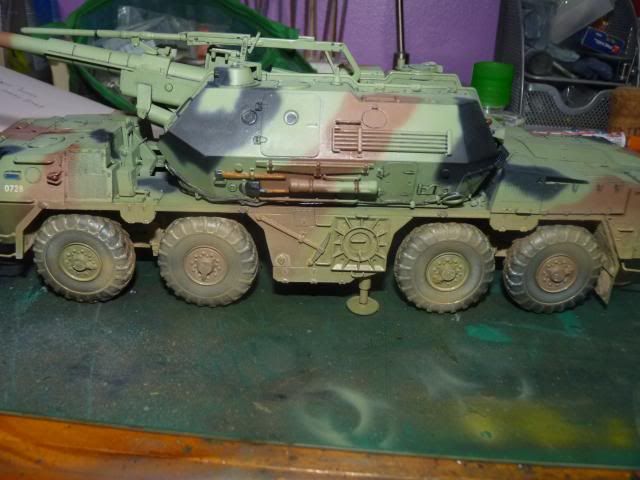
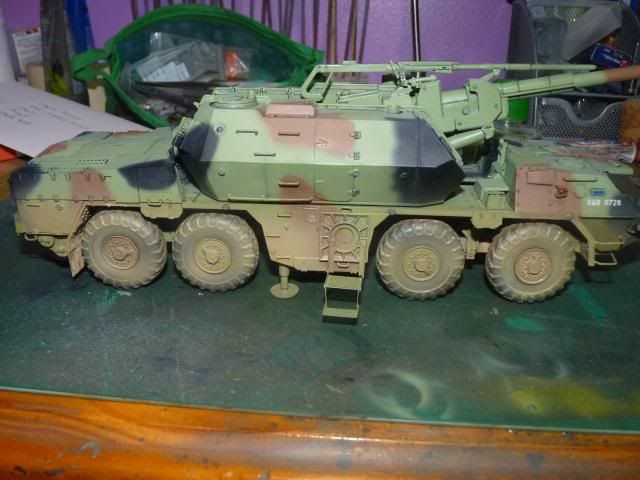
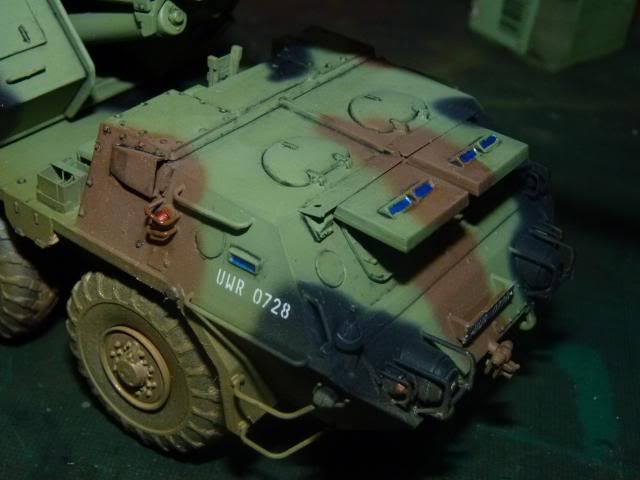
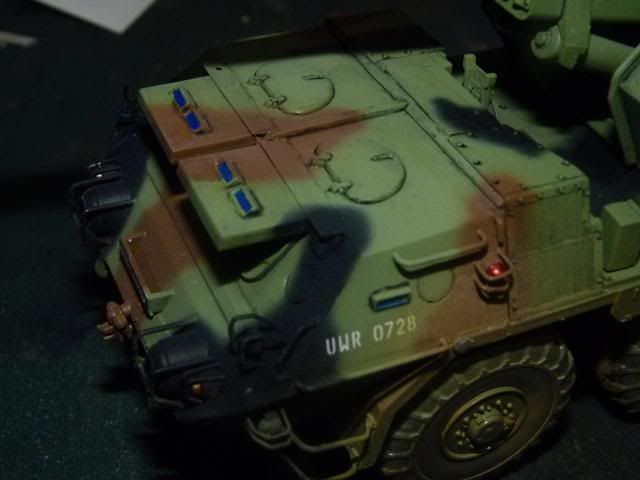
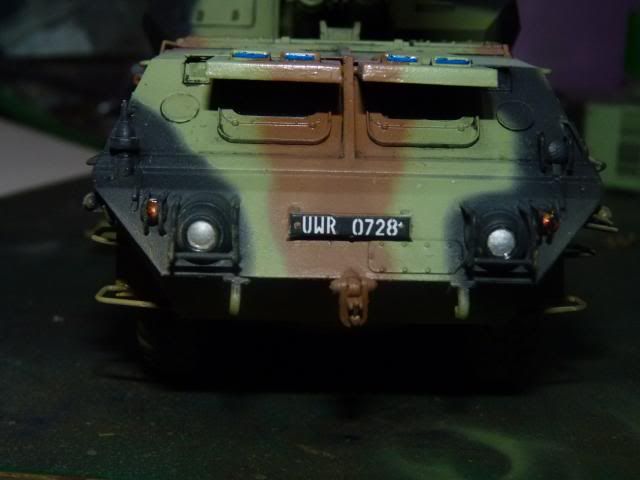
I painted the green and wood brown in Gunze Sanyo, Mr. Hobby Aqueous colours while the black was painted in Tamiya. This was my second time painting Mr. Hobby and boy I really love it. It goes on much better then Tamiya. The scheme is for a vehicle in service with the Polish Army.
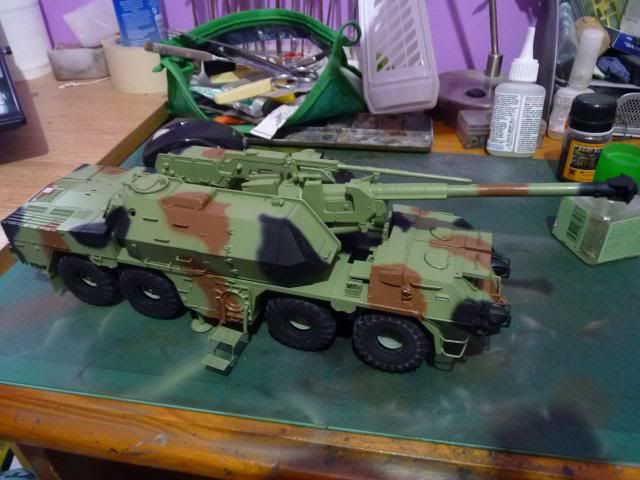
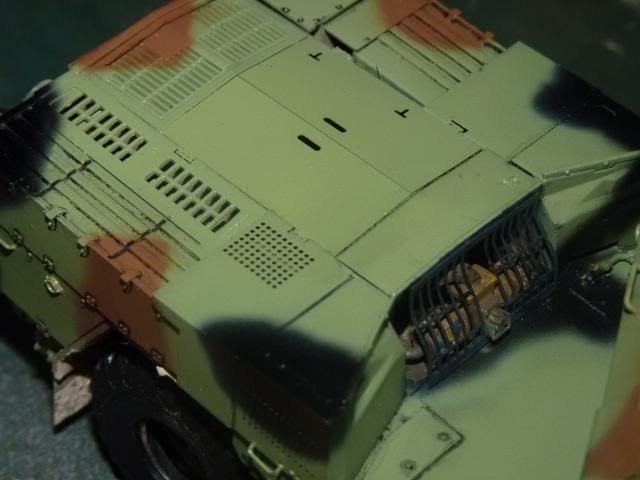
For weathering, I kept it rather clean apart from the various shades of dusts and many streakings. I am very very weak in making streakings and since this baby offer a lot of nicely angled surfaces, I though I'd give streakings another try. I used a grey colour streaking wash which I applied following a friend's suggestion; that is to streak them from bottom to up. I let it dry and apply another gloss and put on streakings that go top to bottom using oil; the colour was naples yellow. I am really happy with how all the streakings came out. I couldn't do that well on my Challey2, much less on my E-100. This is just very satisfactory for me.
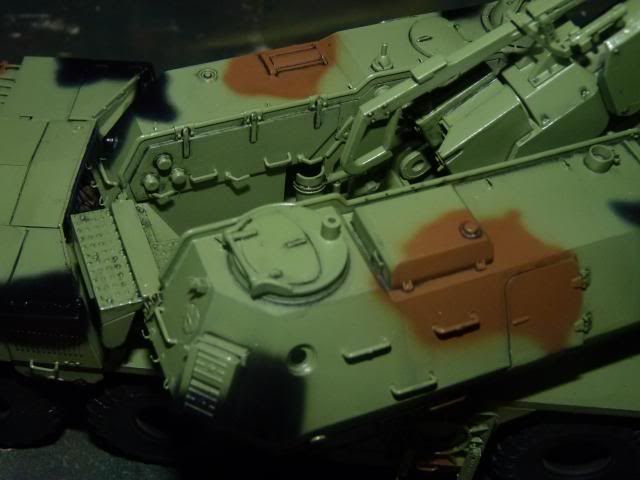
After that, another gloss coat and I bombarded the lower parts of the vehicles with 3 different dust and dirt shade enamels; each layers blended using a brush moisten with white spirit. I followed that up with 3 more different colours of pigments once satisfied. After that, a final matt coat sealed everything.
The build was enjoyable, one of the best builds I have had. I made a full account of the W.I.P in the previous posts and you are welcome to look over at them if you are curious about how well the kit goes together. Actually, let me make a list here for the Work in Progress posts -
Read more >>
Right... so I have here another finished kit for you following after the ugly E-100 that I just finished a while ago.
What we have here is a little gem from HobbyBoss. At the price of £44, this kit comes with rubber tires, clear parts, highly detailed suspensions and chassis, an engine, a sufficient amount of interior details fro the front cab and metal cable ( and of course, photo etch; 3 fret of them to be exact ). The only downsides were the two halves barrel, lack of any details at all inside the turret ( I'd have really enjoy if they put something to fill in the gaping hole where the auto-loaders fetch the round and charge.) and a rather wrongly sized P.E part that serve as a protective barrier for the engine and some poor information on the marking schemes. The downsize are really out-weighted by the great details of this kit. If anybody is thinking of getting this kit, I strongly recommend it. You won't regret it.
I painted the green and wood brown in Gunze Sanyo, Mr. Hobby Aqueous colours while the black was painted in Tamiya. This was my second time painting Mr. Hobby and boy I really love it. It goes on much better then Tamiya. The scheme is for a vehicle in service with the Polish Army.
For weathering, I kept it rather clean apart from the various shades of dusts and many streakings. I am very very weak in making streakings and since this baby offer a lot of nicely angled surfaces, I though I'd give streakings another try. I used a grey colour streaking wash which I applied following a friend's suggestion; that is to streak them from bottom to up. I let it dry and apply another gloss and put on streakings that go top to bottom using oil; the colour was naples yellow. I am really happy with how all the streakings came out. I couldn't do that well on my Challey2, much less on my E-100. This is just very satisfactory for me.
After that, another gloss coat and I bombarded the lower parts of the vehicles with 3 different dust and dirt shade enamels; each layers blended using a brush moisten with white spirit. I followed that up with 3 more different colours of pigments once satisfied. After that, a final matt coat sealed everything.
The build was enjoyable, one of the best builds I have had. I made a full account of the W.I.P in the previous posts and you are welcome to look over at them if you are curious about how well the kit goes together. Actually, let me make a list here for the Work in Progress posts -
Part 5


The Wheels -


Some close ups on the streakings -


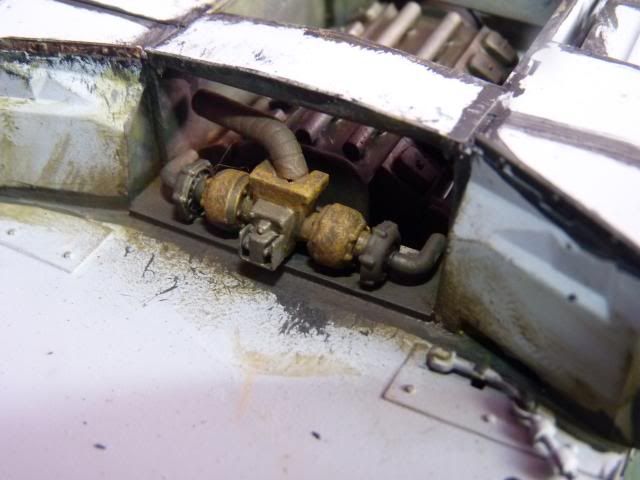
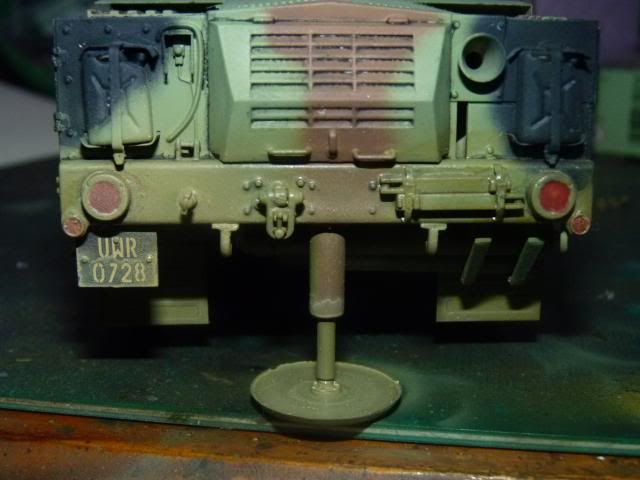
The opening to the engine -

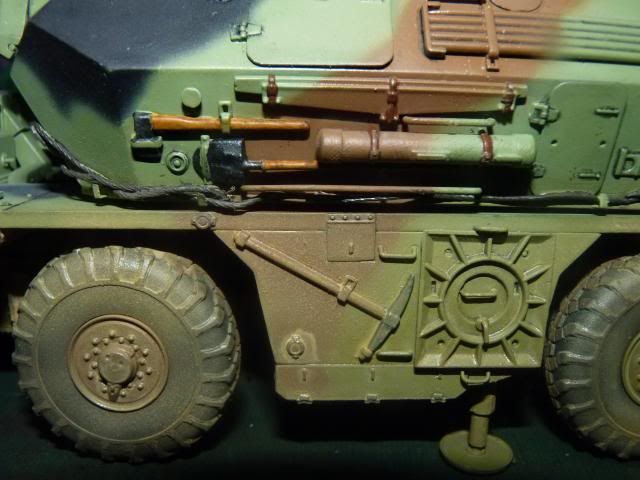
The Tools -

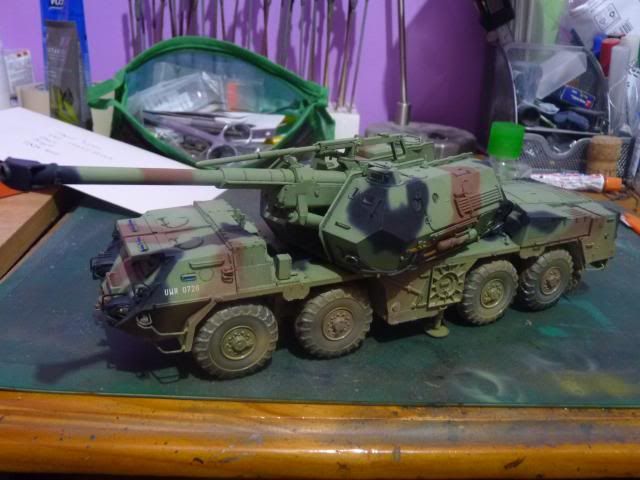
And as usual, my show case photos from various angles -


And as usual from me, the Gary Wintin Shot as coined by a friend -

Well, that's about as much I can sum up about the build. The exact steps can be found in the 5-part W.I.P.
I'm vary satisfied with what I did, albeit it could look better but still, I'm happy.
It's time for the photos -
(If you think some are small, just click on them ) The Wheels -
The opening to the engine -
The Tools -
And as usual, my show case photos from various angles -
And as usual from me, the Gary Wintin Shot as coined by a friend -
Well, that's all I can say about this. As you all know, my patience is my bane so the usual hiccups are met but nothing I can complain. All in all, this was a GREAT and very enjoyable build and I am more than proud to have this on my shelf.
I couldn't keep building if not for my supporting friends and comrades. Thank you guys for always supporting me. Thank you dear readers for your patronage as well.
I couldn't keep building if not for my supporting friends and comrades. Thank you guys for always supporting me. Thank you dear readers for your patronage as well.
Until Next time.