Wednesday 29 February 2012

Trumpeter 1/35 C1 Ariete MBT

Hello All and All hello. Welcome to another finished kit of the bird, although I might have to disappoint you guys as this finished piece is not a gundam but rather another of my favourite AFVs - a tank.

I was a little bit bummed out with working on gundams and most importantly, I was sick and tired of people letting their skills in modding their gundams get into their heads ( elitism and so no so forth) that I decided to get away from all those negativity and w
orked on this.

Well, more like re-worked on it cos I did this way back in my noobish days with pieces just slapped on and with some silly-full-of-brush-strokes-hand-painted camos and I have been dying to rework on it and now's the best time to do so.

Also, not to nit pick on my own kit, but I bloody well forgot to close the seams along the entire length of the bloody barrel ... darn it.. oh well....

This is a  MBT (main battle tank) from the Italian army and the brand is Trumpeter and the scale is 1/35.

I used Tamiya paint for painting and shadings and MIG pigments and some artist pastels (chalk) to simulate the mud effect.

I have to say, for my first time every using pigments and putting in such weathering effects on AFV model, I did really good.

I would like to thank my two teachers whom I met on FB, Mr. Glenn Burford and Mr. Chris Bryan ( owner of http://www.modelmakerz.net/ ) for always answering my question regarding scale models and my good friend Miguel Escobar, who helped me with the feed back and Steve Woods ( again, a modeler I met on FB ) whose T-72 dio has helped me alot with this one.

So without further ado, I present to you , my master piece in scale modeling - Trumpeter 1/35 C1 Ariete MBT


I took quite a bit of photos showings exactly what I have done and how they look like -
Here is the link to the Muds and weathering I put on the wheels -

LINK - HERE

And Here is the Link to the TOP views - to see the dust and shadings from top -

LINK -  HERE

And here is the Link to the Close up views of the accessories of the tank -
LINK - HERE

I hope this beauty is to your liking. I haven't touched scale models for quite some times, it feels so thrilling to work on this and finish this with improved standards from 2 years ago..

Thank you all for reading. Stay Tuned for more.
Read more >>

Friday 24 February 2012

Build Off With a great Sculpting Engine

Hello Dear readers ...... Welcome to another Blog post from the hummingbird. I am terribly sorry (again) for my delays in updating my WIPS and few posts on my blog. Life is hitting me hard and having some family issues that drained my metal energy which also sap my mojo and  physical energy.

Anyway, today I would like to blog about what I have been doing, Gunpla-wise. As you can see from my title, I am having a build off with a great,great, great sculpting and SBing modeler.


That such modeler goes by the name of TheHelmosEngine. His works can be seen on this blog, which he named Hanger03 . Here are some example of this finished work  (LINKS ARE IN THE PICTURES PLS CLICKED ON THEM ) -


He is the modeler that sculpted the entirely new kit using the MG Zeta, which is the very same kit that Kamm is working on. Don't worry, I will link you guys to Kamm's videos -

Part 1 of the Drehksturm - LINK
Part 2 of the Drehksturm - LINK
Part 3 of the Drehksturm - LINK

From Kamm's videos, you can see how Amazing this guys .... he is just awesome. Going against this guy won't be an easy task. The funny thing is, while I am admiring his sculpting skills, he finds my mechanisms and gimmick mods inspiring, so we both can benefit each other from this.

You might be wondering how the hell we decided to have a build off, well, it wasn't anything special as I was building a Legend and he is working on a Providence so we thought it would be cool and a very nice addition to the MAC forum to have our Build-Off in the Workshop and then Boom, we are having a build off.

Here is the link to our Build-off Thread on the MAC form - ''Official Build-Off Thread''  be sure to check in there as TheHelmosEngine builds at a very very fast speed. you can always check the works he does on his blog - Hanger03.

This is really exciting for me and I am up against one of the great modeler of MAC, a great sculptor and I am kinda worried he will beat me (hands down) in details and shapes and sculpting but rest assured, I am countering his every move with mechanism mods :P.

Wish me luck....

OH by the way, I am also having a Build-Off with a certain Monkey of Gunpla ... the reason he is called Monkey is that HE can copied up to 90% of the original work, you know, monkey see monkey do ?? hehehe.... but that's a story for another day.

I will be updating my Legend here on the blog as usual so don't forgot to tune in.
Thank you All for reading and really appreciate the support. You guys are the best.
Till next update, be sure to Stay Tuned.
Read more >>

Thursday 16 February 2012

2012 Mecha Contest Entry: Legend Gundam Part 6

Hello peeps .... Its about time I update this ... as I have been pretty low on Mojo these days... but here I am ... with another update ... and I hope I don't disappoint you guys ...

On with the update -
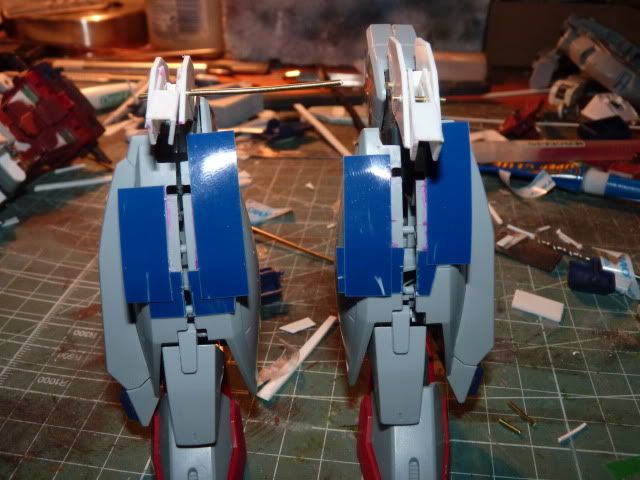
I extend the middle piece of the upper torso to cover the ugly front of the lower piece ...


the lower torso is, sadly, haven't been touched yet ...

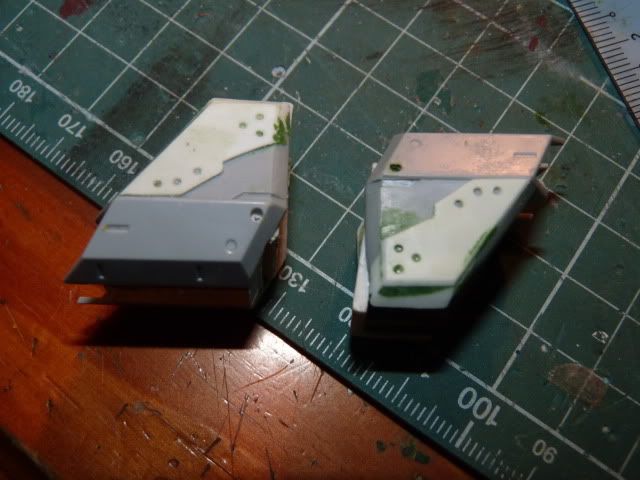
Next thing I do was put on some detail platings on the shoulder ... BOTH FRONT AND BACK ... same shape on all four sides

I haven't actually cleaned the shoulders cos I am planning to do more ...

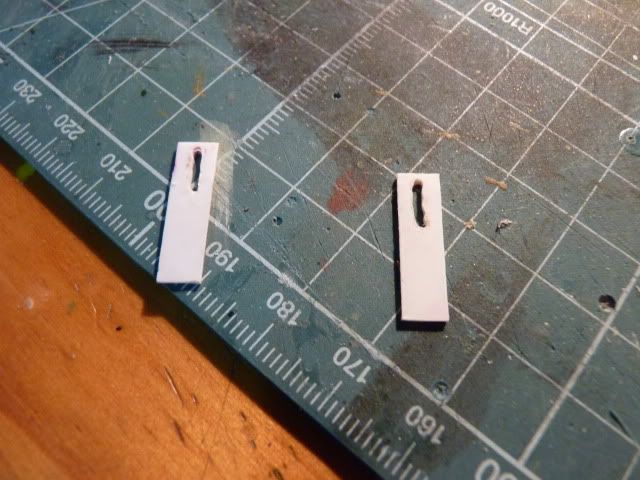
after that , I cut those those little things


And then these two slots


Combine them both and with a little bit more plate all around, I got these
You might be wondering why I did that and What they are ....
I will tell you why I made them later on in this post .. what they are ... well, they are part of the knee armour

Now that I got it, I have to now figure out how exactly should I place them ... after spending , I think 2 weeks, I got a idea and started cutting away immediately

By the power of Dymo tape ( labelling tape) let there be a accurate guide line on where to cut ..


A few more pain staking hours and got this ..
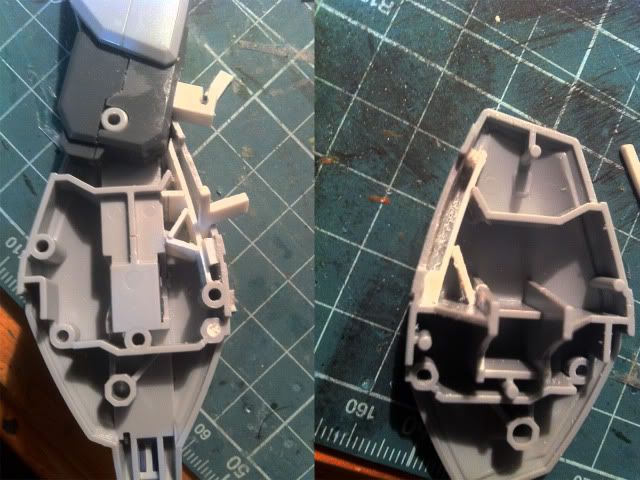
I drilled it out cos I need to install the MG knee armour mechanism

After that, I cut those two little strips


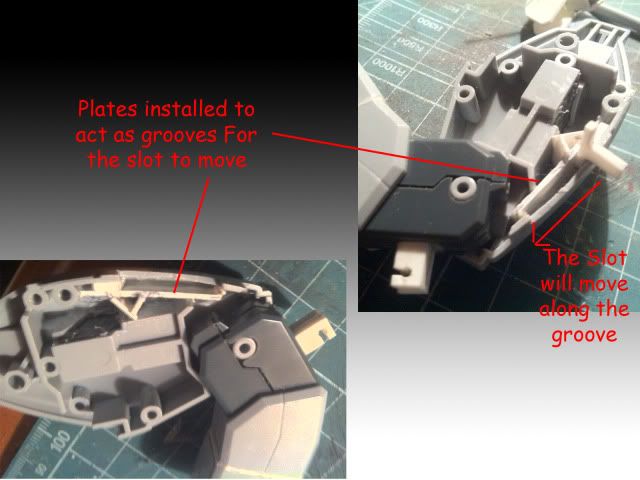
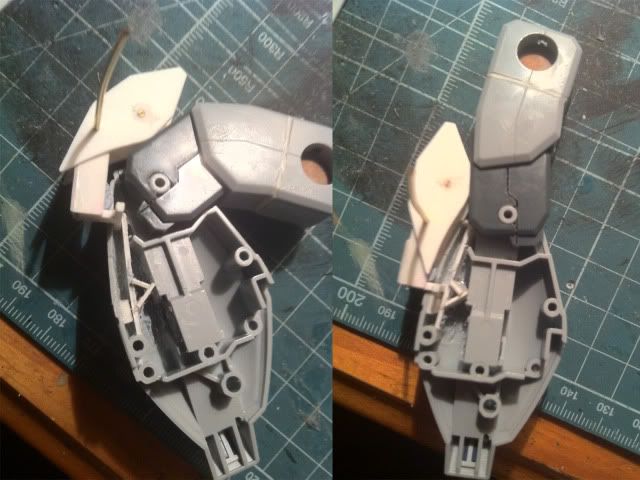
 and now, after spending quite some time, I figured out what I have to do ... so I started the inner of the legs for the mechanism to work

You will see the red circles.. I cut away some portions of plastics
Why I cut it away ...?? Because I need to do this -


Same things on the other leg as well -


The breakdown of the mechanism is as fellow

When knee joint is bent, the curvy knee armour attached to the knee joint will bent along... and by doing so, the lower part of the knee armour will move up along the slot I drilled on it ... thus, achieving this mechanism.

Doing these mods, allow the knee to acheive this


It was a pretty stressful 2 weeks trying to think how to make it work, but Im gland I thought of this ... I know this is not perfect But i really love it ...

Hope you guys will love it too ...

Until next update

Read more >>

Sunday 12 February 2012

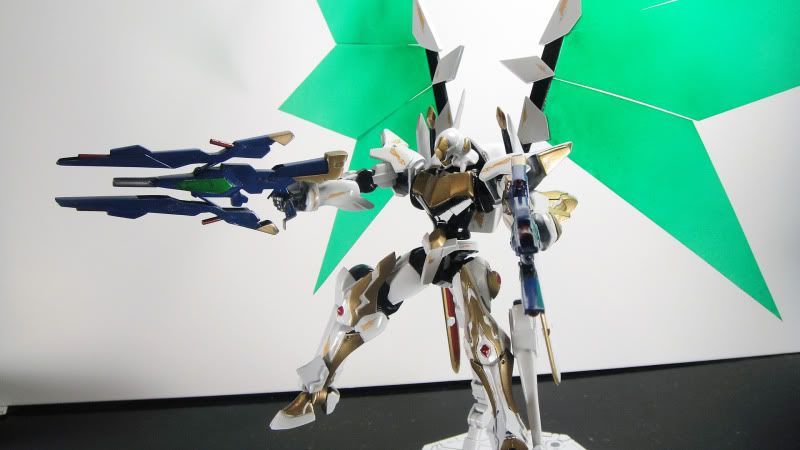
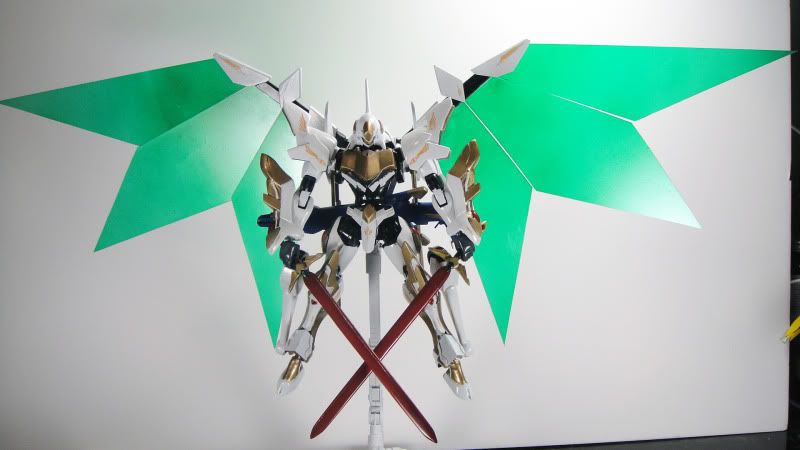
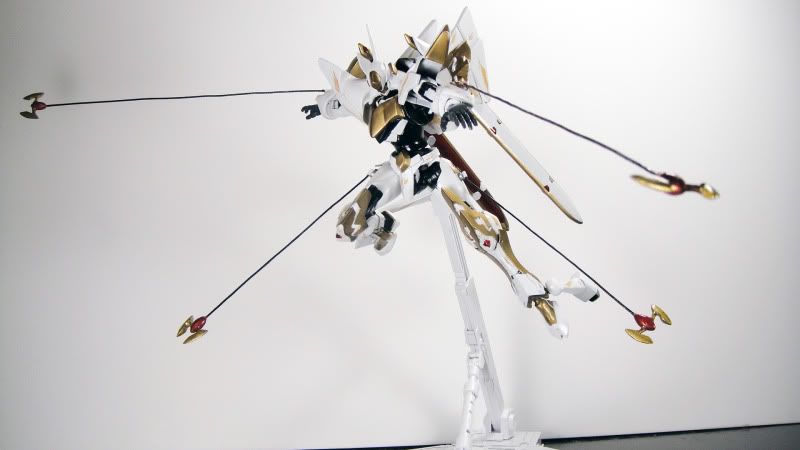
Featured Modellers Chapter 4.3: Winndom's Knightmare Frame Lancelot Albion

Greetings my fellow gunpla enthusiasts. It has been a while since I have featured some one. Well, today, I'm featuring a great piece of work from within MAC.

Again, just like his first two work, Winndom has done yet another ingenious work, converting a gundam kit into a completely different mecha from a different anime.

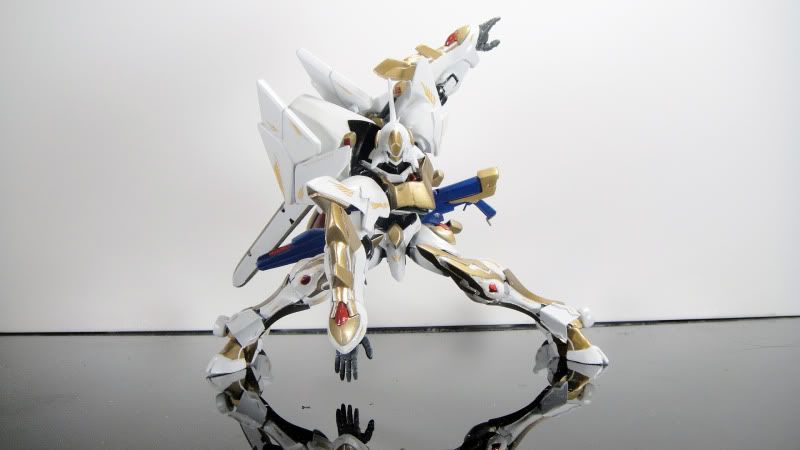
That's right folks, just as the title, he SB and sculpted the knighmare frame, Lancelot Albion, from the much acclaimed Code Geass series.

There's nothing to say about how this kit actually started but it was just out of the woodwork, Winndom suddenly made a thread on the forum with some insane putty sculpting and boom, a nice piece of work is born.

He did have some difficulties however, as he started to paint this kit, his airbrush crapped out and he thought this kit will never be finished. He also stated he was so incredibly desperate to finish this kit that heresorted to spray cans to finish the job.

He did admit the build wasn't as clean as he would like because of his AB messing up but in the end, he was really pleased with the work.

He stated about 75%-85% of this kit was SB with putty and he was also bragging about how it show off his sculpting skills... yeah yeah .. we know, Winndom.. we know.. LOOL

The decals he used was printed onto waterslide paper from his laserjet printer, would you look at that .. DIY decals... that's nice.

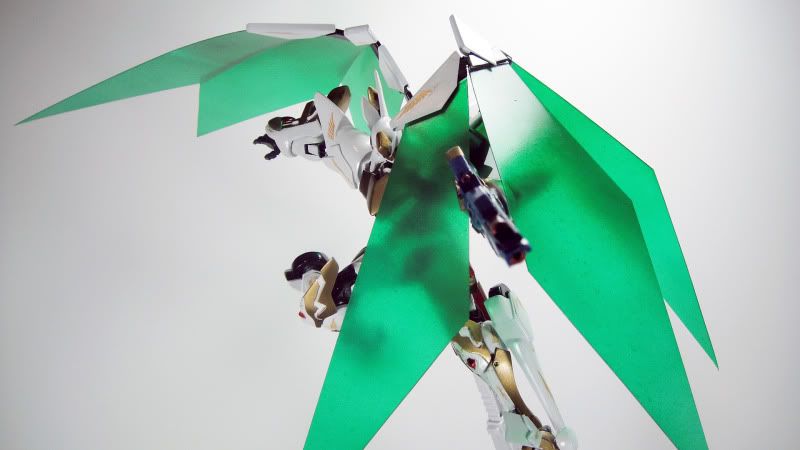
Well that's about what he did on this one. My personal comment - its sculpted beautifully, its looks beautiful, it was made by many innovative ways of SBing, I find the use of copper wire to mimics joints very ingenious and the wings are just beautifully made.

The draw backs is that , like Winndom's had admitted himself, not perfectly clean and the paint , as some of the members have pointed out and which I agree on, the gold needs to be reworked on. He himself knows and he also stated that he will be working on his painting skills. Come to think of it, I need to too.

Well, that's that. Without further Ado, I present to you, Winndom's masterpiece -


Well, Winndom have taken many photos and these are just some of them. If you want to see more , please kindly click on the LINK to the official thread on the MAC forum. 

A beautiful kit regardless of the little Boo-boos Winndom made. A great piece of work and I really love it and I hope you dear readers love this too. 

This is for now ... Please look forward for more... Stay Tuned until the next update.


Read more >>

Friday 10 February 2012

The start of a legendary tutorial


Hello and welcome to another blog post from the hummingbird.

First of all, I would like to say sorry for my lack of update on the blog, I have hit a wall and my mojo was just dropping, all time low.

Now, is a prime time to blog about a up and coming series of tutorials from one of he Legend of Decay ( you can argue about Decay's being the Legend of MAC as much as you like, but seriously, he is one ).

As you all know, Decay has decided to make an 3 hour long, fully detailed and fully explained tutorial on painting mini figures, such as those of the Warhammer series.

Here is the very first video that I speak of -

Now, you might argue why his tutorial should be featured like this and blah blah blah. Right, I have everything I need to counter that.

First of all, this - (the Link to this is HERE)
is hand painted entirely..... and not to mention Decay has been modelling for a total of 20 years and he has been painting Warhammer figures back in the days so nuff'said, I guess.

Just in case, there are some people who don't know about this Awesome modeler,
here is the link to his blog - LINK

and here is some facts about him -

  • Decay has been modelling for over 20 years
  • He only started working on Gunpla for a mere two year
  • Decay was only scarcely active at figure FM once
  • He became an active member of MAC as soon as he register
  • He now hold the Meister status in MAC, which is a moderator level
  • He hails from Germany
  • And best of all, A very very very good friend of mine.
Decay is a very skilled modeler, doing a range of modeling including painting figures, clean works, diorama, weathered and the ever impressive modifying works.

And here is a re-cap of some of his works I have featured -

For the mini figures he painted, you can check out his works in his blog.

Well, that's that for this post. Be sure to subscribe to his channel, like his video, u know, do your stuffs what you normally do on Youtube. 

Till next update, Stay Tuned for more.
Read more >>

Thursday 2 February 2012

2012 Mecha Contest Entry: Legend Gundam Part 5

Hello Ladies and Gents .... Welcome to another modeling blog post ( you know whose voice I'm trying to talk in.. LOOOL )

Right, time for another update ....

if you guys can remember, I was working on a MG shoulder yes?? After 1 and a half year of trying and failing, I finally achieved the desire result. Don't worry, I will give a full walk through of what I did ( As I always do ) ....

Okay, picking up from I left off, I made the two slabs like so -


Those two slabs are both 1.5mm think, if you are curious ....
And this is the layout of it.....


which, assembled, gives me something like this -


And after assembled with the body, the shoulders look like this -


Which allow the shoulder to move freely just like a MG ....


Again, I have to give credit to and say thank you to Gondordestiny that it was because of him I was aware of such ''glitch'' .. and the glitch is the shoulder it self.. it was long and wide that it was hindering the movement of the arm and the arm can't swing out as much as I wanted to ... and referencing Gondordestiny's Legend, I knew how to counter that .. so Thank you again GondorDestiny of Plamo.

Right, moving on , I cut the shoulder itself like so -

Its not entirely finished yet, FYI

so that, when I put it on the body, the height is reduced that it does not hinder with the arm swinging movement anymore. ( as you can from the photo, the rod of the flap can be seen above the shoulder)


After cutting that shoulder like so, with no more hindering, it becomes like this


And I am grealy satisfied how it comes out ....

After that, I'm moving on to the knew. I want to make a MG knee and I have no idea how to do it so I ''copied'' MG WZC's knee movenment and I based my mods on dydee's 1/144 wing zero mod... so Thank you so much dydee....

So i made this -


and following this templete-


I cut 4 identical pieces of them, all 1 mm thick.

As you can see, I have two pieces of brass rods on the top... and this is so that I can form the knee like so -


and the little pieces I showed earlier is glued on like so -


and when the knee armour is attached, it can bend like this -


I know, I know,, this is kid stuffs but its the best I can do ....'''yet ''' ...  but at least, I'm happy with what I got ... I will see what more I can do ...

and I also extended the toe -


I was going to sand the steps down but I kinda like it ..... i might keep it.. but I'm not too sure.....

Right, this is it for this update .....and again I stress, my works are rough as I take photos as I build along...

Thank you all for looking and stay tuned for more ....
Read more >>