

Good day people. It's almost Christmas. Hope you guys are done with xmas shopping and ready to exchange gifts.
I'm sure you all are aware that I am building a quick dual build of the JS-4 and the KV-5. Well, I have finished both of them. I planned to do a finished post for each separately and since I have already posted about the KV-5, here's the JS-4.
For a detail review of the kit, please refer to my review post I made for this - LINK.
I made a full account of the W.I.P in the previous posts and you are welcome to look over at them if you are curious about how well the kit goes together. Actually, let me make a list here for the Work in Progress posts -
Read more >>
I'm sure you all are aware that I am building a quick dual build of the JS-4 and the KV-5. Well, I have finished both of them. I planned to do a finished post for each separately and since I have already posted about the KV-5, here's the JS-4.
For a detail review of the kit, please refer to my review post I made for this - LINK.
I made a full account of the W.I.P in the previous posts and you are welcome to look over at them if you are curious about how well the kit goes together. Actually, let me make a list here for the Work in Progress posts -
Part 3
The kit is built out of the box except for just one small thing, The gun is from my Panda Hobby's Obj 279. I love how the JS-4 look but I really think the original 122mm gun make it look less intimidating so I heck off the 130mm gun from Obj 279, shortened it a little bit and put it on and I never regretted it.
I bought Painting Guide for AFV by José Luis Lopez Ruiz and after reading the book cover to cover once, I decided to apply the unique Black and White technique. I misted my own mix of green on this which include quite a bit of different shades of green including Olive Drab. After the initial misting, I realize I messed up the mix so I had to mist another layer of green as my first layer was too yellowish. Again, I wasn't happy with the green I had to apply another pure green to blend all the colours. I put on too much green on top of the B&W so its kinda not that obvious any more but you can still see the effect. Here's a shot of the B&W layer -
.jpg)
Following a blast of pledge gloss floor wax, I pin wash with the colour Burnt Umber and used Naples yellow, Cobalt blue, white and a very small amount of black oil paints to blend all the colours in.
For the weathering, since this was an actual vehicle, I wanted to show it with some weathering to depict a used vehicle ( trials, exercises and what-have-you ). I put chippings all around and decided to put some rust streakings out of some those chips and decided to put on collected dusts on some nooks and crannies and the same dust effects on the wheels and tracks.
The kit is built out of the box except for just one small thing, The gun is from my Panda Hobby's Obj 279. I love how the JS-4 look but I really think the original 122mm gun make it look less intimidating so I heck off the 130mm gun from Obj 279, shortened it a little bit and put it on and I never regretted it.
I bought Painting Guide for AFV by José Luis Lopez Ruiz and after reading the book cover to cover once, I decided to apply the unique Black and White technique. I misted my own mix of green on this which include quite a bit of different shades of green including Olive Drab. After the initial misting, I realize I messed up the mix so I had to mist another layer of green as my first layer was too yellowish. Again, I wasn't happy with the green I had to apply another pure green to blend all the colours. I put on too much green on top of the B&W so its kinda not that obvious any more but you can still see the effect. Here's a shot of the B&W layer -
Following a blast of pledge gloss floor wax, I pin wash with the colour Burnt Umber and used Naples yellow, Cobalt blue, white and a very small amount of black oil paints to blend all the colours in.
For the weathering, since this was an actual vehicle, I wanted to show it with some weathering to depict a used vehicle ( trials, exercises and what-have-you ). I put chippings all around and decided to put some rust streakings out of some those chips and decided to put on collected dusts on some nooks and crannies and the same dust effects on the wheels and tracks.
This is one of the few kits that I am absolutely happy with what I did. I did have to nitpick about some boo-boos but the enjoyment and seeing it finished far weight the boo-boos
It's time for the photos -
(Just click on the smaller ones and they will pop out )


The running gears -


Some random close ups -


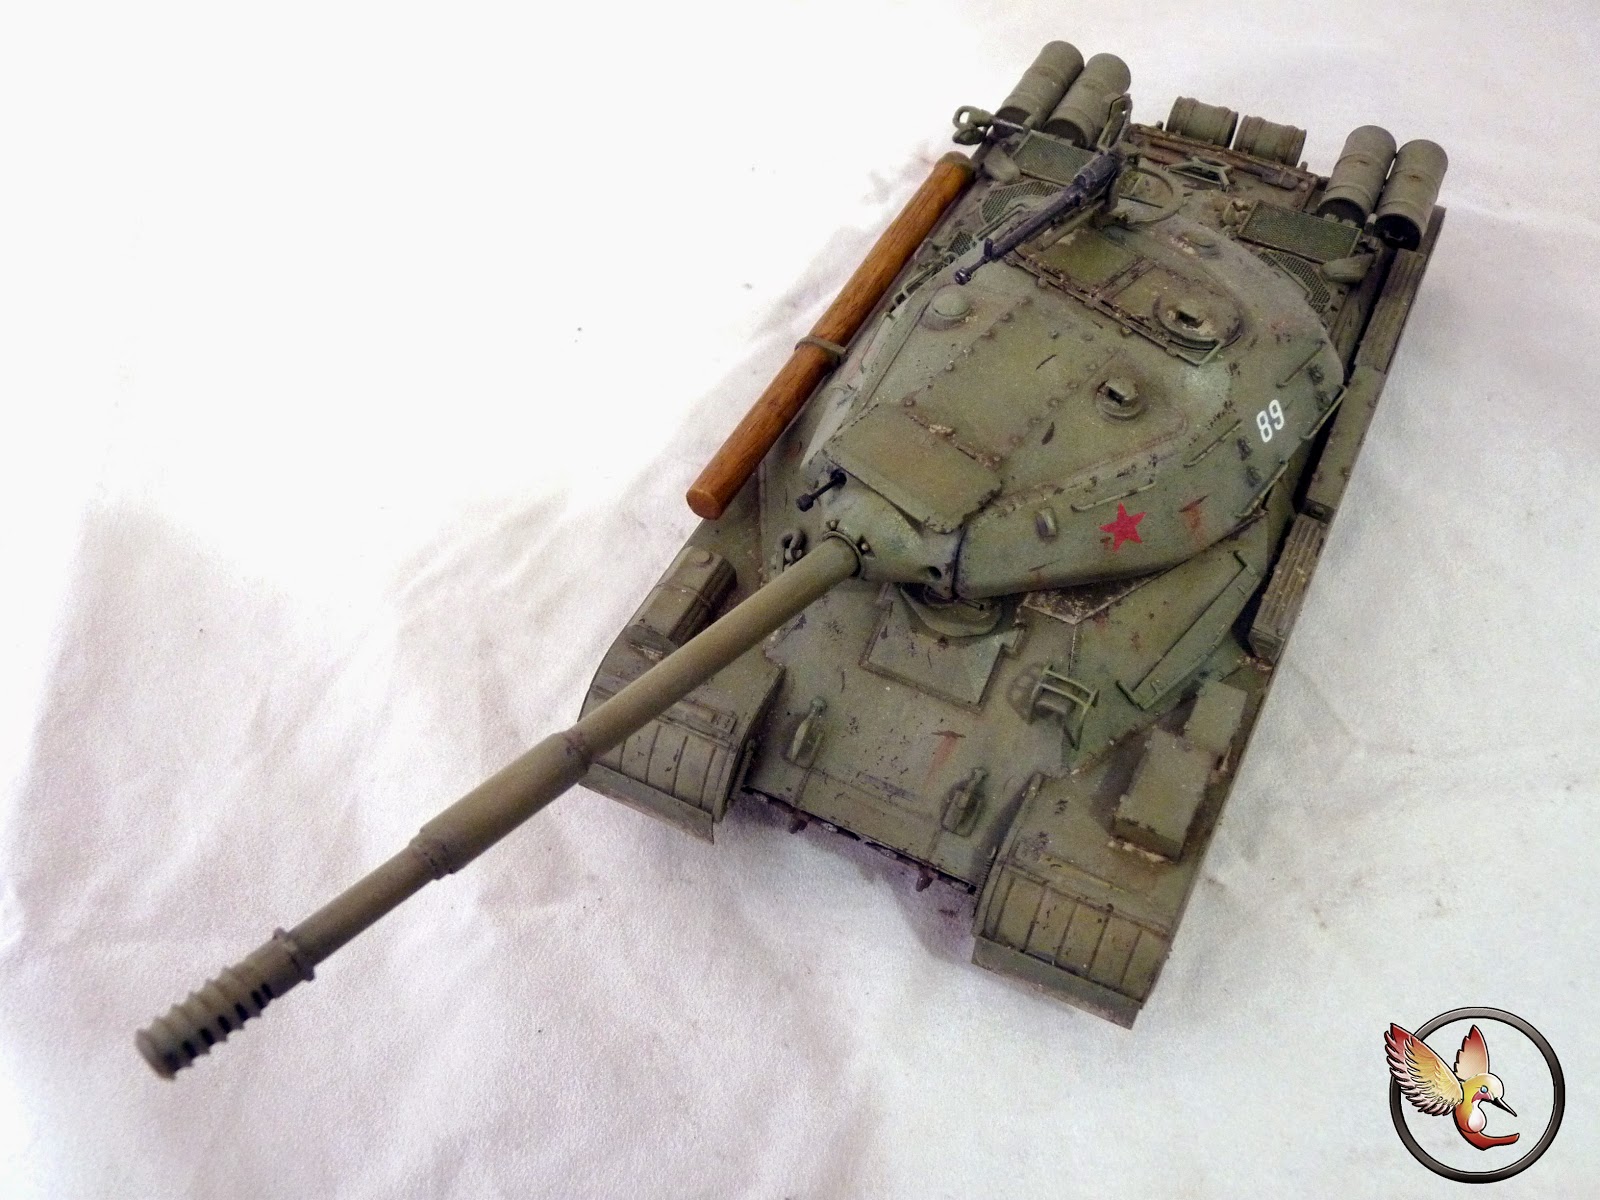
And as usual, my show case photos from various angles -


And here it is, side by side with the KV-5,


The vehicle itself just looks lovely and I'm really happy with how this turns out. This is a milestone in my skills in highlights, contrasts and oil filtering/fading and to mention a very valuable test piece for the B&W technique. This is one baby I will be proud to have on my shelf or another one's shelf should anybody would buy it as I have plans to sell it.
Speaking of selling, I am selling some of my built models so if any of you are interested, shoot me an offer on ebay -
http://www.ebay.co.uk/usr/romance6688
Internationals are welcomed as well but most likely have to be communicated via email and paypal as I did not turn on international shipping on ebay. So shoot me an offer on ebay or from email if anybody's interested.
(Just click on the smaller ones and they will pop out )
The running gears -
And as usual, my show case photos from various angles -
The vehicle itself just looks lovely and I'm really happy with how this turns out. This is a milestone in my skills in highlights, contrasts and oil filtering/fading and to mention a very valuable test piece for the B&W technique. This is one baby I will be proud to have on my shelf or another one's shelf should anybody would buy it as I have plans to sell it.
Speaking of selling, I am selling some of my built models so if any of you are interested, shoot me an offer on ebay -
http://www.ebay.co.uk/usr/romance6688
Internationals are welcomed as well but most likely have to be communicated via email and paypal as I did not turn on international shipping on ebay. So shoot me an offer on ebay or from email if anybody's interested.


