Saturday 31 December 2011

Entering the MAC forums' 2012 Mecha Contest


Simply put and to the Point - you need this poster to qualify in our 2012 Mecha Contest at MAC forums.

Your WIP thread at our forums should start with the photo of your kit with this poster as the background. We understand that some modelers like to keep their builds themselves or simple just can't take photo step by step,thus you need not be detailed with your WIPs, just make sure they are informative enough and would have the poster in the beginning of the thread.

Here is the step by step break down from one of the creator on how to enter the contest. It has been to show the basic, simplest steps on how to enter so you would not have problems.


We hope to see your work very soon in the Contest WIP Threads and hope you all have fun with this contest.

If you need any further info and or need to ask question, just drop by to the official Q&A and rules thread.

Start your engine gents .... and let it rip.........
Read more >>

Friday 30 December 2011

Modelling 101: Don't bite off more than you can chew


Hello Ladies and Gents ( if there is any ladies at all that read my blog post). Welcome to another post from the hummingbird.

Right, in this post, I would love to talk about another basic thing junior modeler need to know. And its basically about ''biting off more than you can Chew''.

That's right folks, ''Biting off more than you can chew''. It can happen, it will happen and it happened to me. Ruined a 1/144 Freedom and a 1/100 Heavy Arm and not to mention, I'm living in a country where Gunpla is very hard to come by.

Before I go on, have a look at my failures owning to my mistake of biting off more than I can chew.


As you an see, these are the result of me biting off more than I can chew. The Freedom, I bought it back in 2008 and I saw White Base's freedom and inspired by it. The Heavy Arm, I got it in early 2009 and was inspired to MG-fied this thing. 

I started Gunpla at late 2007 and the freedom was like my third gunpla since I started and there was only a limited resources to which I can access. In short, I had no idea what the hell I was doing or how to do thing. I was just inspired by other's great build that I wanted to do something like that. I was 18 back then, that also speaks a lot, as I was still very young and just wanted to copy something great. And boy, I did copy with out proper learning, proper practice and all I got was failure. But that didn't discouraged me, it fueled me to learn from them. Of course, those two models became wastes.

Its true gunpla is very addictive and inspiration is very very important. But perceiving inspiration in the wrong way can result in disaster. For a young and aspiring modeler, seeing so much inspiring builds can and will fuel him to try to be like his inspiration, be it modding a kit or painting kit. 

If that's that case, I just want to say this - Take things slow. Research, Ask around, read tutorials and practice first. For instance, lets take MatX for example. He does great modding job. One would (and surely be) inspired by his crazy, awesome, out-worldly modding. And from that inspiration, would come drive to mod and without proper practice, thinking one can do it,  one will start cutting up his gunpla, only to find that it is near impossible to get even a fraction of the modding done. Evidently from my past photo, that exactly happened to me. I didn't research enough and I went ahead and BAM, Failure. I bit off more than I can chew and I was left with two crap. 

I seriously don't want my juniors to go through what I have gone through as it is quite painful and a massive waste of money. So, please, take it from a man who went through this, do not DO NOT bite off more than you can chew.

I hope this post have been nice and educating to read. If you require any thing regarding gunpla, please don't hesitate to ask me and even if you ask me something that is not my expertise, I can refer you to my friends who know more. 

Thank you all for reading and as ever, thank you for your ever lasting support. 

Stay Tuned until the next update.

Edit - to add to this post, A great great modeler by the name of Matt Tomczek said and I quote 

''  I understand that Gunpla is hard to come by for you, but I actually disagree entirely with this. In order to learn, and progress, you need to do more then you can. If you just "take what you can eat" you'll never get better or learn anything at all. In the event that you ruin a kit, so be it. You learned the lesson, and yes it sucks that you lost some money, but in the long run you'll understand what you did wrong and will learn to either prepare better, or avoid your mistake. '' ... 

This is true yes ... but at the same time, I have seen many junior modelers biting off more than they can chew and doing something they still cannot do and put into a bad community, that will have a negative impact on those said modelers. 

The most important thing is , instead of biting off more then you can chew and getting negative results and what not , I would just like to advise to take things slow and practice and slowly and surely, it will come to you. Just don't rush.

Read more >>

Monday 19 December 2011

Using Support for Structural Integrity

Hello, Hello, ladies and gents - The hummingbird is here with another tutorial ( if you could call this tutorial) for easier scratch building and for structural integrity of the scratchbuilt parts. And that, ladies and gents, are achieved by using supports, just like using girders when a building is being built.

A word of advice before going on, my method ( just like all and any other methods out there) is not THE way to do thing. It works for me and I wanted to share this with my peers and most especially, the juniors in this hobby. You are more then welcome to experiment with this method and tweak it around and come up with your own or use it to how you see fit.

Alright, Lets get cracking.

As you may all know, structural integrity is important. I mean, would you want to see your SB parts buckled or snapped off due to weight issue, not currently alinged... so on so forth, after such long pain staking hours working on it and at the end '''' uh-uh ''? I seriously don't want to. I would go on a rampage if that happens. Now, that's where and when ''supports'' come in. Trust me, it works wonder.

Lets take a look at this picture for example.


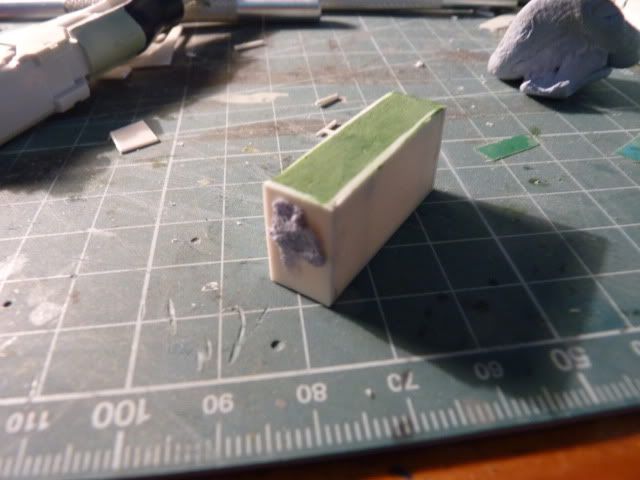
This is nothing more then a simple box, yes ? Now, you might be wondering why I am showing you guys this ...... The Answer is right in the next picture..


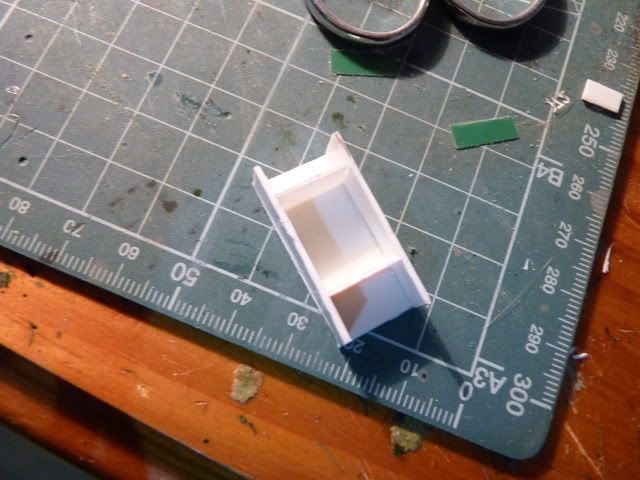
VOILA .... AS you can see, I put in two supports across the ..eh.. length??!!!??... ( anyway).. across the two sides .. before closing of the top and base and one of the sides. That, my friends, IS the support system I am using.

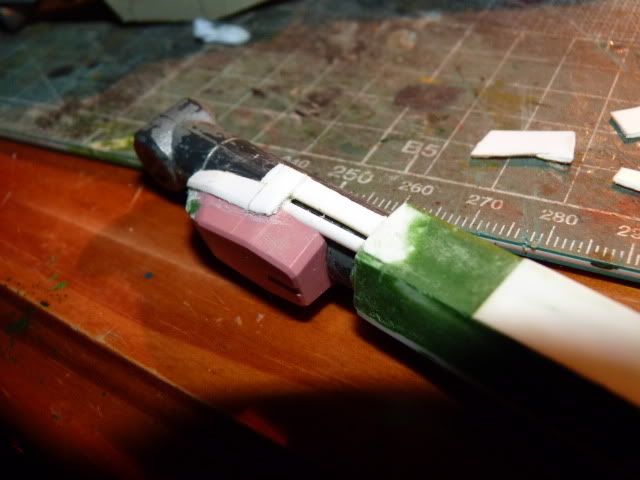
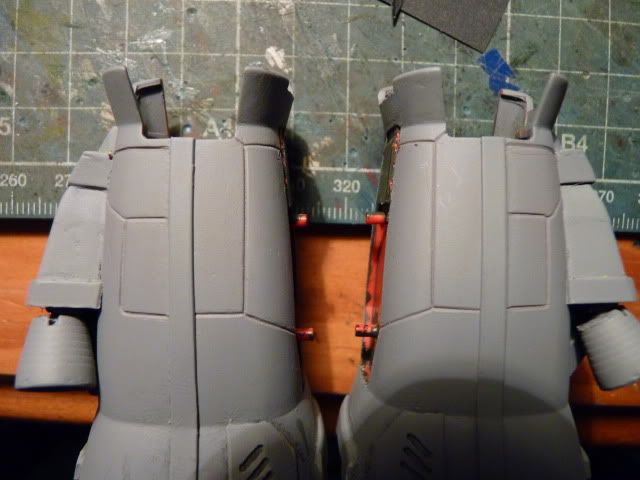
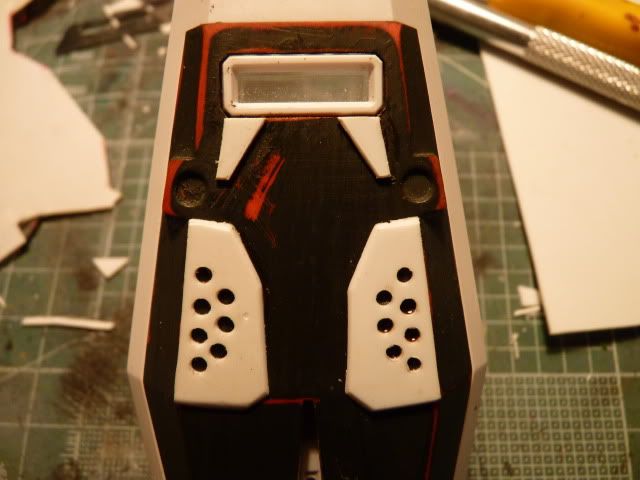
Now, I will give a details brake down of how this support system is useful. Lets take a look at the picture below -

Right, as you can see, that picture is from one of my wips where I was using the support system to its fullest. I wanted to shape the general cockpit idea of the concept mecha and I did this to start the process of building the body. Right, as you can see, I have put in two supports, support 1 and 2, clearly indicated by red arrows. Now, do you see the pink line with the caption ''Part A '' ?? Right, just at the end of it, are some pegs from the scrap parts of the HG S-gundam I'm using. One Could Argue that I could just simply glue the plate ( part A) on those pegs at that back. That is true yes, I could, but that is also wrong. Of cos, that same question comes into my mind and I have tried it and it was a utter failure. The little plate glued on to those little pegs cannot hold the weight of the Canopy and it was wobbly, in addition to the canopy bending down. Hence, I took it off again and put in Support 1 which is a direct support between the Scrap Part and Part A, holding the weight of the canopy and Support 2, at a diagonal, to brace the weight and also to support ''1''. And voila, no more wobbly canopy, solid and stiff and firm. 

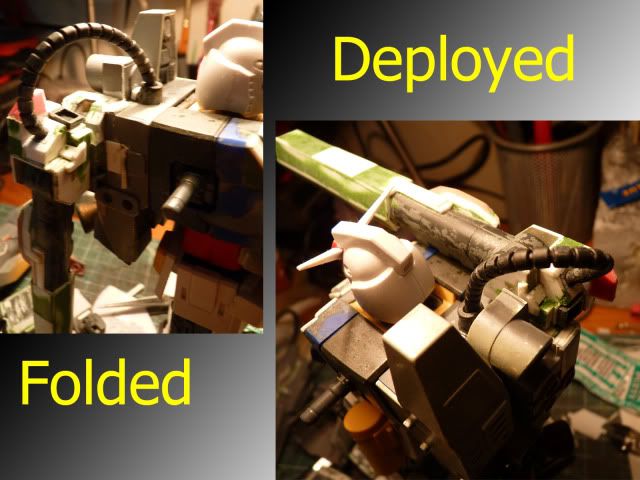
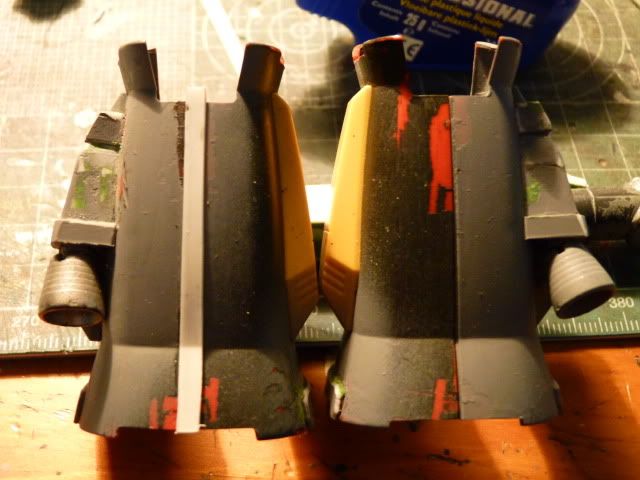
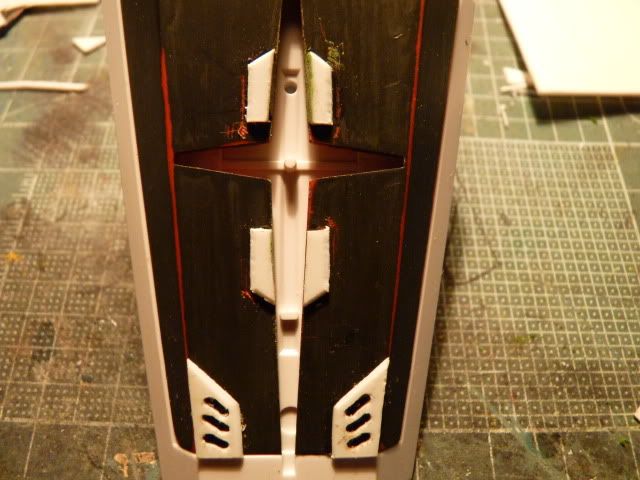
Lets take a look at another photo - 

This is what using supports has given me. Again, I could just glue that slab inside the chest but doing that won't guarantee complete stability and with posing and futher handling, there will be a failure ( a failure as in breaking, snapping, etc).  Lets take a look at another picture.


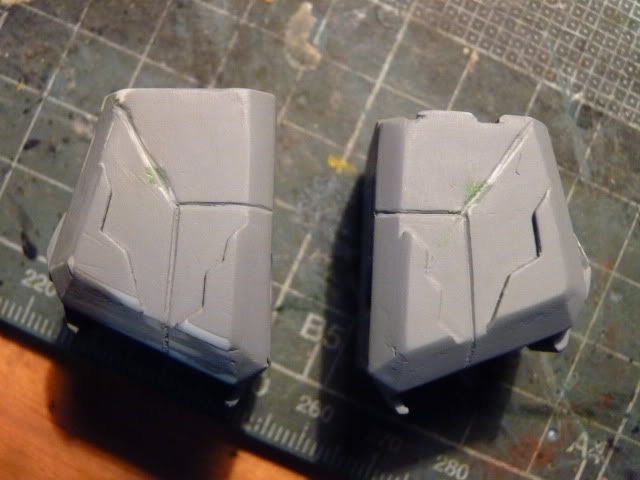
Right, in this photo, you will see that I use supports for two reason - (i) for integrity and (ii) for shaping/forming. 

(i) At the top photo, you will see side A and Side B, yes? Right, those two are basically glued , as you can see, on the sides of the scrap body part and glued along the length of the top. If I hadn't put in a support between them, the mere appliance of force on those two sides ( side A and side B ) will dis-lodged them, make them deform under force, etc. Now the most important thing to remember on this is that you would want a exactly measured length of support between them, as you don't want the two sides to be at an angle but rather completely straight and flat and parallel to each other and perpendicular to the scarp part. 

(ii) Right, for the bottom pictures, its simple. you just put in a exactly measured length, ( exact measured on all four sides). You would want the supports to touch to the back of the canopy and also to touch the back angled part also, you would want the width of the supports to be exactly as the one that you see on the back. that way, when closed up, you will get a nice firm, solid and stress-resisted ( up to a certain level of cos, I mean, you're squeezing this with a hydraulic press or anything) shape or parts. 

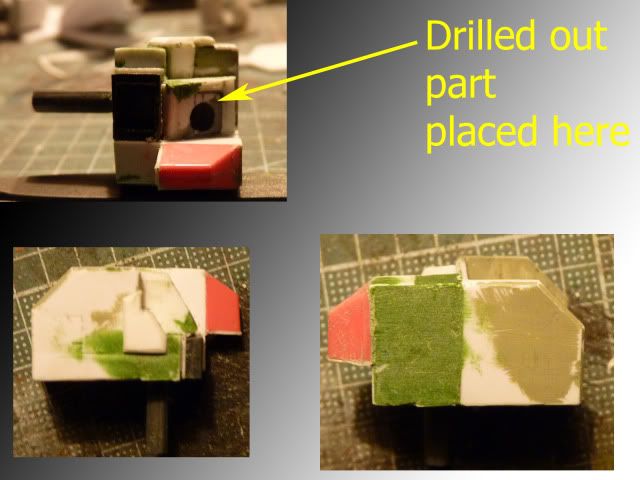
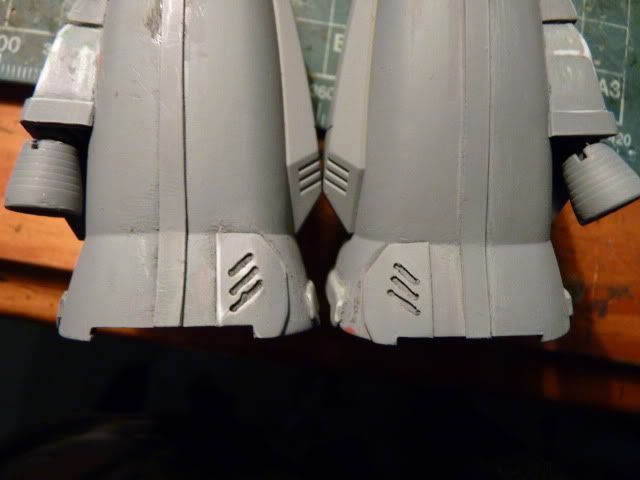
Another great example of the support system can be found here in this next photo ..

This pic is carefully labelled so I don't think I need to explain further more.

Well, that's about it . That's as much as I know about supports. Again, I stress, my method is not THE method. You can use it, turn it the other way around, or even come with up a better version based upon this. You are, in fact, welcome to do so and If you do, please tell me too, so that I can use your improved methods too.... LOOOL.. 

I hope my juniors and peers who want to delved into the world of scratch building find this tutorial mighty useful. If you have any questions or need further explanation, please do not hesitate to contact, I will be more then happy to help out.

Until Next post then. 

Stay Tuned for more.

Read more >>

Thursday 15 December 2011

MG Perfect Gundam "Koenig Gustav'' Ver. H,Bird

Hello all and All hello.

First of all, this build has been really really fun for me.

I learned a lot from this build, learn where i am weak, learned what i need to improve upon and what not.

The concept is to just improve the look of the old MG perfect gundam as I love this kit and with some modding skills, it can be a awesome model. That is my target and concept.

The design is influenced by the Ver. Katoki version of this gundam but the final design is drawn out by a good friend who goes by the name of Thelmosengine. I would like to thank him for that designs he draw for the knees, shoulders and the cannon.

I would also like to thanks Kamm, Decay  and GondorDestiny of Plamo as the detail work on this perfect are influenced by their great models.

I would really like to thank a buddy , whose name is Harry ... as he was the one sorely responsible for giving me a great colour scheme. Thank you harry.

I would Like to extend my gratitude to my fans, peers and friends who have been with me through this build and your supports are very very much apprecaited.

Although I want this model to be perfect just like its name sake, I couldn't fulfill my goal as I still made some boo-boos ... I did however tried to clean up but still, some marks and what-not are still left in some hard to reach areas... things i missed during the clean up.

Also, I have improved with the water slides, I am still pretty much struggling with dry transfer and sticker ... I still need to practice on them AND it pretty much shows some boo-boos with them here on this model

Still, I love how this looks and by now, The Perfect Gundam will get more love that it deserve, I hope

If you are interested in the Work in progress, I have made the entire full account part by part, which I will list below - 
Part 1
Part 2
Part 3
Part 4
Part 5
Part 6
Part 7
Part 8
Part 9
Part 10

thank you all and enjoy the photos


My Most Favourite Pose


And some more poses


And Lets end this with a Bang ..


I hope you guys like this as much as I do and please show the original MG some love. Thanks all.

If you want to see more photos -
http://s1001.photobucket.com/albums/af133/hummingbird2012/Koenig%20Gustav/

oh, I almost forgot.. here is the before and after picture


Sept 2014 - Update
A little update - I am very harsh on myself and I know there's alot of area that could have been done better now that I look at this 3 years later. Some certain gaps, seams lines  and so on so forth but I am very proud of this and will remain so even with the imperfections.

C&C are welcome... just be gentle guys ... haha Thank you all
Read more >>

Tuesday 13 December 2011

Inspiring WIPS of MAC forum - Part 1

Greetings my dear readers


I woke up today, with the Perfect Gundam almost finished, nothing do and I was browsing stuffs on the MAC forum's WIPs and this idea just came into my mind - 

'' Why not make a Blog post which show off all the inspiring builds (WIPs) of the MAC Forum''

That said, here I am, ready to make a blog post with a list of great looking, awe inspiring, and educational WIPs .... 

So, lets stop the chit chat and get right on to business - 

I will go descending, sorted by date, alright? Let's start -


Ok, seriously, as you all know, WE of MAC are about 80% modders so the amount of inspiring wips is just too much at at 24 pages, I don't wanna bog down the blog post with too much links ...... So..... 

I will leave this much in the first post and I will continue posting more in the 2nd post and so on so forth ...... 

I hope these links are helpful to you as they have been for me ... 

MAC support, encourage and follows the unofficial rules of showing step by step and detailed works done and I have no doubt everybody who read this post will be able to benefits from those WIPs.... 

Until Next Post ...
Stay Tuned For More

Read more >>

Sunday 11 December 2011

Special Feature 1.2 - Kamm's Ground type Sazabi (HG)

Hello there Ladies ( if there are any) and gents .... Once again, its time for the little birdy to blog again....


And that's right ... you saw it in the title... Another special feature ... a few moons back, I made a first special feature and this is the second one .... and in the special feature, I will be featuring a ground-breakin, breath-taking work for one of the Legend of MAC and ADMIN of. MAC . A man with a golden heart, who goes by the name of ''' trumpet'' .....Kamm.


Now if you all could remember that I made a blog post about the build off between the Decaying Legend and the Hand Painting Assassin, You might have noticed already What I will be featuring today. But in case you don't remember, let me kindly refresh your memories with a link back to it - Here it is 


I seriously doubt Kamm will need introduction to who or what he is .. but just in case you guys forgot about him or haven't actually heard about him, let me refresh your memories - 


  • Kamm  only got into the hobby since 1 year ago, 
  • He loves to paint models - he's a painting guy, pure and simple.... 
  • He used to paint warhammer models and now, he has switched to gunpla. 
  • He HAND BRUSH his models - that's right, HAND BRUSH 
  • His most famous work is the FAZZ: FEARED ONE
  • He rose to fame after building his HLJ gundam
  • And best of all, A very very very good friend of mine.


Kamm is a very skilled modeler, most particularly  in the painting and weathering departments. He has done  a range of modeling including painting warhammer figures, clean works, weathered and the ever impressive modifying works.


If you could kindly refer back to the announcement about their build off, Decay and Kamm decided to mod a HIGH GRADE Sazabi into their own version. Kamm choose to work on a ground  type and he really went all out on his sazabi.


To go along with this concept, and of course with some help from me ( hehe, just kidding) ... he choose to go with a two tone green colour scheme just as you would see a real war machine in the outside world.


And don't let this blow you away  but the whole kit has been hand painted. You saw it right, , Hand painted... I will be damned if I could find a single brush stroke on that thing... Always tried to look for one so that I could rub it in his face.. but damn, I still can't find one... LOL


Just with Decay's sazabi, You may be wondering why I featuring this exclusively while I have my own chapter, featuring Kamm's work...  Well, here's a list of why -
1st - a very very magnificent piece of model
2nd - the mods are just too realistic, I am a military geek and I can assure you, he made everything practical and realistic 
3rd - one of the best weathering I have seen
4th - amazing paint and clour scheme, Certified by this Military Geek ( me !!)
5th - perfect decals 


I could go on and on about this Sazabi ... but Why prolong the photo section?? You guys properly can't wait anymore ...
So without Further Ado, I present to you ....
'' The ASSASSIN SAZABI '' 

A simple yet beautiful wallpaper made by  Kamm himself -


And as you know, is a Vloger so here is his video he made for this baby -

Kamm doesn't have a blog but you can see many more photos and the discussion over at the the offical Thread over at MAC.

I hope you will find this Sazabi as magnificent and beautiful as I do. Lets give Kamm a round of applause for completing such a monster and please DO visit his channel to give feedback, add friend or subscribe.

Oh, and if by any chance you know Kamm  or if he has helped inspire you or helped you in modeling or whatever it is, please do click the picture below and check the tread out.
Posted Image
^^^^^^^^
You will know what I'm talking about and What is going on and What to do after visiting that page. So please please, do visit that page.


I hope this post has been a fun to read one.
As usual, thanks so so much for being such supportive and kind readers.

STAY TUNED FOR MORE
Read more >>

Monday 5 December 2011

MG Perfect Gundam Ver H.Bird Part 10

Right ... this is my final update before I move on to painting ..... 

lets start shall we - 

First of all I did this - 
Posted Image

I had to drill that bit out so that that I can do something for the power cable to go into the gun, I mean, it would not be practical for a such a huge gun to function without a proper power source -

The drilled out part was then attached on the gun's gimmick as you can see in the photo and that part is further refined -
Posted Image

So, now the power cable will go into the gun like so -
Posted Image

And I also put on some new parts on to the gun .. as a mean of refining it .. 
Posted Image

After that , I put on a strip of plate along the seams there the two halves of the leg armour meet - 
Posted Image

That's my little trick of avoiding permanent sealed panel lines .. :P

Didn't want to go heavy on panel lines and/or pla plate so I only put on these on the feet 
Posted Image

after that, put those little plates on the back of the leg armour for details - 
Posted Image

Scribed panel lines on the shoulder armour, left and right, on both front and back 
Posted Image

After that, clean up the chest armous and scribed some panel lines on it 
Posted Image

More scribing ... more panel lines 
Posted Image

And want to try more platings and detailings so went happy-happy-plating on the shield 
Posted Image

Posted Image

Well.. that's about it ..... I haven't build anything with that much details and panel lines so the Perfect is acting as a test bed for me to improve on my detailing skills ... and I have to say, I enjoy all those detailings 

This is it for any works to be done on this baby... next update, would be painting ... I am still thinking about the paint scheme ..

oh and before I forget.. I name this Baby ... Just like my ''Raven '' .. This baby is named '' Koenig Gustav''' ... Gustav, being the name of the famous killer croc in africa ... 

Well, this it for today ... Thank you all for reading and being fan of my works.. you guys rocks.....

Stay Tuned for more
Read more >>

Thursday 1 December 2011

Special Feature 1.1 - Decay's Space Type Sazabi (HG)

Hello there Ladies ( if there are any) and gents .... Once again, its time for the little birdy to blog again....

And that's right ... you saw it in the title... A special feature .... for one of the Legend of MAC. . and the name of the Legend is Decay.

Now if you all could remember that I made a blog post about the build off between the Decaying Legend and the Hand Painting Assassin, You might have noticed already What I will be featuring today. But in case you don't remember, let me kindly refresh your memories with a link back to it - Here it is 

Right, now, I'm pretty sure You all know who Decay is but there maybe some who don't know so let me re-introduce him again -


  • Decay has been modelling for over 20 years
  • He only started working on Gunpla for a mere two year
  • Decay was only scarcely active at figure FM once
  • He became an active member of MAC as soon as he register
  • He now hold the Meister status in MAC, which is a moderator level
  • He hails from Germany
  • And best of all, A very very very good friend of mine.


Decays is a very skilled modeler, doing a range of modeling including painting figures, clean works, diorama, weathered and the ever impressive modifying works.

If you could kindly refer back to the announcement about their build off, Decay and Kamm decided to mod a HIGH GRADE Sazabi into their own version. Decay choose a space type and worked on and boy-oh-boy, did he mod it or what.

To do justice to the space theme, he went for a Gray Red color scheme tha was inspired by one of his favorit games - Mass Effect.

And hang on to your hats cos the next fact will blow you away ... The whole kit has been hand painted. That's right, Hand painted... I will be damned if I could find a single brush stroke on that thing... ( thank god I didn't.. :P )

You may be wondering why I featuring this exclusively while I have my own chapter, featuring Decay's work...  Well, here's a list of why -
1st - a very very magnificent piece of model
2nd - the mods are legendary - it's not even the Saz anymore .... its been DECAYED
3rd - one of the best weathering I have seen
4th - amazing paint and clour scheme, screams out ''alien'' or ''space''
5th - perfect decals

I could go on and on about this Sazabi ... but Why bore you out ???
So without Further Ado, I present to you ....
'' The DECAYED SAZABI '' 


that's a wallpaper Decay made for this baby.... great isn't it ?? Love it ...


There are loads more photos at Decay's own personal Blog - Here is the link so if you want to see more, just jump over there .... And if you are interested in reading about it, you can always visit the offical Thread over at MAC.

I hope you will find this Sazabi as magnificent and beautiful as I do. Lets give Decay a round of applause for completing such a monster and please DO visit his blog to give feedback.

OH, I almost forgot, here are some BEFORE/AFTER pics -


I hope this post has been a fun to read one.
As usual, thanks so so much for being such supportive and kind readers.

STAY TUNED FOR MORE
Read more >>