

This time- I will be focusing on the turret.
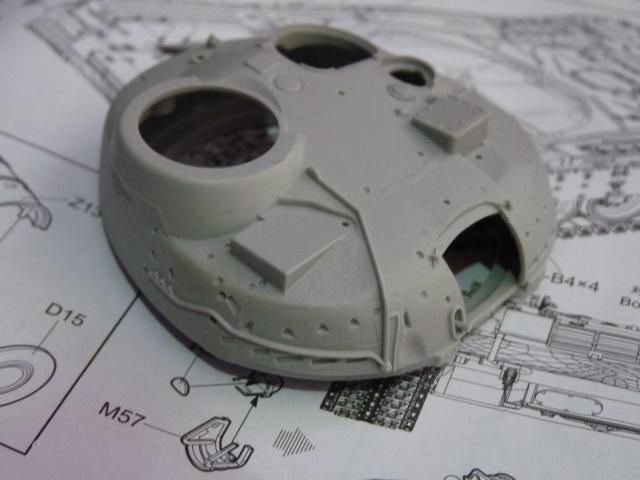
Started by gluing the two halves of the turret together. The turret comes with moulded on cast texture but it's a little soft but since I'm happy with this so I didn't put on the extra cast texture.This is how the turret looks -
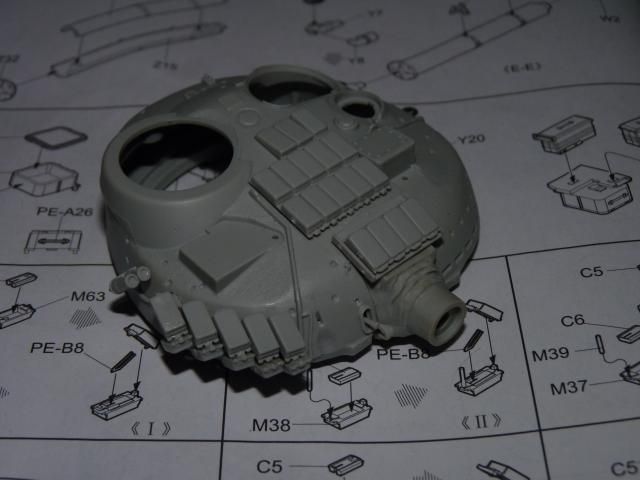
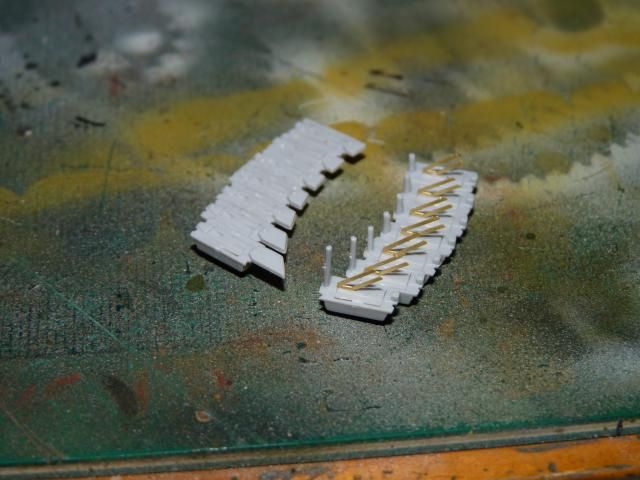
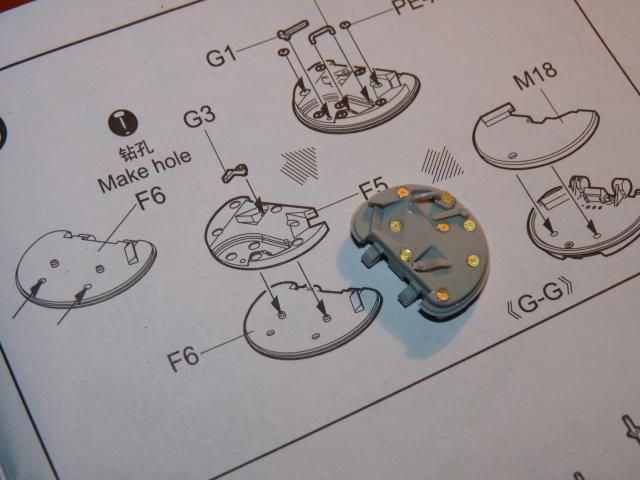
After that, I started putting on the ERA blocks (this is the kontakt-1 bricks according to sources).I stared on the right cheek of the turret. Each single set up of the blocks involved 5 parts and it took quite a bit of effort and steady hands-
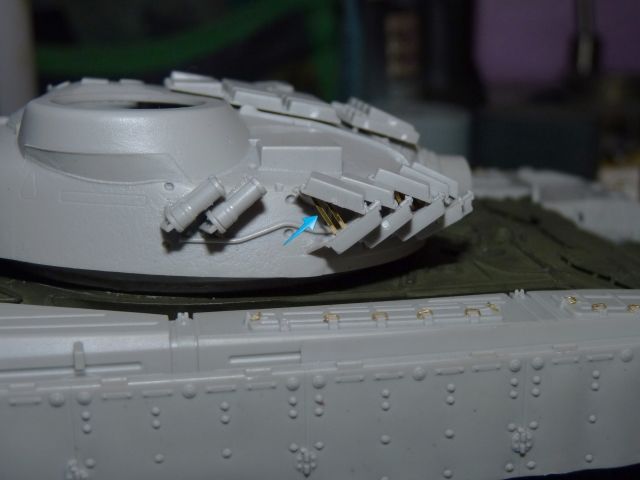
You can see in this photo the photo etch support that goes in between the upper and lower bricks -
Imagine doing that for 5 times. But that's not all. this is only just for this area.Followed that up with more block set-ups for the side.
The side blocks are vertically facing outward and these were quite fragile and fiddly so extra care has to be exercised.
Next, I moved on the the left cheek. For some reason, the blocks are set up in an easier way for the left cheek so rather then each individual blocks, I just had to do a whole row.
Still, not an easy job as you can clearly see on the photo.
That entire row goes on the left check along with some roof blocks on the edge of the cheek and side -
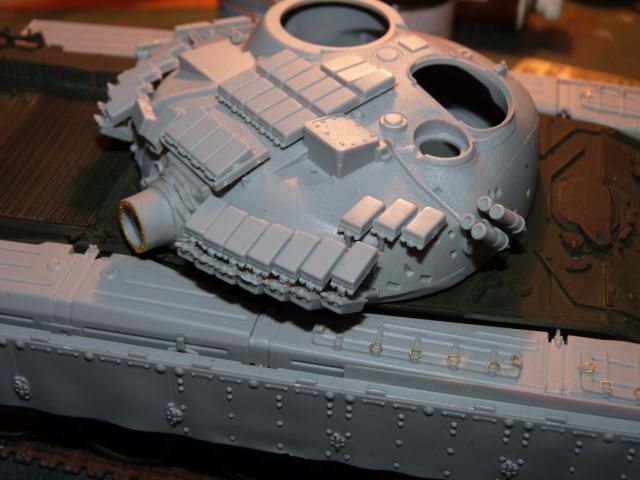
Followed up by the side blocks and SGLs -

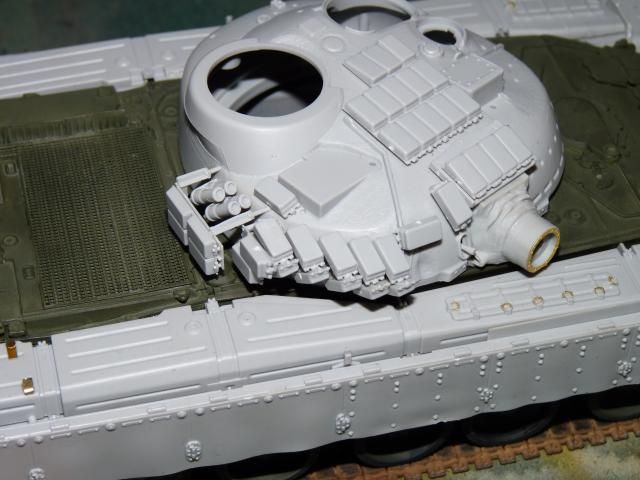
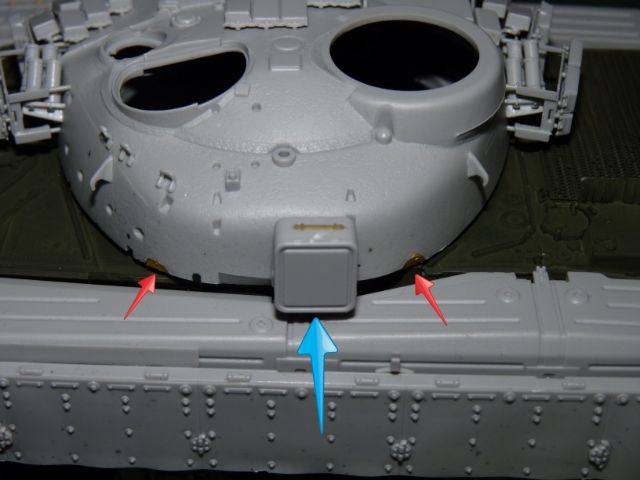
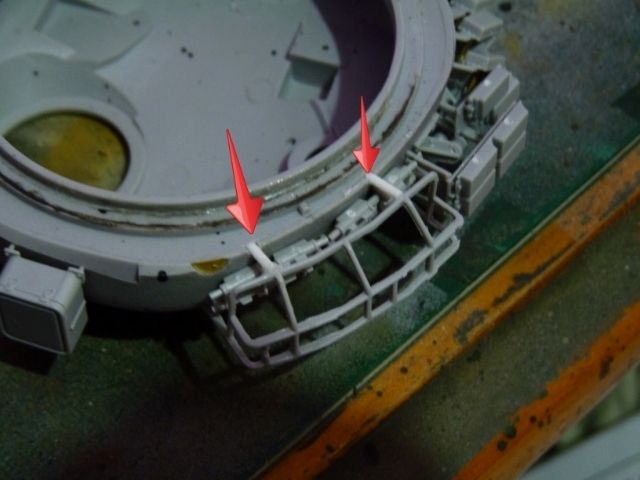
Satisfied with this, I moved on to the back of the turret. I had to put on two little pieces of PE as indicated by the arrow. I don't know what they are but the manual say I have to so yeah.... and I also put on one of the boxes. What are those boxes anyway?
Next, I put on the turret basket.
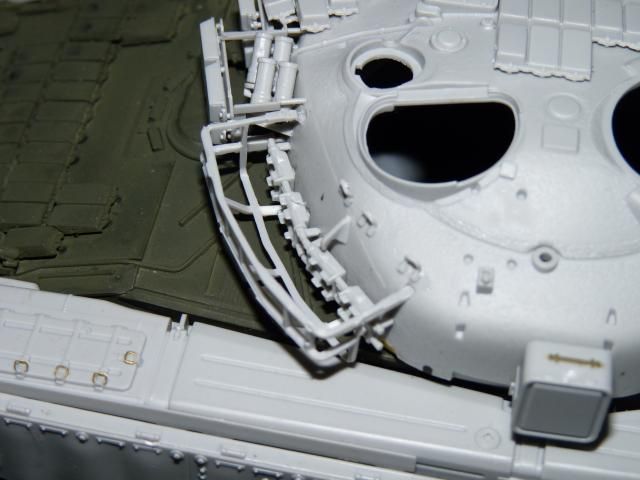
while putting it on, I realise it was really wobbly at the bottom and after inspection, I found out that the two supports for the bottom of the basket is missing. I am not certain whether trumpy forgot to mould it entirely or I broke them or cut them in mistake. Regardless, I used the evergreen rods I have ready and made some fixing.
It's not glamorous but hey, it works.
After that, I put on the fording equipment. Bear in mind, this is not the big fording tube of the T-80BV. As far as I have looked, these are found on the T-80UD.
I also put on the 2nd box on the right side of the turret. The
upper portion of that little rack is empty as I haven't put on the machine gun ammo box yet. I want to paint them first in different colours so I'm leaving them off until I painted them.
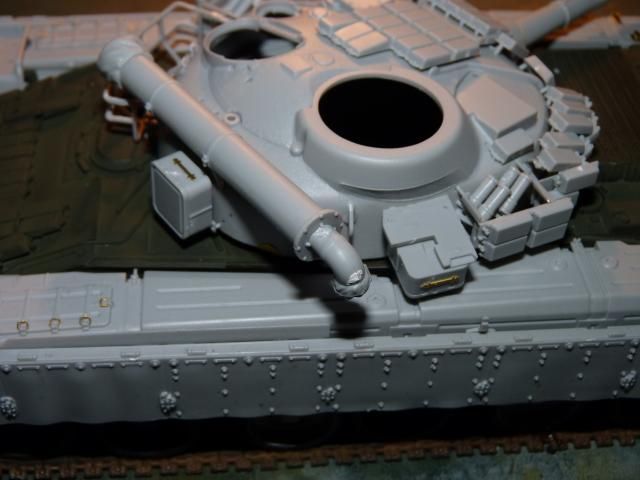
Next, I moved on to the gunner hatch. For a hatch, this were is some intricate steps and engineering involved.
I then put on 3 of the P.E parts on the roof and sights and the base of the gun. At this point, I have glued the two halves of the gun together and now, this is how the model looks -

That's it for now.
Stay Tuned for more.
0 comments:
Post a Comment