Wednesday, 30 January 2013

Modelling; a hobby or something else?


''' Gary -
that is true.... sometimes... when i'm confused.... talking with friends or doing models or sketching really calms me down and.. i feel happy.. like in a world of my own
 really... i made the right choice making modelling my hobby

Miguel -
because doing it you can be a little boy...and a little boy doesn't get worried about adult silly things...if you grow older and think you must become serious and mature, you´re lost, we must always grow with the little boy inside and amaze with every single and simple thing in life like...the un, the Moon, the dust!!! a sand grain, how an animal looks like, whatever as if it was the very first time you see them  '''

That is taken from a very very old chat that I had some years ago with a close friend. It was back in 2008 and I was having a kind of crisis with my then-current relationship. And that is exactly what we said about modelling among all the various topics we talked about.The more I think about it, the more I realize that modelling is about stress-relief ( not the OTHER kind of stress, mind you ), something to make you forget about all the worries of a adult person struggling in this WAR call life. I fail to understand why it has to become something even more stressful.

That aforementioned friend, Miguel, always told me ( and I quote ) '' don't try to kill yourself, Gary '' with my models, to take things easy and just to enjoy it. The quote came up when we were talking about whether to put too much PE parts or not on our Panzers. Evidently of what he said, he build in the same way, I haven't seen him bashing his head on the wall over a model, he just keep building and he just enjoys it and with each kits, he seems to be improving.

He was right though. When I start modelling, I was attending my foundation course and coming from a Thrid World country ( Burma ) and suddenly being taught in the British Education system, I was struggling so much to follow, not to mention the language barrier which also impeded on my social life back then. Modelling was my let out. I remember building my very first model here, a Revell 1/72 Halifax Bomber, slowly on days that I don't have classes or the weekends. It was a blissful experience, away from the clamoring of the class rooms and coursework, hearing nothing but the music I turn on, seeing nothing but the model in front of me, holding nothing but the pieces and a glue bottle. Nothing but a little boy, enjoying his time alone, exactly what my friend said.

Skip a few years - I got settled in London, made friends, met other modelers  post on forums start getting recognized and things just become to change. My thinking changed, my purpose of modelling changed. What  I started as a hobby became something else. I don't know what it become, I still can't find the answer but its not a hobby anymore. Under the pretense of  building for myself, I began to build to get recognized, to be known, to get comments like '' great work'' , '' awesome'' blah blah. I like scratch building and I do scratch build and with what I have done on my Nataku, Noir, Astrea, Perfect and Legend, I was basking in the glow of those comments ( well, I am not exactly in the level of guys such as Julius Lim or Decay but I do have my own level ) that I was no longer building for myself but to get those comments.

I strived to improve myself, to be able to build like those guys, lying to myself that the reason was sorely to improve myself. That is only partly true as the other reason for that is to be popular (like the guys that build in Ora-zaku or the winners of GWBC and such).I did not realize I was wrong in thinking like that until a few months ago. I became competitive as well. I used to hate competition, I was a '' let me live/work/play with my own pace and freedom '' kind of person and I disgust the hatred that comes with competition. To think I changed just for some models that one builds for fun.

A few weeks ago, I was talking with one of my friends and we were talking about how one modeler ( i cannot name who for privacy reason ) skips sleep, stay up until like 5 or 6 in the morning which resulted in  deprivation of sleep, getting in trouble with his girlfriend, etc. My friend told me '' that's a kind of suffering u know, is it worth it? Do we do something to suffer or to have fun? now that's something to think about'' and I just had to agree with him. Yes, I do work on through the nights as well but only when I get days off for like 3-4 days or on my holidays. When I was in a relationship, I couldn't even build at all. (I'm working night shifts so my productivity reduced a thousand fold ) For something that is regarded as a Hobby, is it worth it to build something with so much compromises and sufferings?

I don't know that answer to that question myself, but I know this, I build for myself, as a hobby and I will be getting rid of all those stupid way of thinking slowly but surely. Come to think of it, I already started doing this with starting with my Legend Gundam WIP, many people says it is too tall blah blah but I turned them down ( politely, of course ) as I only have to please my own creativity. I might be contradicting myself to say I do not want ANY comments at all. I want.... I need the more important stuffs like feedbacks, tips, suggestion and advises, basically critiques. Constructive critiques, mind u, not somebody ripping on me.

I don't know if this kind of thinking is wrong or right but I am sick and tired of people saying shit to each other, being butt hurt, hating each other and competing with so much stress and seeing those, I just feel like taking it easy, sit back, relax and build and ACTUALLY enjoys WHAT I did and HOW I did it.

And I hope that my peers, my comrades, my juniors, and my friends can really enjoy themselves with the hobby without anybody looking down on them, ripping on them and keep making friends and comrades.
BUT if you are looking for Constructive feed-backs and a community with cool people, join us over at the MECHA LOUNGE any time.

Happy Modelling, to all.


Read more >>

Monday, 28 January 2013

WIP 1/35 Tamiya King Tiger - Part 4

Alright... Time for an update ...
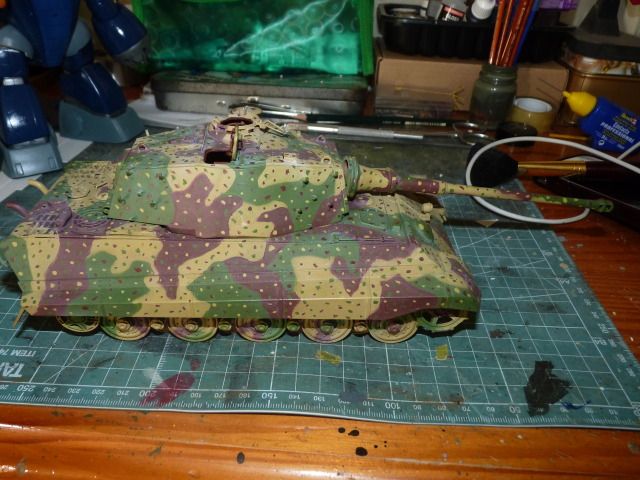
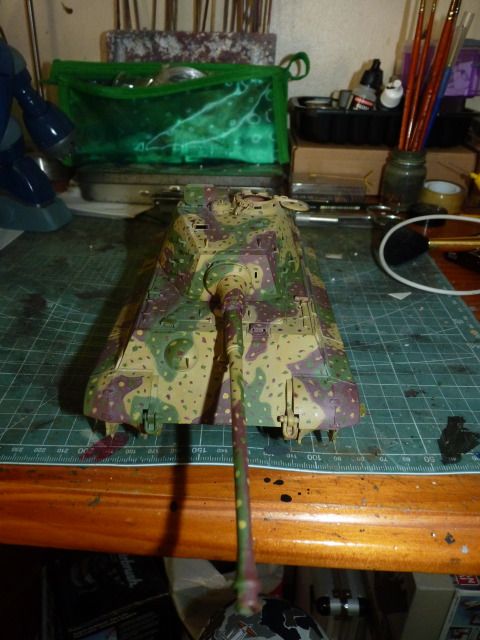
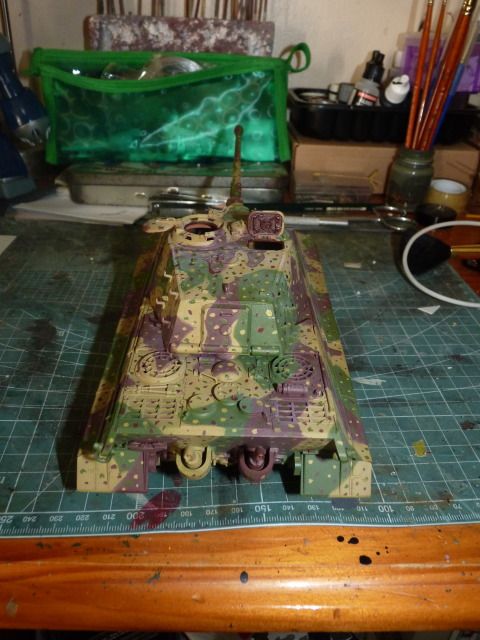
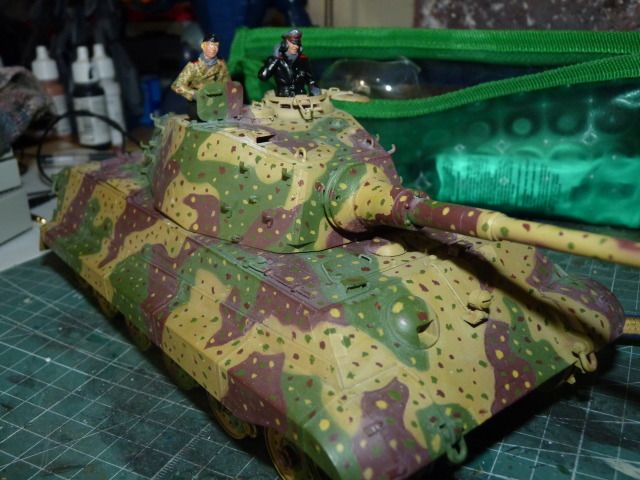
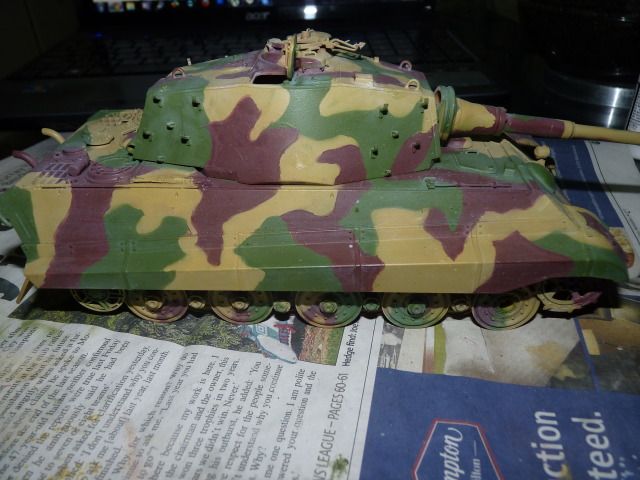
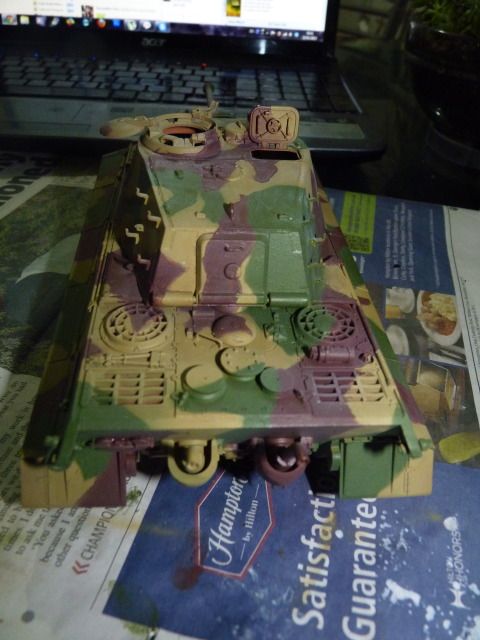
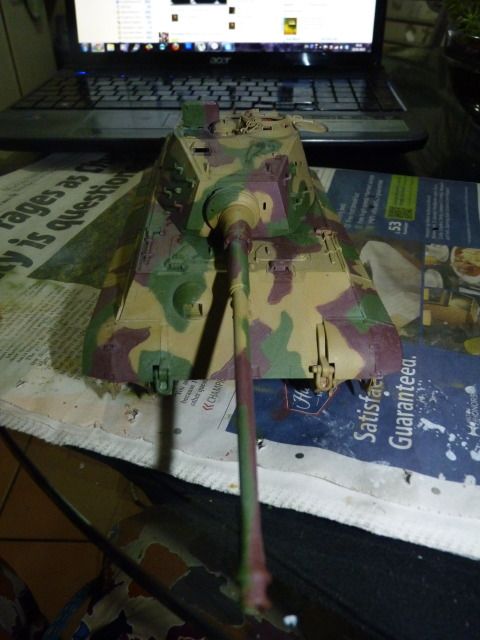
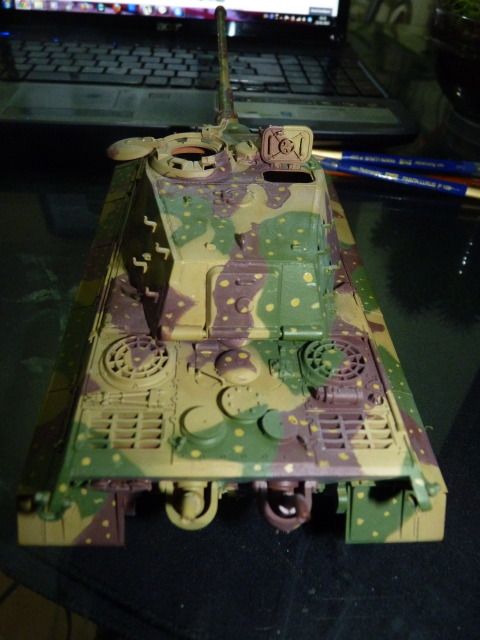
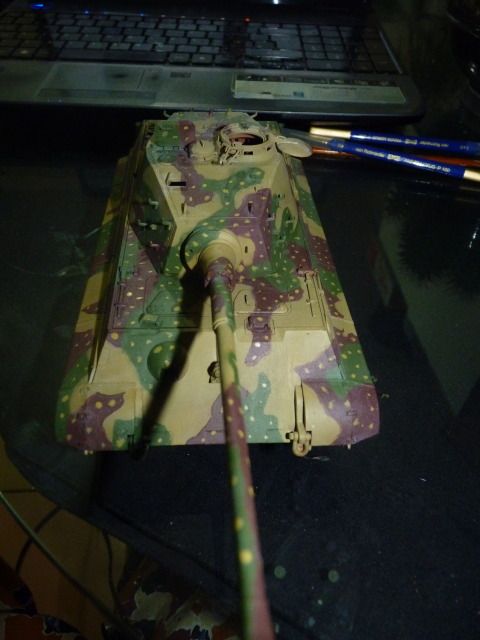
I mentioned in the earlier update that I only finish the first part of the camo scheme... so I followed through with it ..

After the dark yello dots, I applied the red-brown dots followed by the olive green


My mix of olive green is a little bit too dark and don't show too much on the Red-brown camo patches .. Im thinking I should put on a lighter tone,... MAYBE.. I don't know

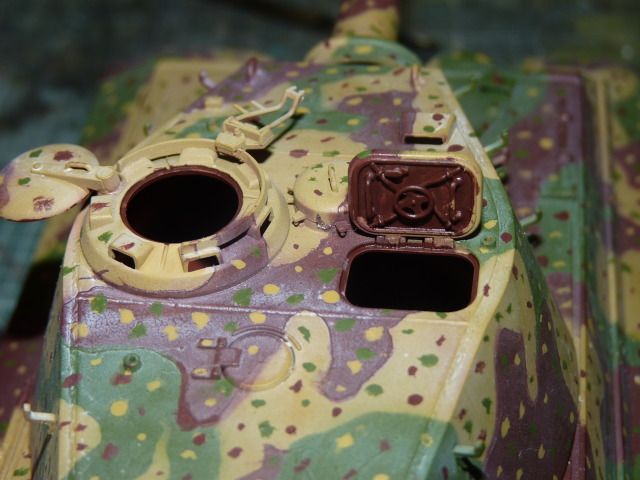
I wanted to have this display with the hatches open and did a little research for it and found out some are with the red-oxide paint layer on the interior of the tank and since I didn't know how exactly is the red-oxide is mixed, I just used the closet colour to it, which is Tamiya Hull Red -


I might need to do a bit of re-touch around the hinges..... AND i just see the little boo-boo around the edge of the commander hatch ... oh well, i will just chip it on the weathering stage.. LOL

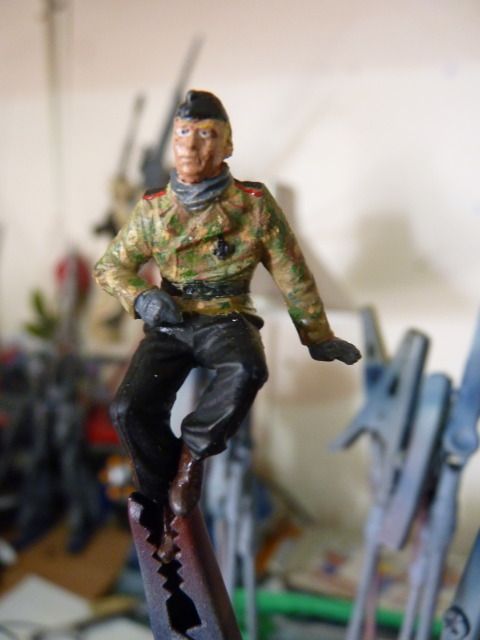
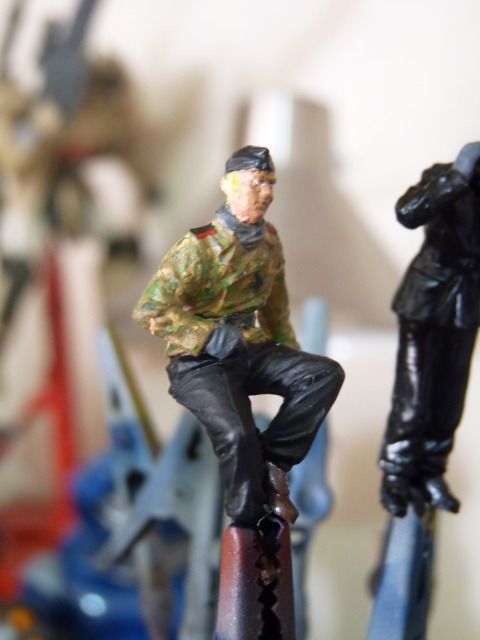
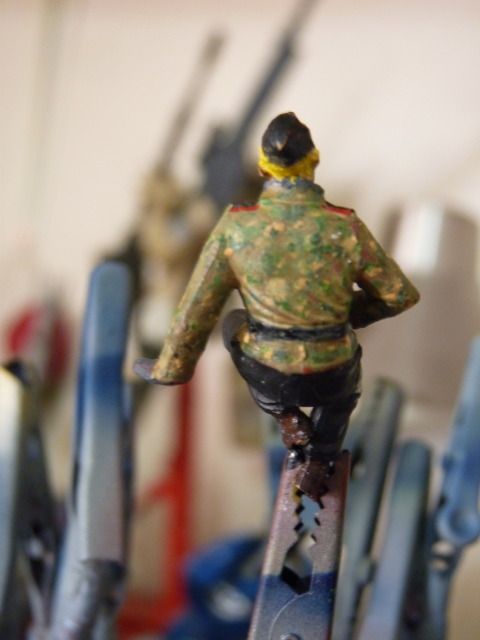
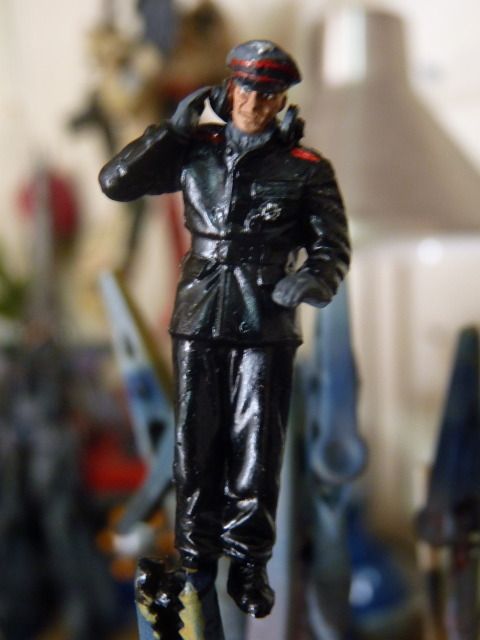
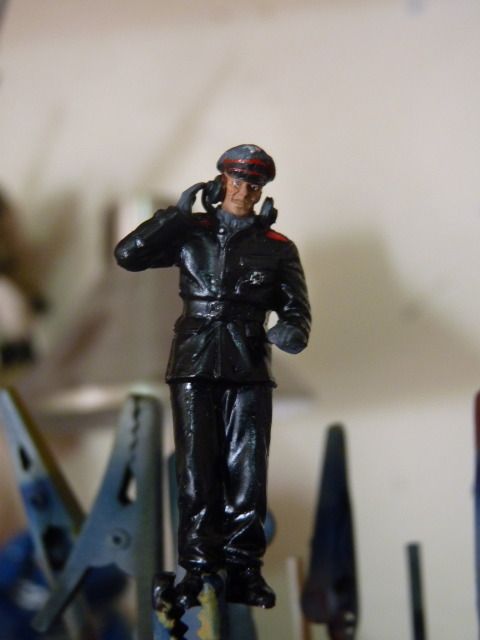
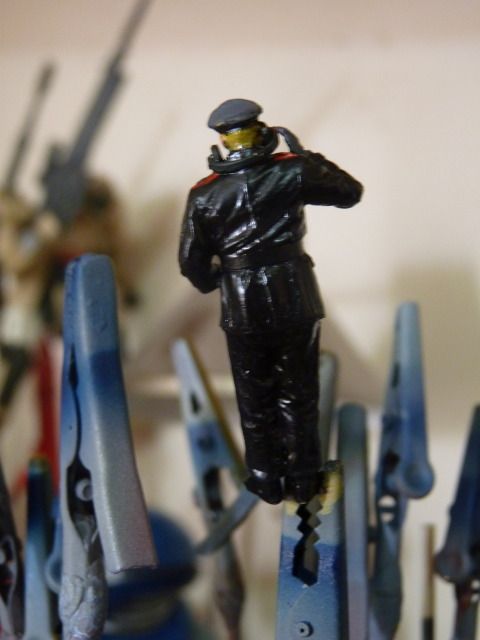
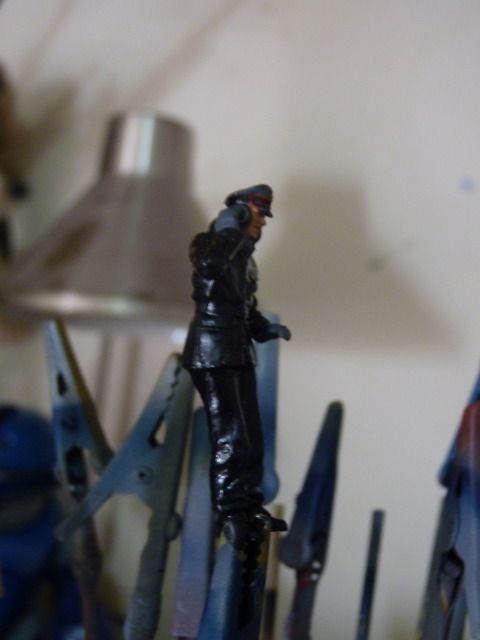
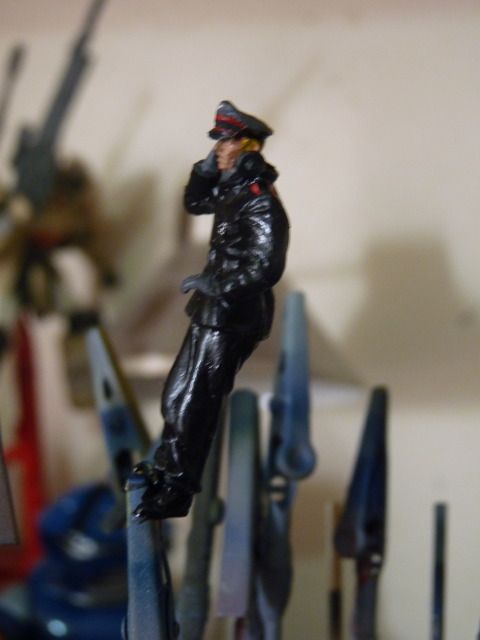
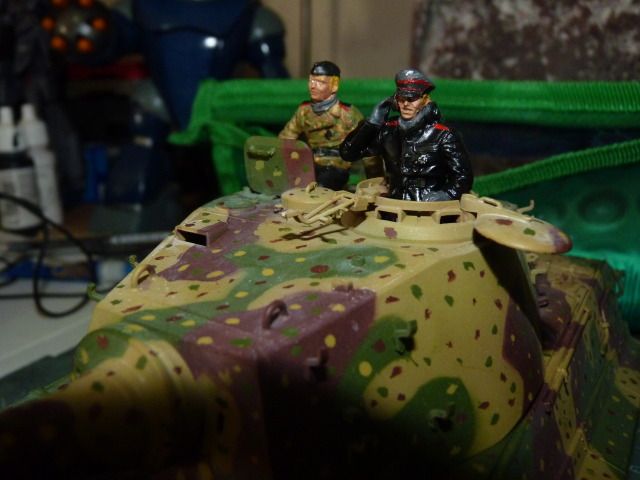
And I painted the two crew members that I want to show ...


This is my 2nd time painting crew figures and my 1st time painting it with full attention to details including hairs and eyes ... and I suck at it .. :(

Anyway, Following is the all around of the loader -


There may be a small amount of in-accuracy in the exact colours or placement of the colours. I had to work with what ever I had in my paint box and didn't want to waste more money on exact paint.. TBH, Im not exactly a rivet counter and as long my work come out nice and clean, I am happy.. I don't want to kill myself with 100% accuracy ..

anyway - followed up the commander figure


And some shot of the might cat being manned


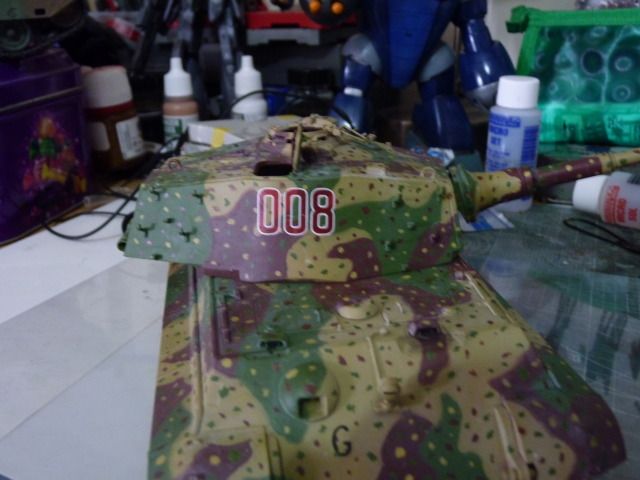
A Number of option for turret number was avaiable so I choose for '' 008 '' as I had a tiger I ''007'' in the making and my friend suggest a 007 and 008, tiger 1 and 2 respectively ....


 Because i choose 008, I have to Scratch built a '' Sternantennae'' and it is in the making right now and will be shown on the next update ...

Well, that's it for now folks... I will keep you updated
Read more >>

Tuesday, 22 January 2013

WIP 1/35 Tamiya King Tiger - Part 3


Alright, Managed to do some work on this cat .. 
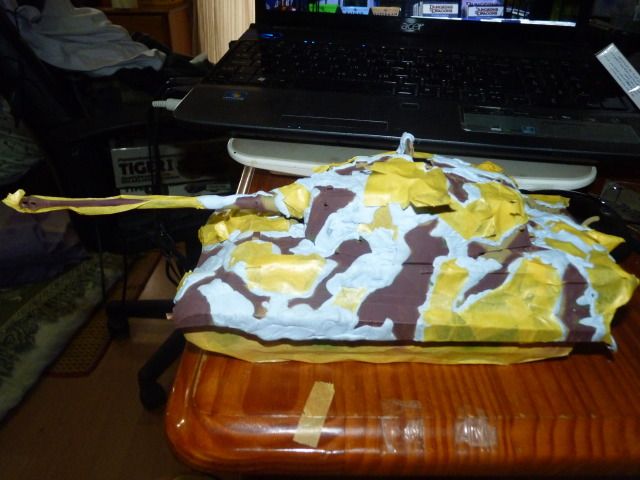
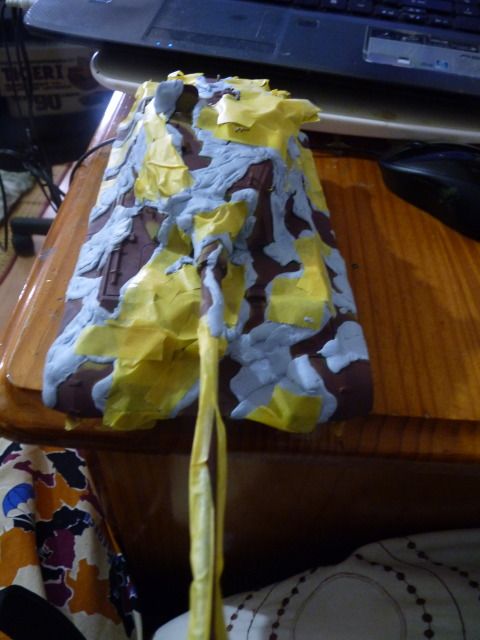
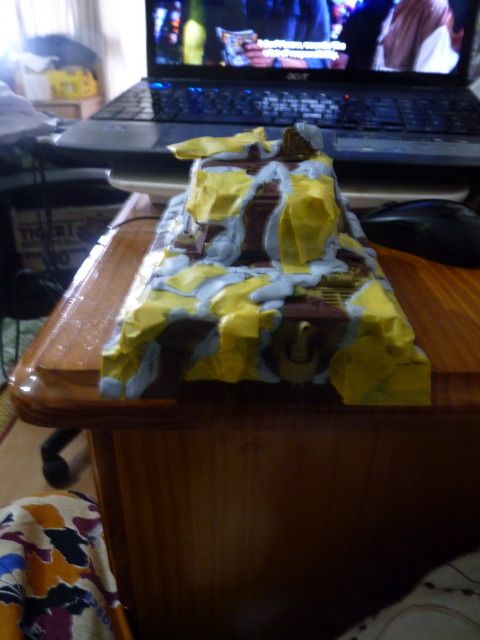
After the initial run of the camo airbrush, I got a better canvas to lay down a hard edge so on to the masking .. I started with masking the dark yellow and the olive green 


That WAS NOT EASY.. WHEW ...next time, I think I should just skip first run and go straight into masking .. anyway -
After the red brown was painted, I went for the olive green, This time, I skipped masking the entire thing and carefully mask and paint on the go with blu-tac ..
This is what I got .... and I have to say, I am starting to love hard edge


I purposely painted the hard-edge layer a bit messy and not entirely uniform as King Tiger 008 was historically Hard-edge, which implies that it was painted by the crew on the field and with the lack of petrol, crew use what ever they can to thin the paint so messy out come 
Now that Im happy with the results,  I sprayed two coats of Vallejo Gloss Varnish and Revell Flat to protect the layers of paint... 
After the follows the First step on the '' Ambush Scheme '' 


The first step, which consist of dotting dark yellow over the red brown and olive yellow is done ... All I need to do is follow up with the other colours 
Well, that's it for today folks, after the 2nd and third step of ambush scheme, comes details painting of the onborad tools and then the crews and I will be done... 
Read more >>

Thursday, 10 January 2013

WIP 1/35 Tamiya King Tiger - Part 2

Alright, Update time 

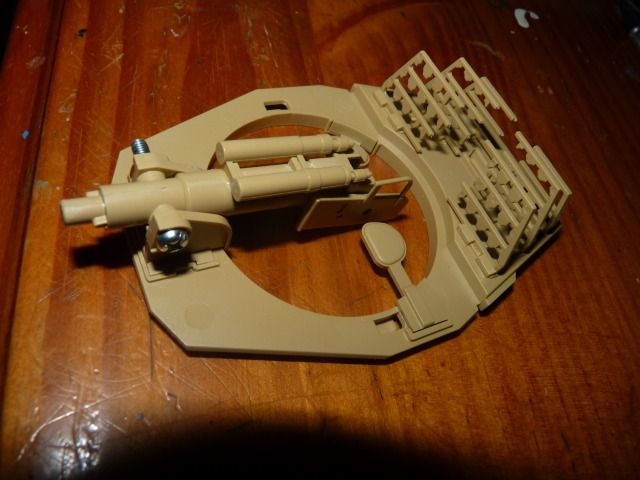
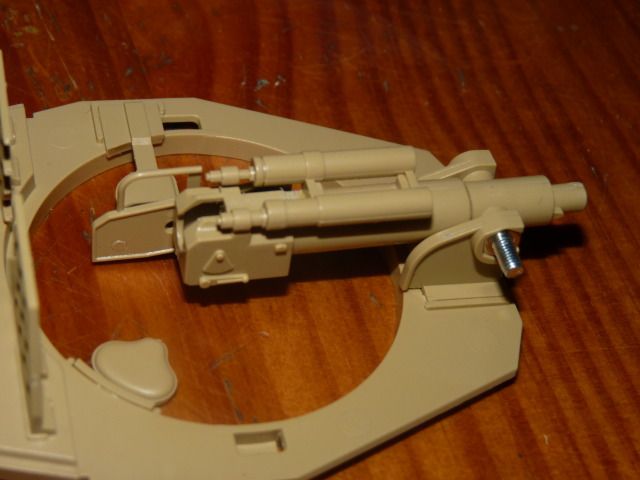
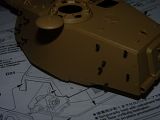
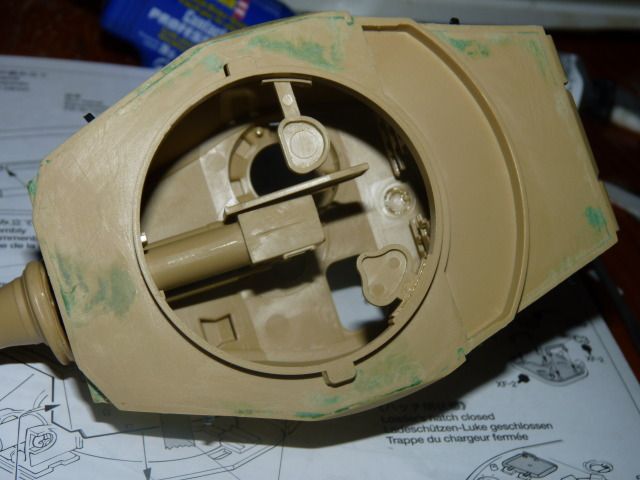
I worked on the Breech and the inner parts of the Turret .. Because the kit has a working rear escape hatch, Tamiya decided to put in the ammo rack ( but strangely enough, no ammo at all )


I really like how the gun vertical traverse is controlled by a screw.. very very rigid and very tight and makes it work just perfect 

There's still a huge seam line in the middle of the breech but since it will be hidden, I don't bother 

The mantlet didn't want to fit perfectly so I had to fill it out 


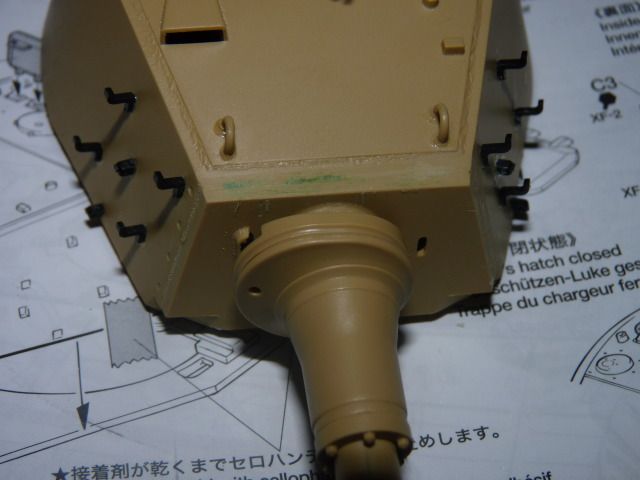
and those little S shaped hooks for the Spare tracks are glued on after it -


Closing up the turret from the bottom .. despite my best efforts, there are humongous gaps and I just can't help fill and sand them 

After that comes the fun parts .. I was doing research about the King Tiger and I found some little bits and bobs of stuffs that were missing on the kit so I decided to put them on to the best of my degree 

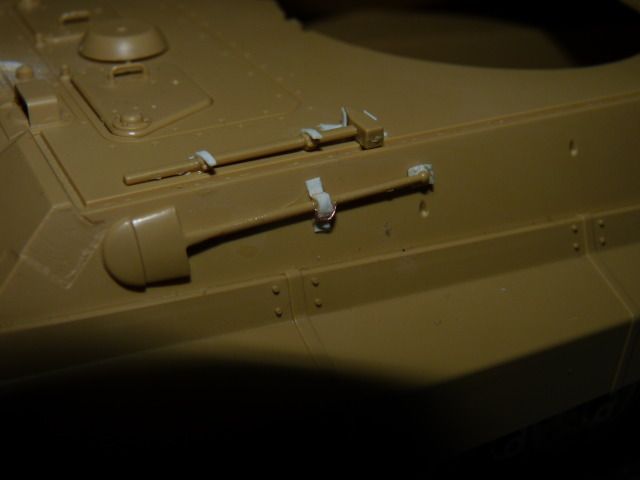
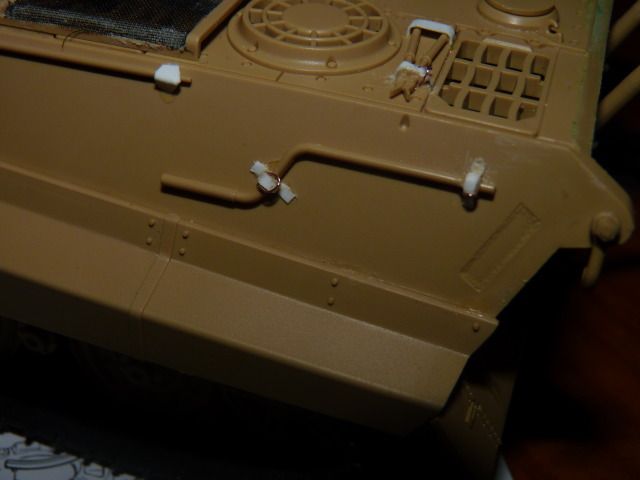
On my research, came across this particular picture -


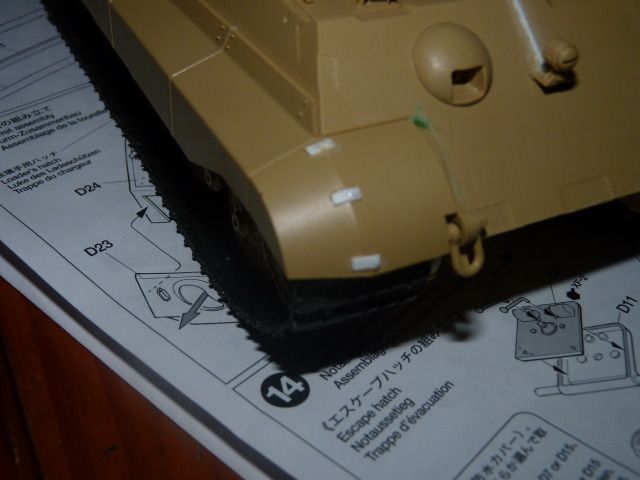
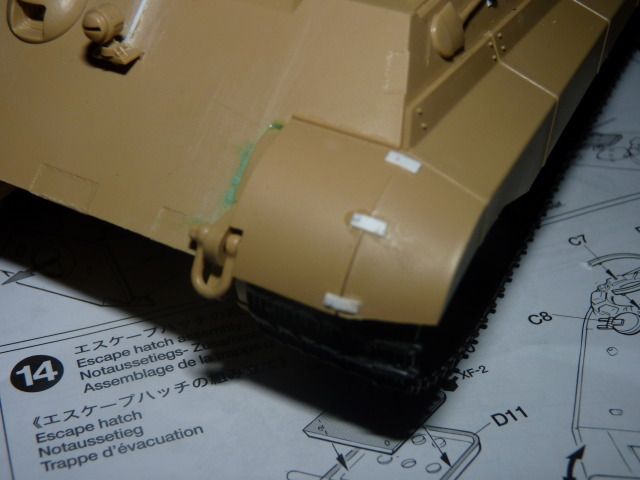
and since the kit lacks those details, I SB ( scratchbuild ) some of a 0.25 Stryene sheet and 0.2mm stryene rod
Right -


Left -


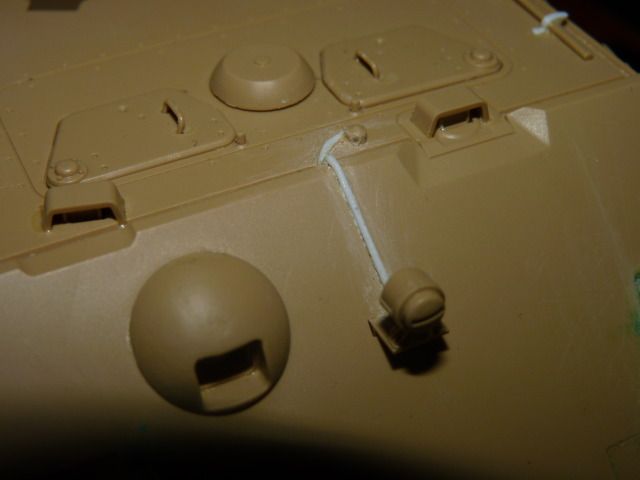
Obviously, no research is need to realize that there was no wiring for the single head lamp on the front glacis Plate so further improvising was need. For that I used 0.2 mm stryene rod and glue it on the glacis plate and into the little hub just like on the real thing 


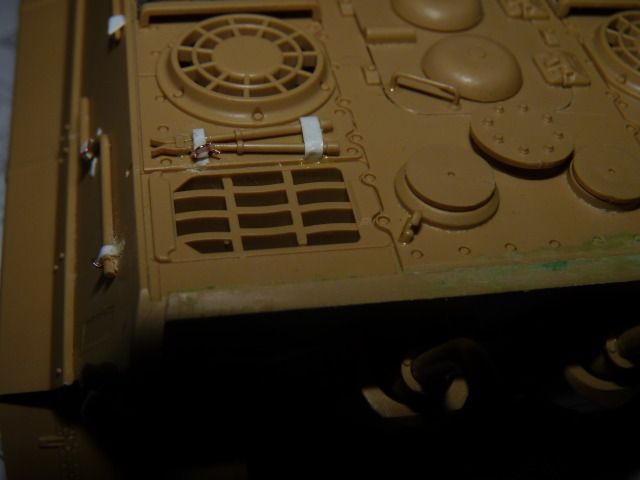
And I wasn't exactly too happy with the tie downs on the base kit so I decided to improve them as well 
 I used 0.25 mm thick stryene sheet and cut those little parts accordingly and glue them on .. 

I was lucky enough to stumble across a short length of cable at work and I use the wires inside as those little belt buckle for the tie down 


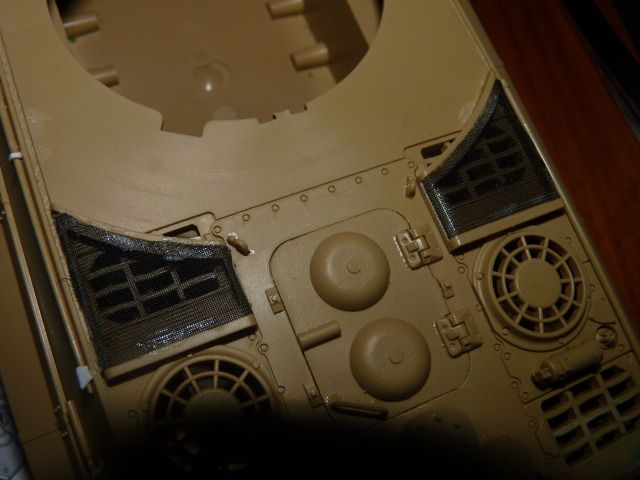
after that I put on the meshes according to the instruction 


I thought about putting meshes over the other areas as well, but I found that not all tigers have meshes on all of them so I just opted out to put meshes over the other areas

anyway, that's all folk.. Hope I don't disappoint you guys
Read more >>

Wednesday, 2 January 2013

DML 1/35 Panther Ausf G Command version

The kit was 10 years old, with the release date traced back to 2003.

This was a Hand me down kit from one of my two masters as he wanted to see me improve and gave this to me as a gift as well as a practice kit.

The tracks were painted first in gun metal, and then black and a brown wash after that followed by various patchs of rust tones ( dark, mid and light ).

The colour I used were a mix of ( all Tamiyas ) dark yellow + tan for the base, blue and yellow to get my own shade of olive green , red,brown, dark red and hull red get the red-brown shade I like...
And after my base coat, follows a massive bombardment of gloss, flat, filters and washes. This was my 2nd time to use filters and I am loving it .. I bought a mig filter ''tan'' for tri-tonal camo and I have to say I am loving this

Also, this is my very first time I started adding various amounts of streakings. 2 different way of streaking methos was used to create these streaks. A normal streaking method of using the enemals and white spirit and a rather unusual method on brushing on pigment, mixed with thinner and lettting it down and while dried; brushed of the dried pigment ASAP.

The exhausts has been rusted to a high degree useing an assortment of stuffs I learned from books, magazine and forums. To be specific, I airbrush on various tones of rust and I use a sponge and dab some rust colour acrylics over that and over that sponged acrylic, I dabbed some rust tones Oil paints to get a kind of three dimensional texture.

The only thing I was utterly disappointed with are the wheels. For some reason, the assembly of th wheels was hell and the wheels did not come out nice and alligned and I didn't noticed it soon enough; not to mention since it was hand me down, my master already put on the very first inner wheels (but those wheels were perfectly aligned and straight). Becasue of that, the track came out utterly utterly disgusting. But I won't complain much as this was a fun build for me ( Apart from the wheels and tracks )
I'm not sure If I did good or not but I showed my master and he love it so that's good enough for me. I loved how it looks myself. I had a chance to put down all the methods I learn on this kitty and it was well worth it.


But enough chit-chat .... Its time for the photos -
For the smaller pictures, just click on them and the original Size will just Pop up ... 


Much like my C1 Ariete, I broke this guy down into sub albums so I can cover everything I done just as you guys can look into each section seperately -

Here comes the top views -


 Various chippings I put on -


The rusted exhausts -


The mud I put on all over the chassis


Under the chassis -


Close up shot of the on-board tools


And last, but not least, the spare tracks in their rusted states -


And some shots that I played around with the camera -


And That covers all I have done.
I know I am not a pro and I still have much to learn but I really love how this looks and really enjoy knowing how much I can apply what I have learned these past few months. I'm really happy to add this in my list of finished kit.


Thank you, my master; Mr. Glenn Buford, for the generous gift so that I can improve.
Read more >>