I bring to you the seventh and final update to my Dicker Max before finally launching this thing.
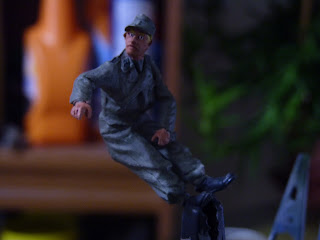
I had to spend a good 8-10 hours modifying and painting the figures. The figures are from MiniArt and boy, do they have flash. Overall quality is not too bad though BUT I am not satisfied with how they moulded the uniforms so I don't think I will be using from MiniArt again. Anyway, I managed to pull through, fixed some of their posture and paint them.
After I have satisfied with those crews, I put on a heavy coat of oil filters and washes to make it really dirty and all the dirt stains stuck on the paint job after a hard summer of fighting.
I also put on the first layer of mud along with the filters and subtle streaking -
A little bit satisfied with that, I moved on to some eternal storage I wanted to put on. Such as these -
I just want to put on a folded tarp or sheet between there as it looked like it needed something.
And this is the rolled up tarp that is stored in the rack behind the fighting compartment. If I did my research right, German SPG had some kind of tarp to cover the open compartment and I wanted to included that in my build.
That is just some excess miliput rolled up into a sheet-ish thing and the ammo box is the one I obtained from the MiniArt Figure kit. Of course, no one would be foolish enough to put a ammo box in front so Let's just assume that's just some storage box. LOL
Satisfied with that, I had a look and I wanted to put on more mud and more texture so I bought Transparent Gloss Heavy Gel from Vallejo to apply my wet mud with -
I also put on RUST and SOOT on the exhaust as well but, again, I didn't take any photos. I will show them on the finish piece.
I did, however, take some shots of the finished piece as a preview though. Here They are -
Until next post guys.
Thank you all for reading and the support you all have been giving me this whole time.


0 comments:
Post a Comment