Saturday, 6 April 2013

WIP - 1/35 Dicker Max Part 3

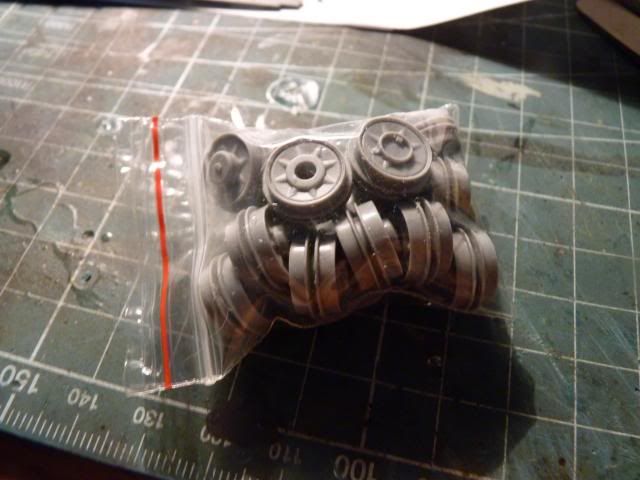
Right so I managed to do some more work on this guy 

I manged to put on those tiny little pieces of PE on those already small little parts .. oh my eyes -

another shot of the same stuffs -

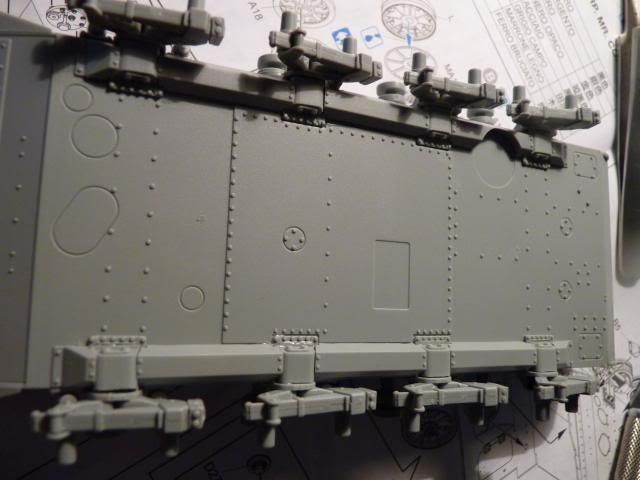
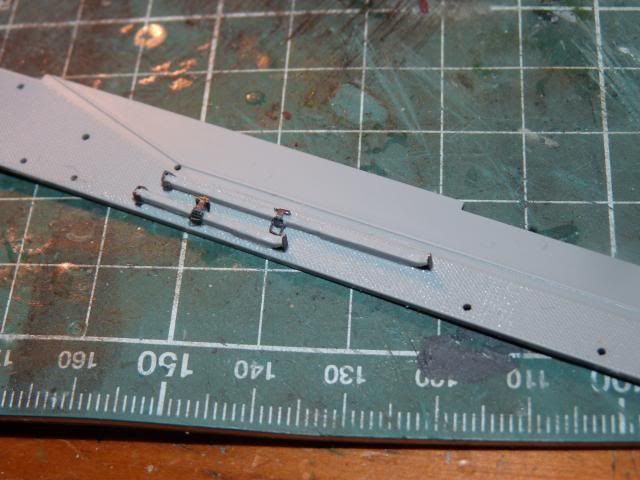
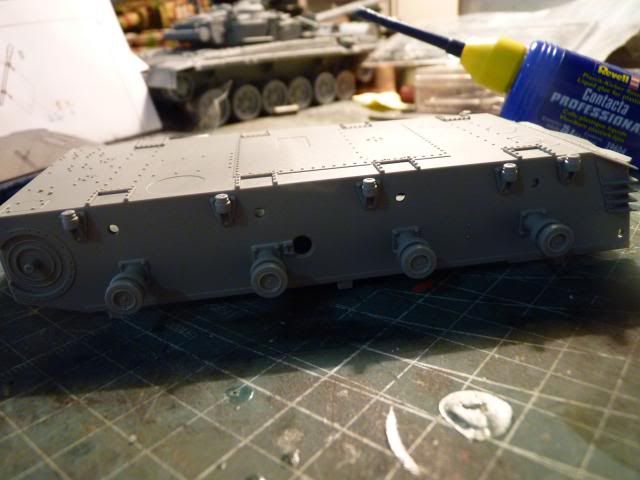
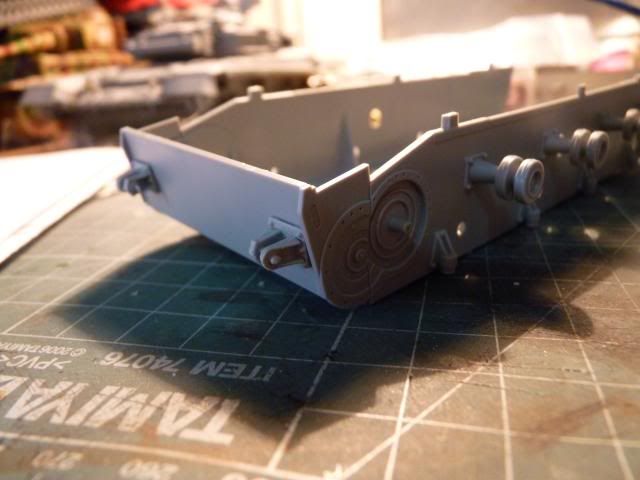
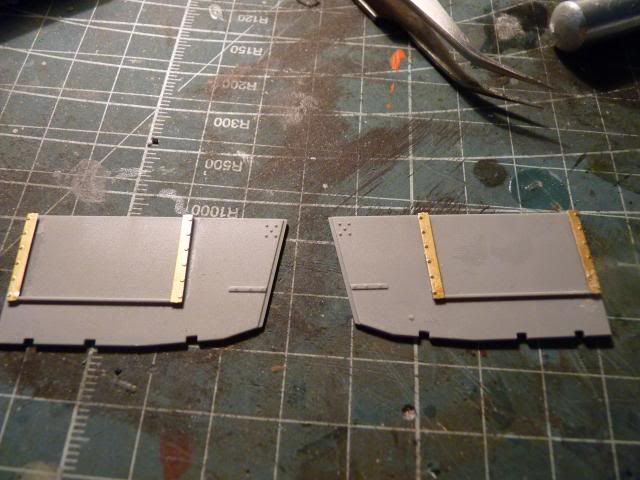
That's the complete list of tools on the left fender minus the spare tracks

And I managed ( barely) to put to make the jacking blocks and put them in the brackets and whatever they are called and finally, on the right fender 
The entire thing looks like crap due to the complicated build process but im guess it should be fine from afar and after primer ( fingers crossed ) 


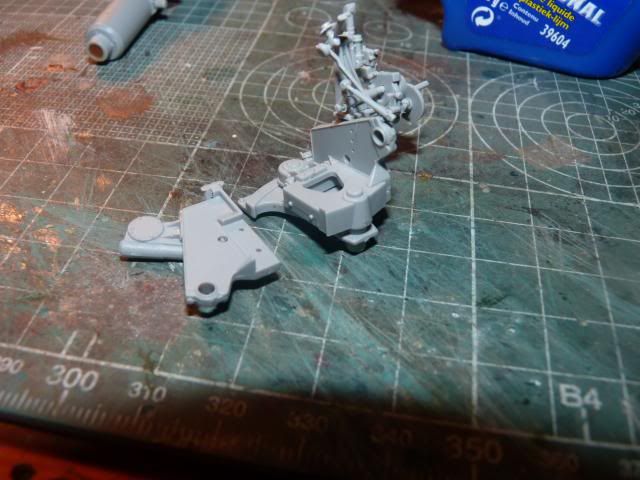
Next, I decided to build the gun ... I started with the breech ... I knew the front would be heavy and after some research, I found out that other people moan about how heavy the barrel is if the Aluminium barrel is used and thus, I decided to improvise.
The gun breech is made up of 4 parts and after studying and dry fitting, I jammed down a fair amount of Milliput into the hollow parts of the breech like so -


After dry fitting and shifting around the putty, the gun breech goes up pretty beautifuly and with a solid and heavy feel to it -


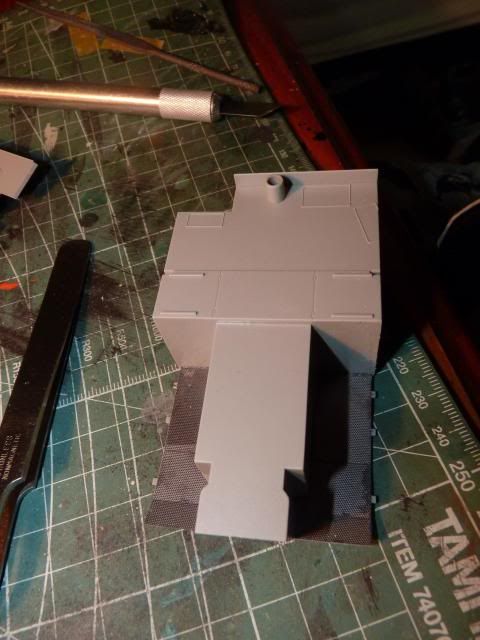
Followed that with the gun mount which kept me PRETTY busy and made me swear alot out of frustation dealing with such tiny pieces and not to mention, the  geniuses at  Dragon was showing a mystery piece on the instruction and took me around an hour to finally realize that piece is not even on the sprues. I was left really pissed off but still, I pushed on and managed to put this up -


Everything goes on together well, including the gun shield -


The vertical traverse was so loose due to the mis match of the diameter of the holes on the gun mount so I drop a fair amount of cement and wait a few second and started moving the gun up and down along the axis so that it won't dry completely and at the same time, make the fixing a bit more tight 

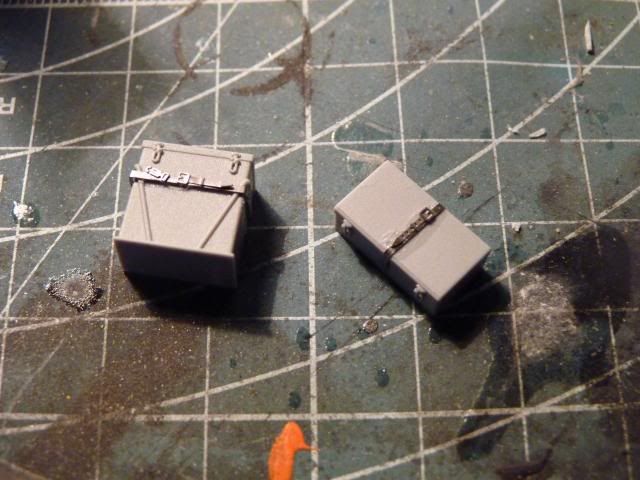
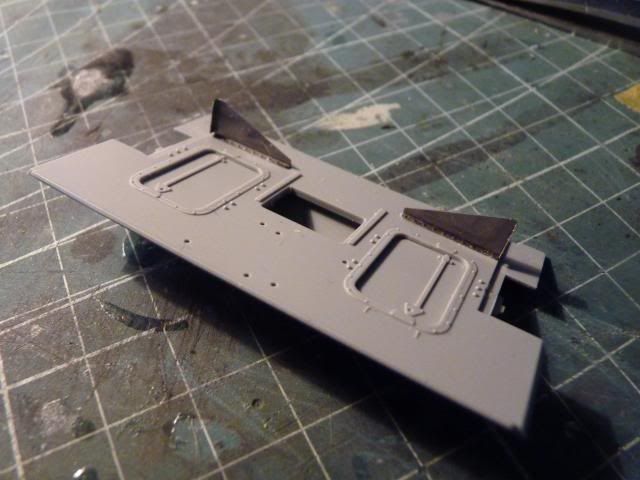
More PE parts- the radio and a First aid box.. not as complicated as the Jacking block so it was done rather quickly -


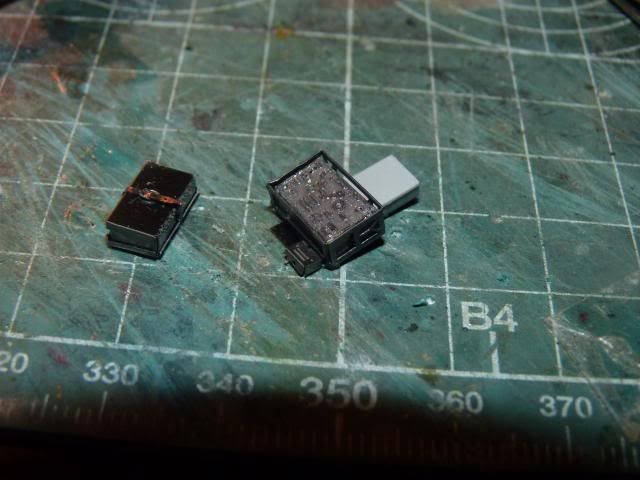
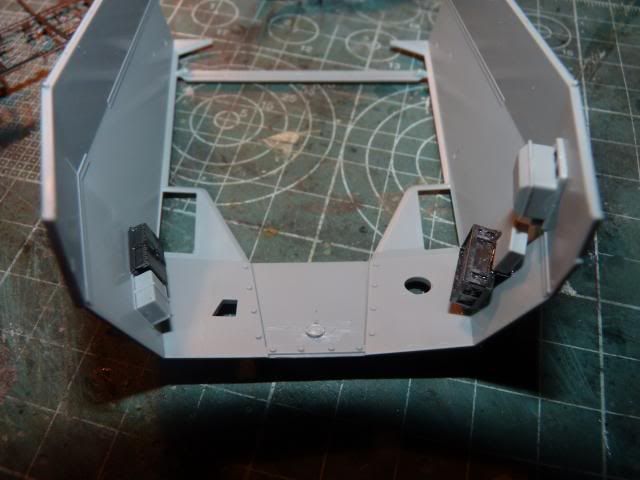
Those two along with 2 more box of somekind goes on the wall of the Superstructure -


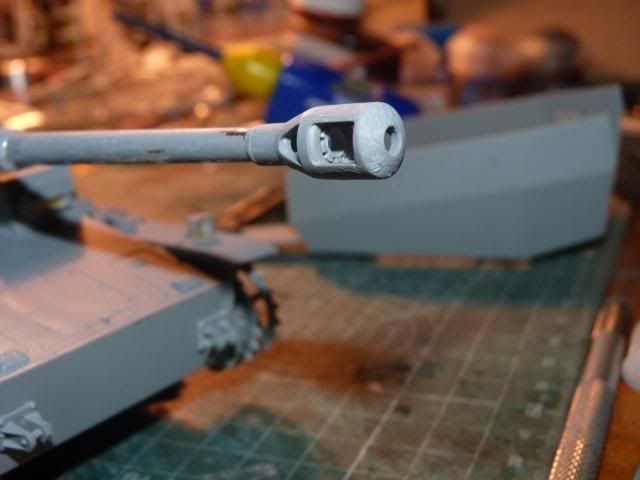
Put on the Muzzle Brake after that 

I decided to put on some texture ( don't know why )

and dry fitting everything, this is how it looks now -


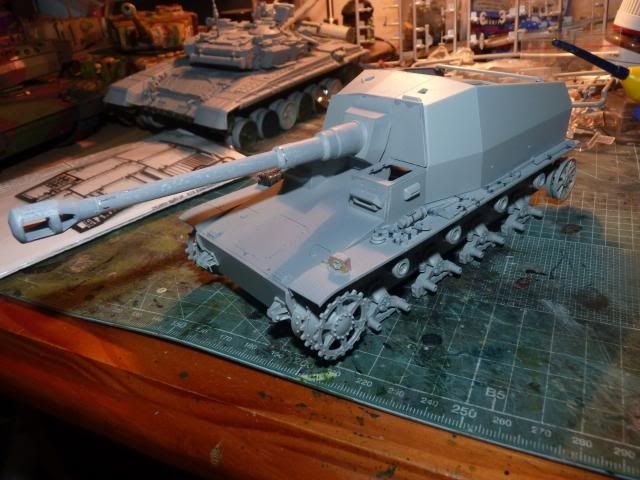
All in all, I am having fun setting this baby up ... 
well, that's it for this update... stay tuned and thanks for all the suppor
Read more >>

Wednesday, 3 April 2013

A few words about Airbrushes from my good Friend


Right.. it has been a while since I have posted a tutorial but this is not really a tutorial but rather a sharing of some great ( and I do mean great ) points regarding airbrushes from an artist who does this for a living.

His name is Chriz Zeigler and apart from looking like a big mean ogre with huge shrek-like hands, he's a great guy and really great with airbrushes that have earned him the title, '' The Colour Whisperer ''.  Many of you guys who frequent to the Mecha Lounge Forum will recognize this lovable giant as Big Z. Do drop by to his company's page on FB here to check out his works, oh, and he also takes custom paint work order as well. So, if you have a motercycle helmet or something that need some sick paint work, he's the one to go to.

Okay... now that introduction is done, lets get on it ....
Out of the woodwork, he made a video giving out some great pointers for those who just got their first Airbrushes


So if you got your first Airbrush or still a noob in using Airbrush ...
WATCH THIS
I just couldn't stress it enough.....

You will definitely get clogged Airbrushes and you will need to maintain your Airbrushes in tip top condition. In the next video, Chris talked about how to do just that.


So you are , like me , still suck at maintaining your Airbrushes, you definitely have to watch this.

NEXT up, he made a video talking about primer and base coat. Speaking about primer, I made this particular blog post, resharing a great article. So many people asked the same dumb question without researching '' Do I have to use Primer?? ''... and the answer to that is , YES. Chris even mention that in this video as well so use Primer.


Now, those three videos should be able to make you ready for airbrushes. Many a modellers asked how to start using Airbrushes and said they are sacred of it and blah blah... but as you can see here, it is your greatest weapon. So use it as soon as you can afford it.

Well, then, that's it for this post and I hope What the '' Colour Whisperer'' said in those videos are benefical for you. They surely were for me, especially the very first video. All credit goes to Chris and don't forget to check out his works on FB or his finished model kits on the Mecha Lounge.

Until Next post and Happy modelling, you guys ......
Read more >>

WIP - 1/35 Dicker Max Part 2

Alright guys ... I got an update for you guys ....

I was dreading this as I don't have any experiences dealing with PZIV suspensions but hey, that's always the first try so gritting my teeth, I manage to put them on like no-


Following up by those little pieces between the bogies ( I honstely don't know what they are called)


After that, I pou on the front glacis plate and the little hub for the driver. The driver hatch is still left open as I cannot decide whether to put in a driver figure or not


Following that is a Transmission block for each side

As usual from Dragon, The freaking instruction was not clear and I ended up with these transmissions :/

Skipping ahead and I tried to put on some PE on some tool boxes


The tool box goes on and so are those two supports ( I guess ) for the super structure


Followed by the Idler wheels with the PE from the kit


and the Idler wheels axel -


and 16 road wheels that are still without the rubber rim


and I skipped ahead the instruction and started putting some tools on the fenders. So many PE to put on and progress is really slow so I have finished only two ...


That's it for this update .... until next update ... stay tuned.
Read more >>

Tuesday, 26 March 2013

WIP - 1/35 Dicker Max Part 1

Hello awesome and beautiful people. Recently, I bought a Dicker Max and now that I have it, I can't help but dig right into the box ....


I also bought a mini-art crew figures for it -
and to further enhance the details, I bought a Eduard set .. Voyager would cost me the same price as the kit so I choose Eduard -
And here is a shot of the sprues -
My cat wants to say hello to you as well.. LOL ...

The instruction states that I start from the Wheels but the kit include rubber rims and I didn't want to kil myself with more complicated stuffs later on so instead, I choose to start with the return rollers and put on the shock absorbers -
Followed by that attachment point of some sort on the front of the chassis
I skipped a few steps and went ahead with the rear of the chassis and I used Eduard PE for those little flaps u see there and also put on the doors for the hatches
I then put on the floor plates ( what do u call those thing.. the little bumps on the floor ) from the PE set onto the fighting compartment
Followed up gluing up some PE parts from the kit ( although I have no idea what Im looking at )
and followed by 4 pain staking hours of cursing and painful eyes, I managed to take away the plastic from the Hand Grenade and put them on the PE rack
The hand Grenade looks like utter rubbish but that was the limit of my ability sad

anyway, That's all I have done for now and I will slowly update you guys with my progress .. Hope I don't disappoint you guys ... Thanks for looking
Read more >>

Tuesday, 5 March 2013

MG Acguy Ver. Hummingbird


Hello All and All Hello ...

It has really been a long long time since I have finished a Gunpla. So many reasons behind that but two main factors are - '' I have not enough time for gunpla '' and '' I'm a little bit tired of some of the elitism and lack of interest to modelling in the Gunpla community ''. But to assure my friends that I am still modelling Gunpla, I made this one. Nothing special about this guy, I bought from ebay ( along with a Gp02 and a Alteisen ) so cheaply and I thought to myself, '' this guy will be my guinea pig to practice and experiment ''.

The main camo scheme is inspired by Camo put on German uboats such at these -


I just used a variety of shade(tone??!!, however it is called ) of blue just because I thought it would be cooler then grey.


Here's the profile views all on four sides of the Acguy -


I figure with the base colour scheme and a camo like that which will also double act as a fake water reflection, it will be pretty hard to detect this guy by sight.

And I would like to be blunt and frank in the upcoming info. You might notice that the entire left arm has no camo applied and left slightly less weathered. Now, I know ( for a fact ) that people will ask/say why is it like that. So let me show you how I got the idea ( if there is no prove, people could say I forgot to paint or blah blah, which in fact was already stated to me twice ). As you know, I am also a AFV modeller and I read monthly magazine.  And I got this idea from this issue -

specifically this article -


and within this article, there's a picture -


Whether in the Chaos GB scenario or the OYW or any kind of war, anything can happen to men and machine and I just wanted to portray some thing like that while being creative at the same time.

I have been improving my weathering and since this is my guinea pig, I went all out. I used Vallejo German Camo Black Brown for the chipping. I chipped with fine point brush and sponge. I still need more practice with sponge ( it give great effect but applying that is tricky)

I decided to put in rust on area that water could and would pool. GDX of plamocon asked did I put on any streaking and the answer is yes, I did. Streaking 1/100 is very hard for me and I got to keep in mind to keep the streaking very tiny. The rust application was an experiment. I played around with MIG pigments, water and vallejo acrylic  I got to admit, I love using a mixture of thinned pigment+acrylic paint, it maintained the properties of both materials and clean up was easy.

I forgot how I used the colours but the colours involved are ( all tamiya ) - dark blue, blue, royal blue, sea grey, neutral grey, metallic grey, flat aluminium, white, deck tan and buff.

Per the norm from me, here's a number of poses -


and If you want to check out the close ups, just follow these links ( as usual, I divide all into sub section )-
Arms -
http://s1001.beta.photobucket.com/user/hummingbird2012/library/MG%20Accguy/Arms

Body - http://s1001.beta.photobucket.com/user/hummingbird2012/library/MG%20Accguy/Body

Head - http://s1001.beta.photobucket.com/user/hummingbird2012/library/MG%20Accguy/head

legs -
http://s1001.beta.photobucket.com/user/hummingbird2012/library/MG%20Accguy/Legs

There may have been some mistake ( big or small ) that I made but still  this is a little bit better then how I usually paint Gunpla... LOL ( I suck at painting in gunpla). Even with the flaws, I am happy to see this came out like this.

Enjoy and thanks for the support as well. Until next time an HAPPY MODELLING.


Read more >>