

This update will be mainly about the finishing the weapon and the shield concept ....
Right, let's start with the weapon.....
First of all, I make Balance Scales for the weapon

the wire used are tungstan, I think, I'm not too sure ... The, eh, bottom are just plates cut with a circle cutter and made concaved via mechnical forces ... The black pieces are just pieces of runner

After that.. i just used some more runners to make what it is in the photo...

As you can see, the top is still empty... don't sweat it ... the next photo will show you what i did about the top weapon
right .. here goes nothing ..
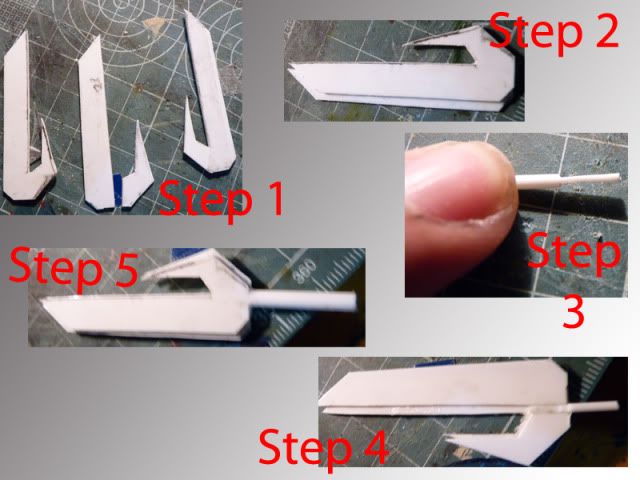
Ok.. step 1 show you guys the parts necessary i needed to make my weapon... two other sheet and two inner sheet... The inner sheet ( I will be stacking them to make blade edge) is, as you can see, made two piece... why i did that... well, I will keep that in suspense hehe
ok ... step 2 ... the front part of the inner sheet is glued under neath the outer sheet......
step 3 - i made a ... eh.. eh... the, u know.. the thing that sword maker put on the blade that will go into the grip to make the hilt.. u know... ( i'm terribly sorry.. i forgot and can't find what it is called.. heee ) ... and i put in the inner sheet for the rear part of the weapon
step 4 - i put in the inner sheet for the rear part of the weapon and i glued the... eh.. lets just say adaptor for hilt; onto the weapon
Step 5 - I finished the sandwhich by gluing the other side's outside sheet... and as you can see in the photo.. the round rod that is the handle got a bit bigger then step 4... yep.. that little thingy you see on step 3 and 4 goes into that handle you see in step 5 ...
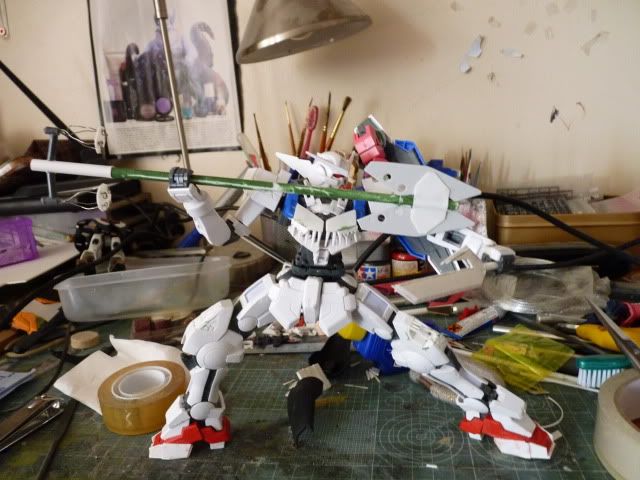
And voila... this is Famine with his almost almost finished weapon.....
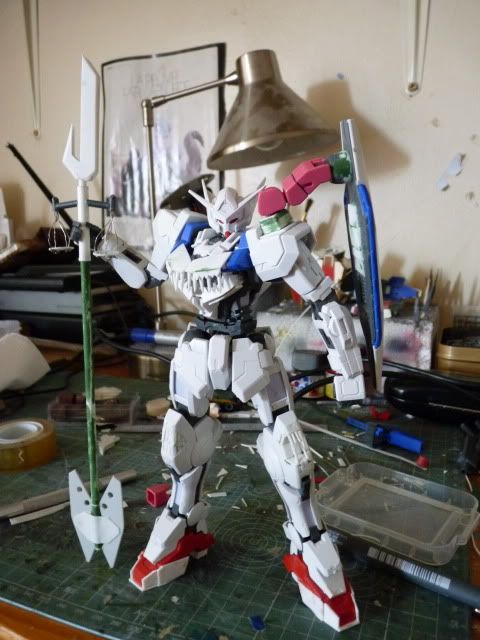
And this is one of the hidden fact about the weapon, the sword can detach from the main weapon like so ..
pretty neat eh??? :P.. i love it.. you might have noticed i gave the Famine a new look with his shield.... yep.. don't worry.. i will explain it now ..
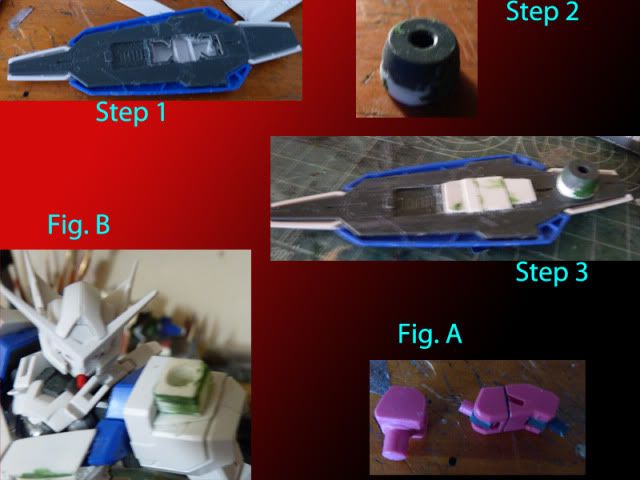
Right.... as you can see form the picture ..
I had to take off the adapter part in step 1 as i want to change the place of the adapter...
Step 2, shows you the taken out adapter, closed by plates and refined So that it can go on to the place i want it to ..
Step 3 shows you how i closed the holes and where i glued on the round adapter...
right... that's the shield done.. well.. not really.. but for now..
Fig A shows the part from the HG Aegis that i scavenged to make new joints and connectors for this baby
Fig B shows you the adapter that the big round peg you see on Fig A can go in ...
I have shown you a pic of how the shield looks like so .. i guess it won't be necessary now....
right, that's it for today.... I hope you guys like it ... cos I LOVE it ... LOL...
Thanks for reading and stay tuned...
lookin' good Gary! more fangs!!! more blood!! more heavy metal!!! XD XD XD XD XD
ReplyDeletelookin' good Gary! more fangs!!! more blood!! more heavy metal!!! XD XD XD XD XD
ReplyDelete