

Imagine you want to make a missle launcher with the missle bay door swinging open to revel the missiles inside??
That is quite complicated, no? The bay door swing open and closing and hinges and everything....
something like this

Well, not really complicated anymore as a hinge can be make (and made successfully) simply by sandwiching pla-plates.
This is part 1 and this will be done without the use of telescopic rods. In part 2, I will talk about hinges made with the use of telescopic rods .
First, lets look at this basic schematic that my mentor and idol MatX posted for me when I asked him how to do it ..
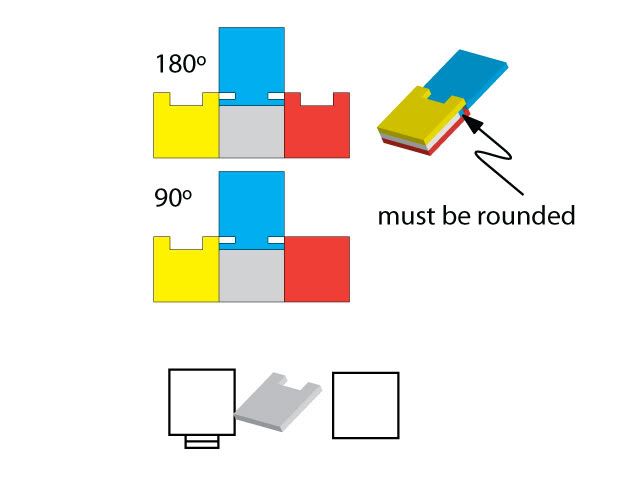
That is basic schematic and what MatX told me and I quote -
If you don't have pipes and round beams, use 1mm plaplates, cut to size (follow the guide) and trim appropriately as indicated. You must round out the hinge part. Since this part is rather small, the "peg" will be too soft so be careful, dab a little thin cement on the hinge part and let cure for at least 6 hours to give it rigidity. Once the hinge is assembled it should be okay.
right, lets move on to the actually making of the hinges ....
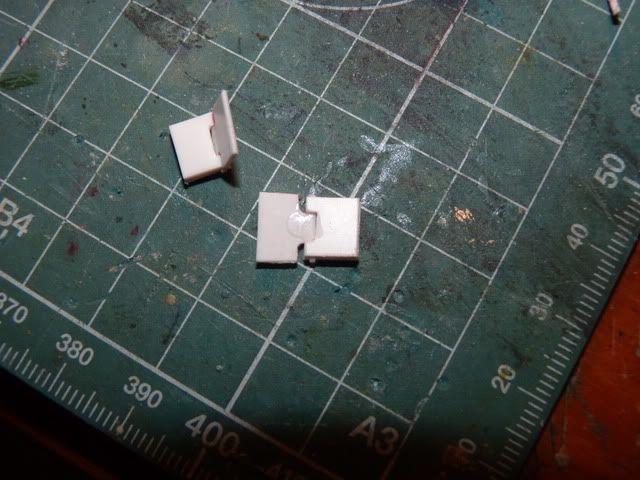
First of all, you might want to cut your plates into this kind of configuration ( lets name this image 1)
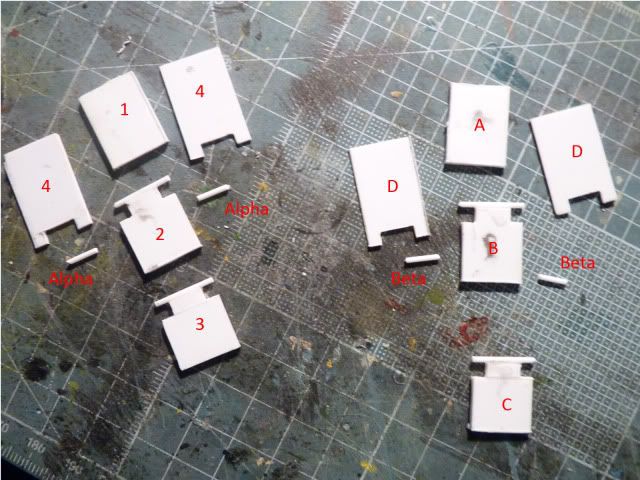
Since i was using a big piece and a rather thick plate, 1.5mm, i didn't want to cut the no.2 plate into the one indicated in the schematic, thus, I cut the sides out and glued on a rod.
If you don't have rod, cut out the plate like so in the schematic and sand off those pegs to have round surface. I have done both method and I will talk about both.
Right, after that, you have to cut plate number 4 as you see in the picture. Make sure to cut it properly to accommodate plate no. 2's ''T'' area. Try to see if number 2 ''T'' fit on number 4 ''H''. You don't want it too tight, nor too loose.
Pieces Alpha and Beta are not compulsory as that concept would be very hard to build in small hinges. Again, I have try both configuration and I will be talking about them.
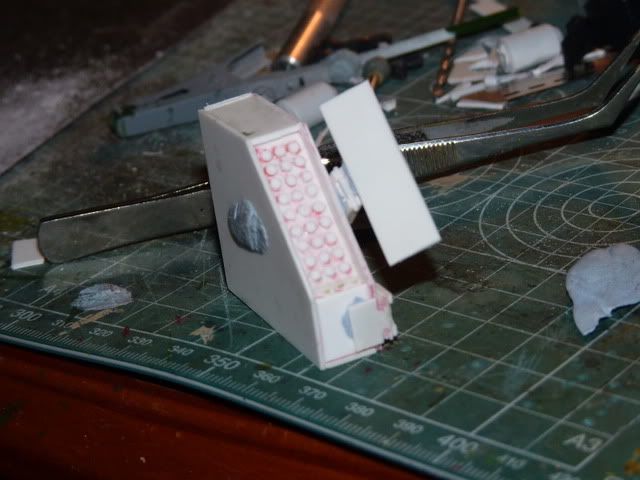
the purpose of Alpha and Beta can be seen in this photo - ( this would be image 2)
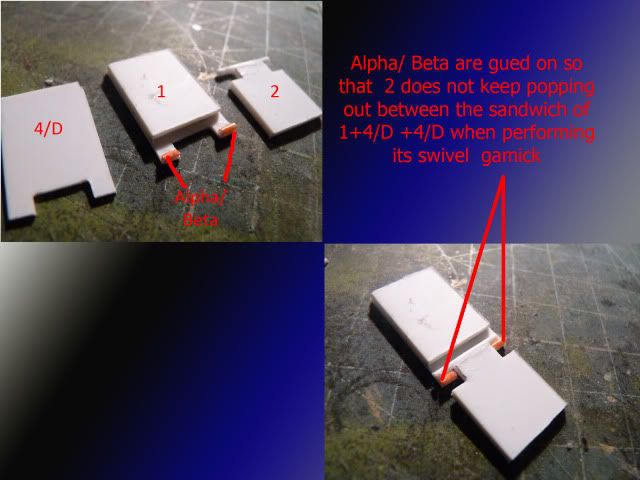
Part Alpha is there so that when the hinge is swiveling, plate number 2 would not detach itself from the whole sandwhich.
And after cutting the plates you see in image 1, you assemble the plates as you see in image2.
In Image2, the other plate 4 is purposely left un-glued for tutorial purpose.
Part Alphas are glued at the edge of one of plate 4 so that when the other plate 4 is glued onto plate 1, the ''T'' part of plate 2 is locked as a hinge in the whole assembly.
Gluing the other plate 4, you will get this -
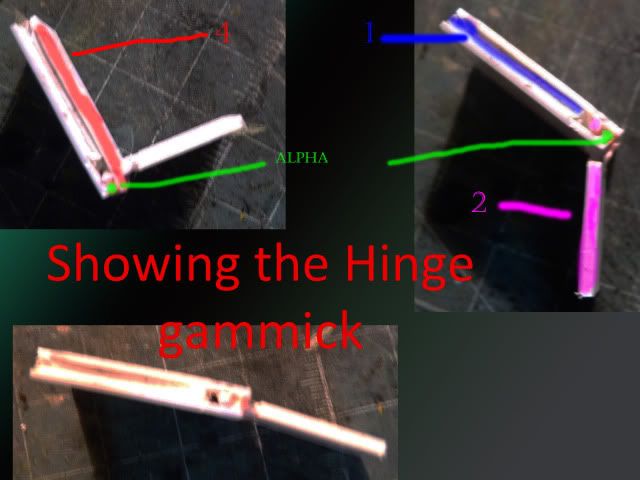
This set up is rather easy as the plates are large, thick and the actual rod is there serving as a real hinge, thus, resulting in smooth motion.
In another way, small hinges are rather hard and more tedious.
Here in image 3, you can see the very small hinges i made -
since those are really really small, its very hard to make into a smooth swiveling hinge but it can still serve its function as a hinge....
as it can be seen from image no. 4
How can it serve its function without a smooth swivel ??
well, since the ''T'' are rounded, even if it can't swivel smoothly, you can always take off the whole thing and re-insert it in as a swung hinge.
In this configuration, part Alpha can't be incorporated as the hinge it self it just too small.
Well, that's it for this tutorial. I hope my explanation are understandable and hope this helps everyone.
IF you need to ask anything, pls do so.
Thanks for the support.
0 comments:
Post a Comment